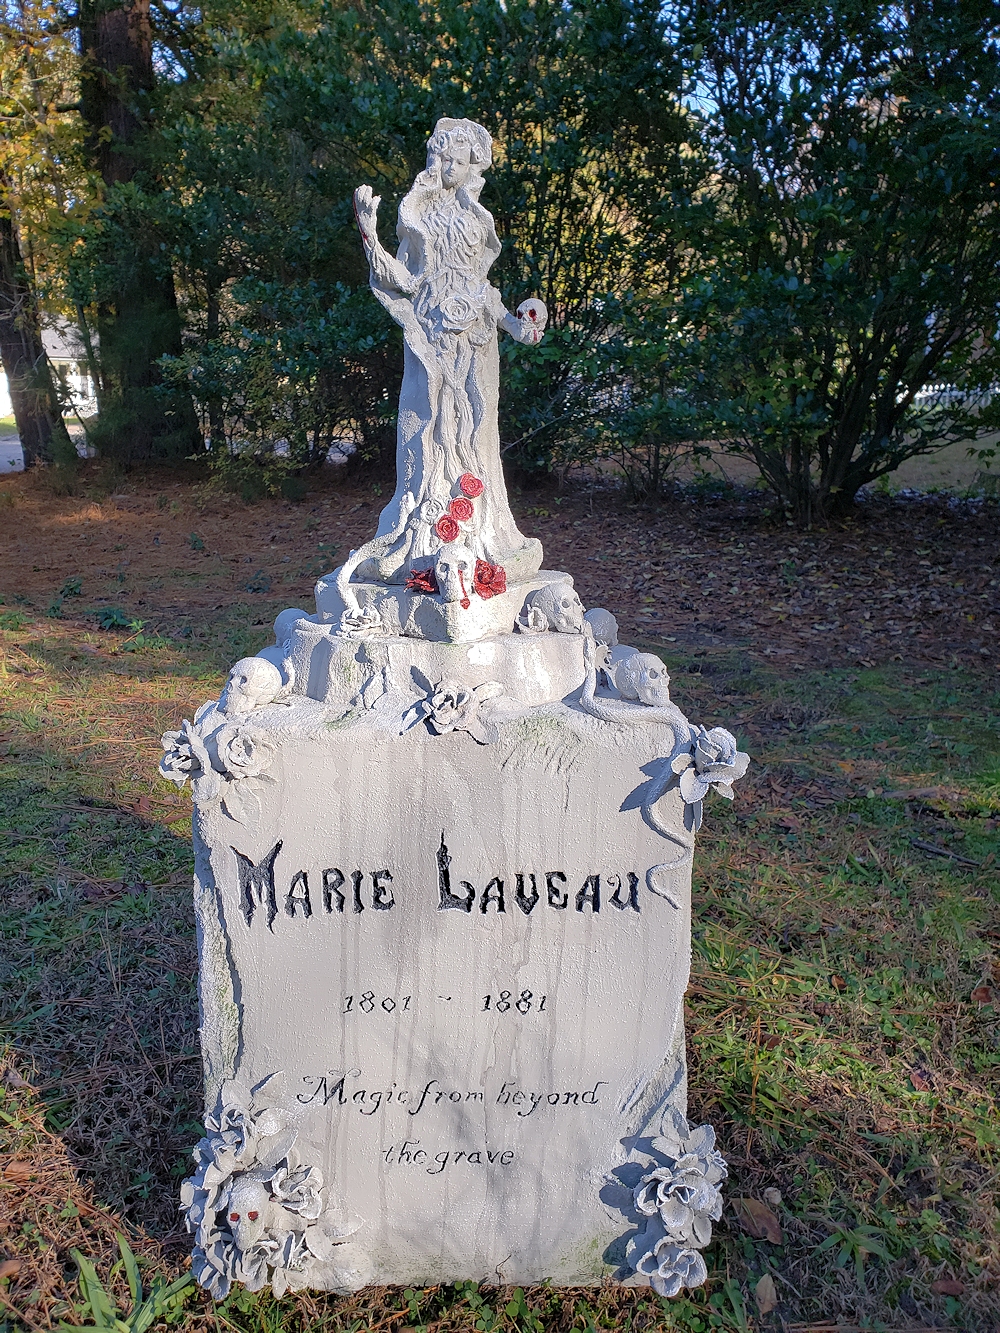
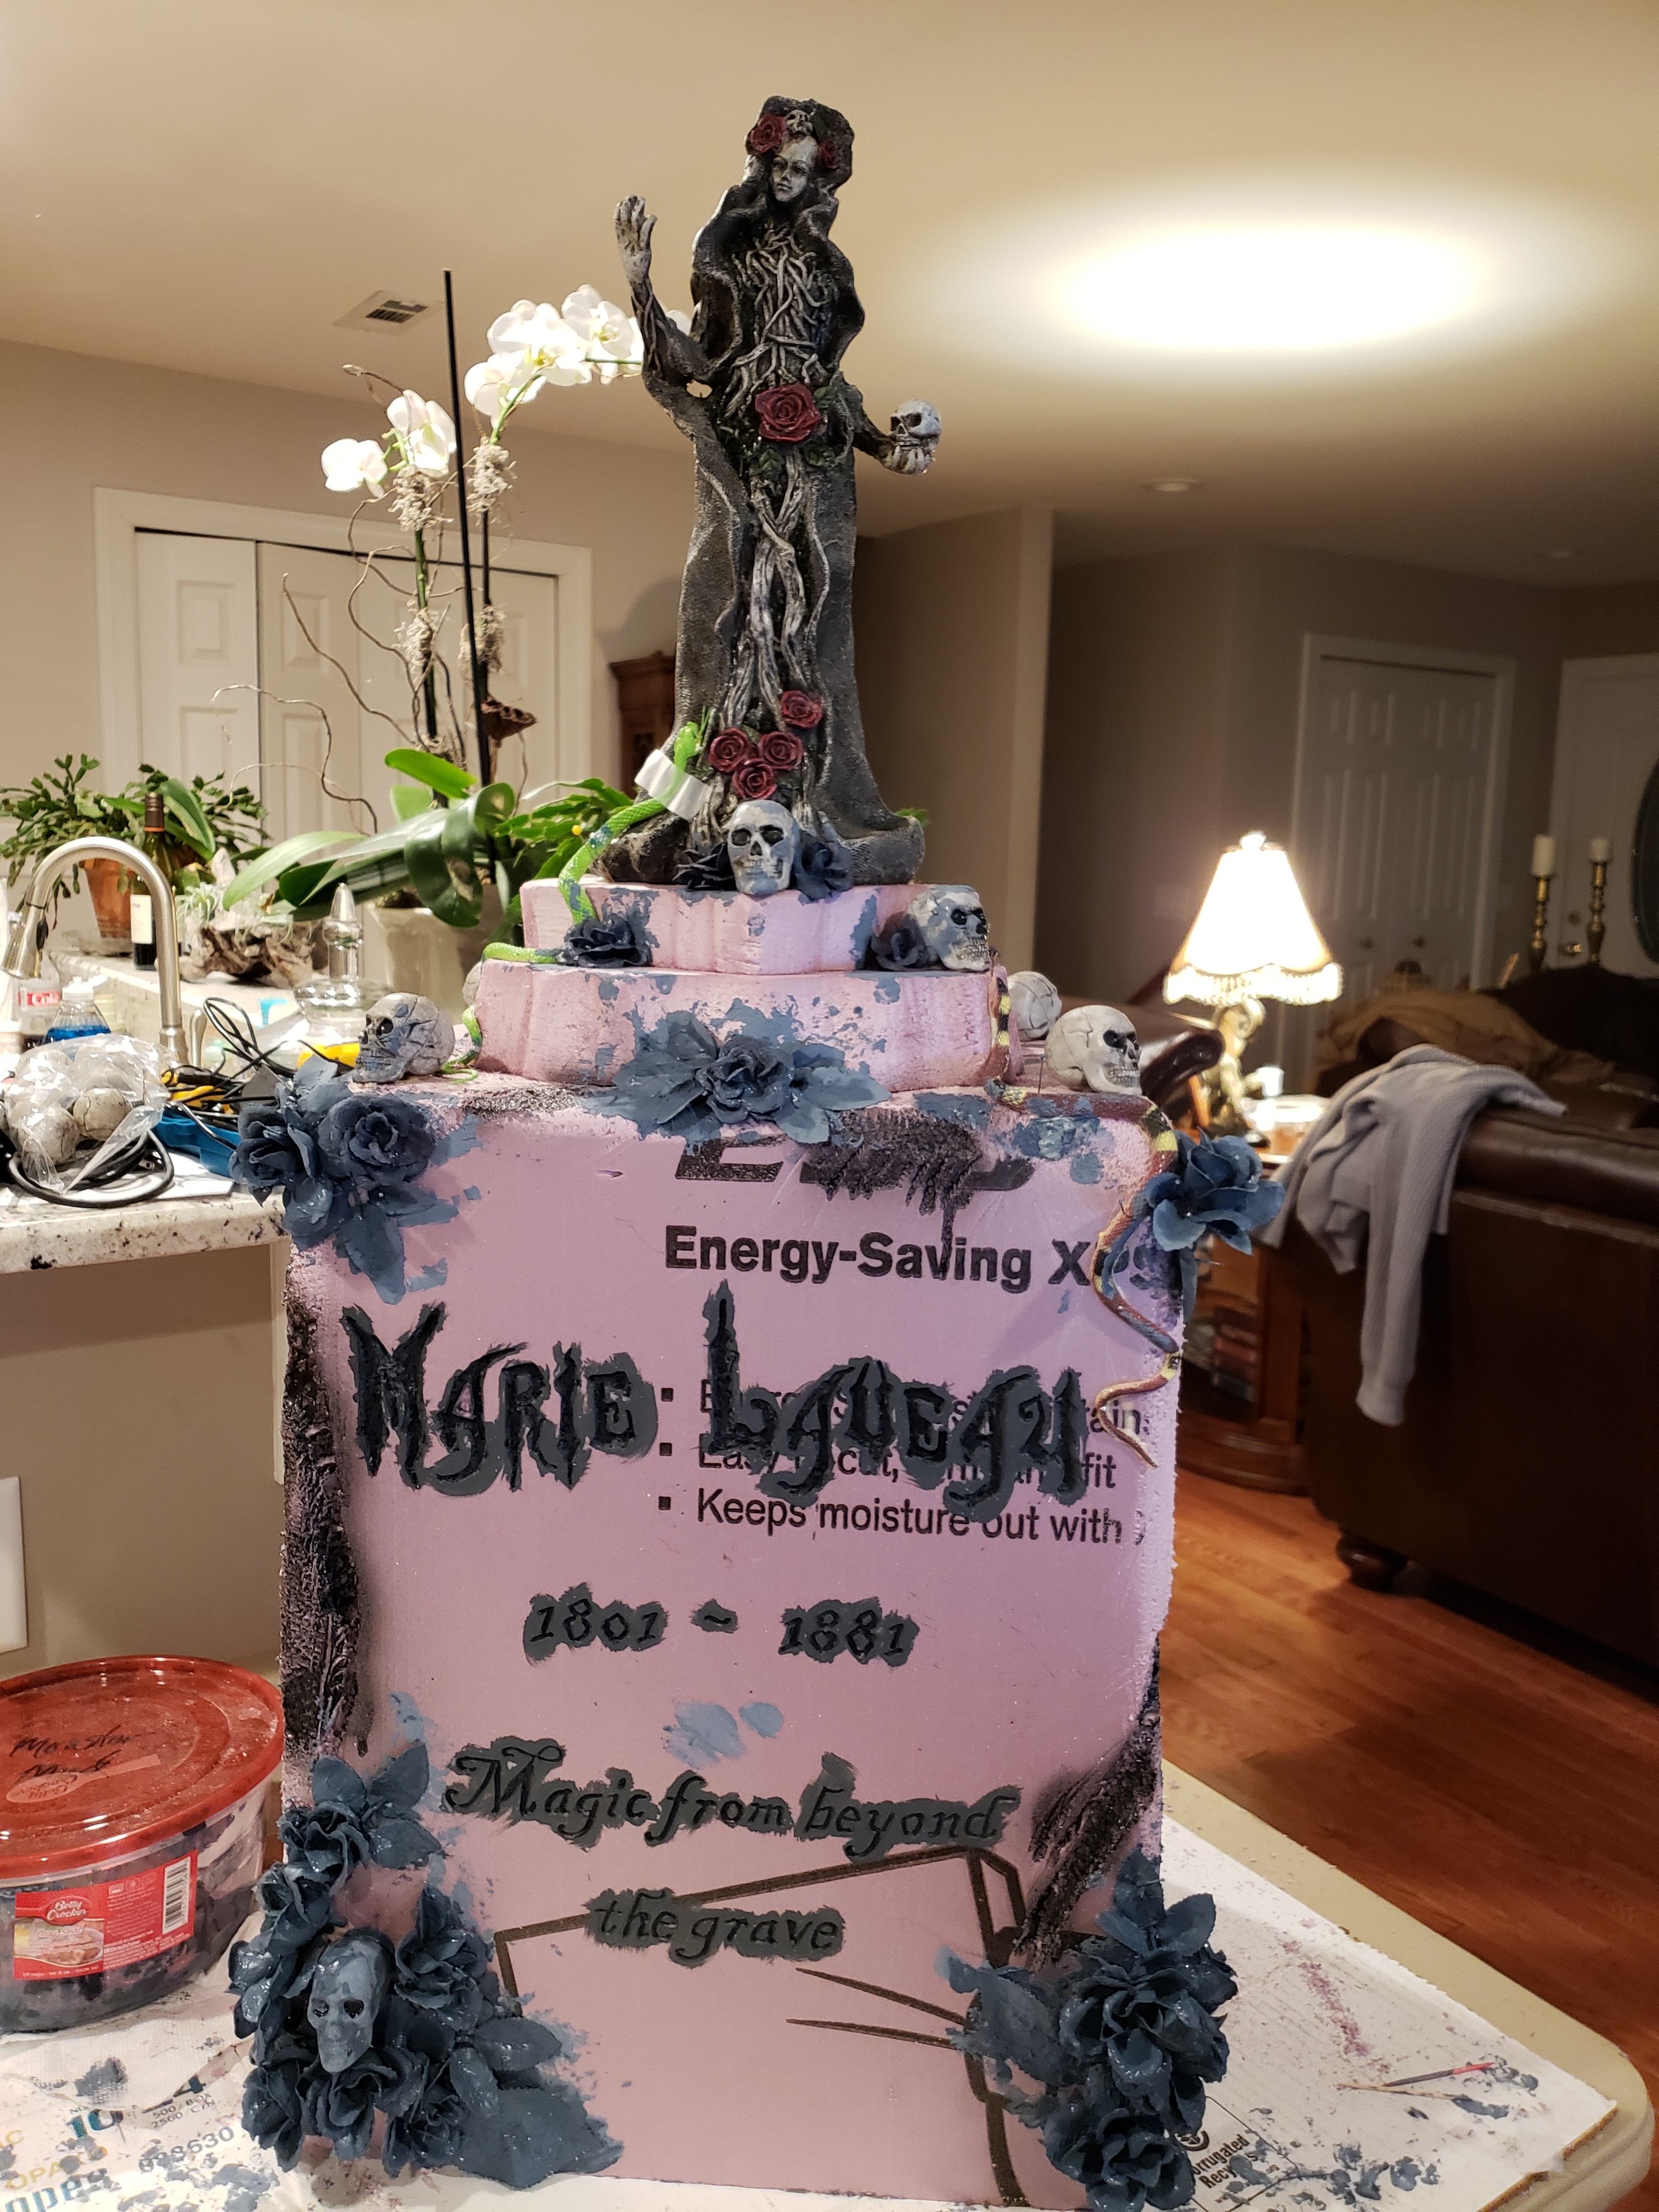
Marie Laveau
See pictures of the build and how she came to be named Marie Laveau below. Pictures don't really do her justice. She turned out beautifully!

Web templates when you need them...

Hi All,
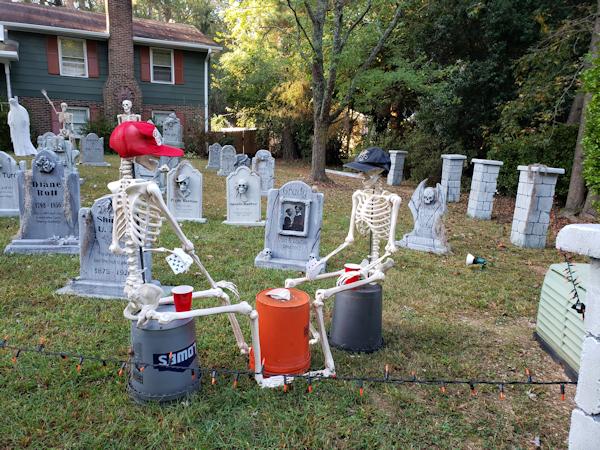
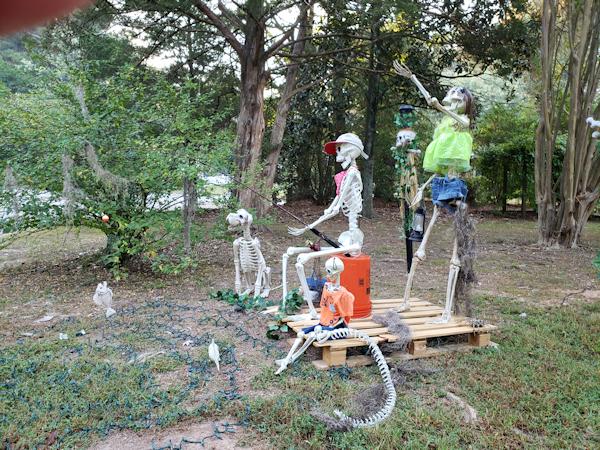
Below is the beginning of my tombstones and props for Halloween 2019. Right now, I have a few pictured, but I'm planning to do eight.Well, the best plans sometimes just don't work out! I didn't get all eight tombstones done. I made three tombstones and 12 fenceposts. I also helped my husband create the entry gateway. Love it!!!
See pictures of the build and how she came to be named Marie Laveau below. Pictures don't really do her justice. She turned out beautifully!
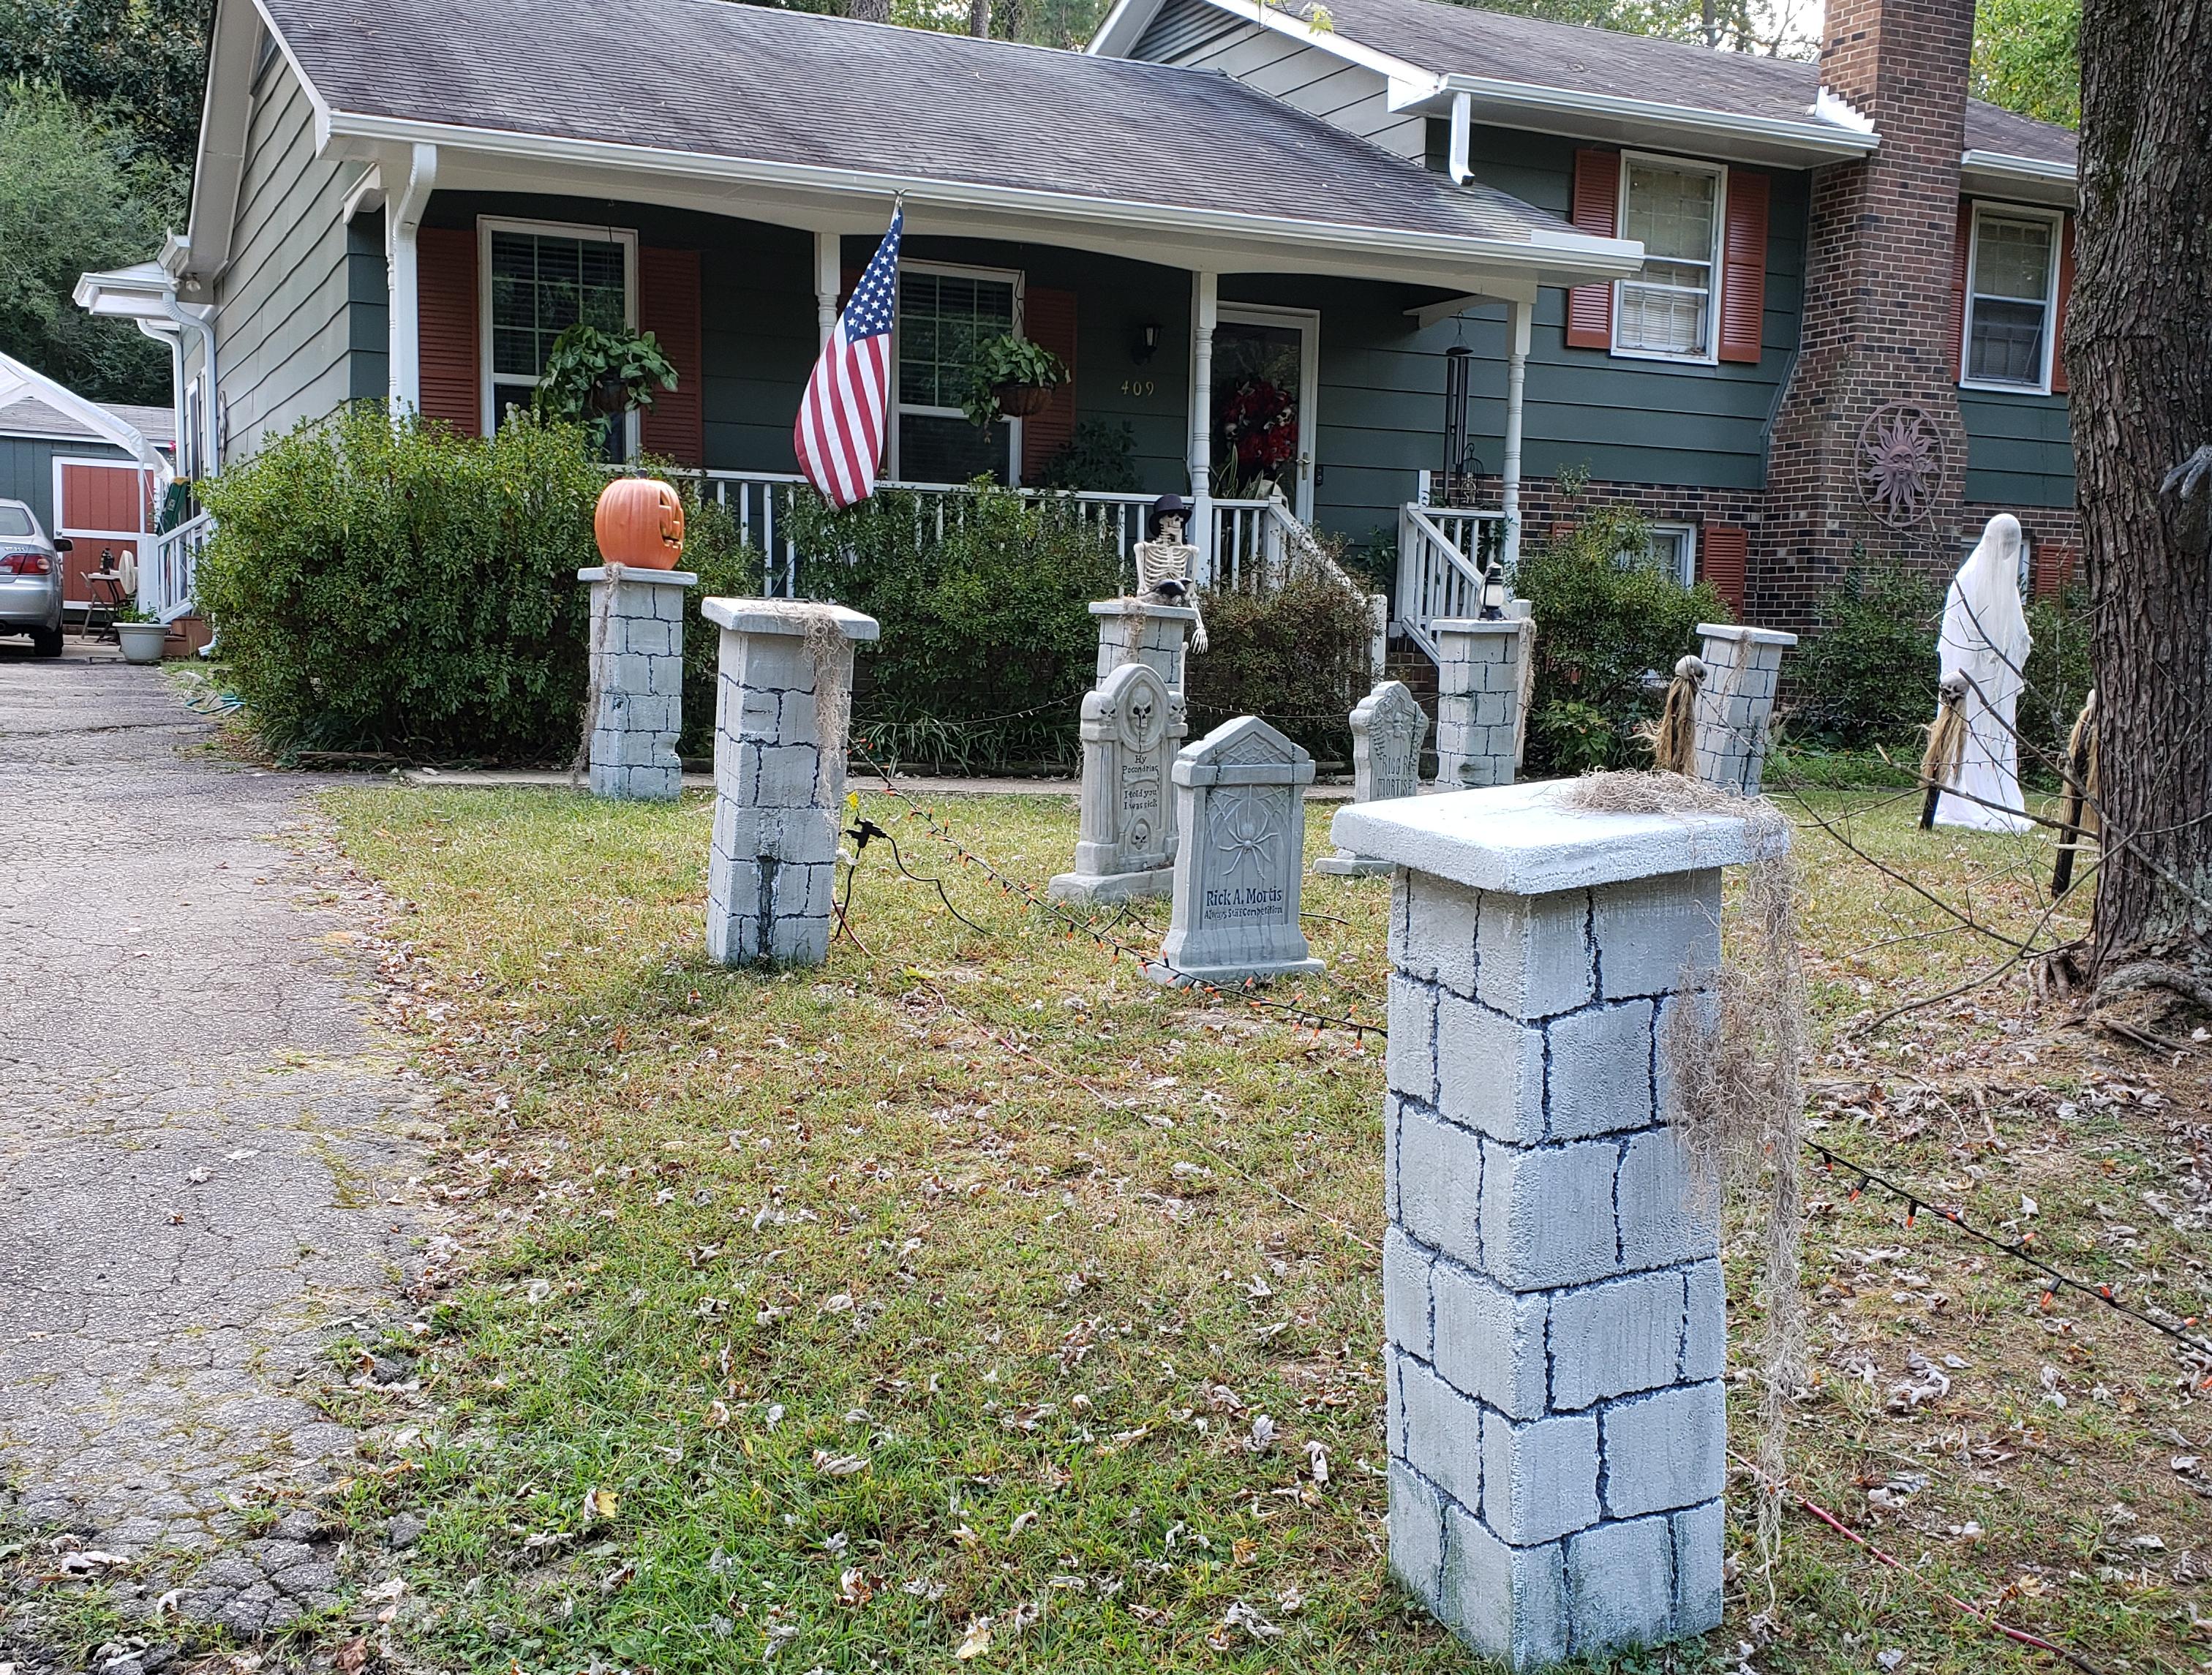
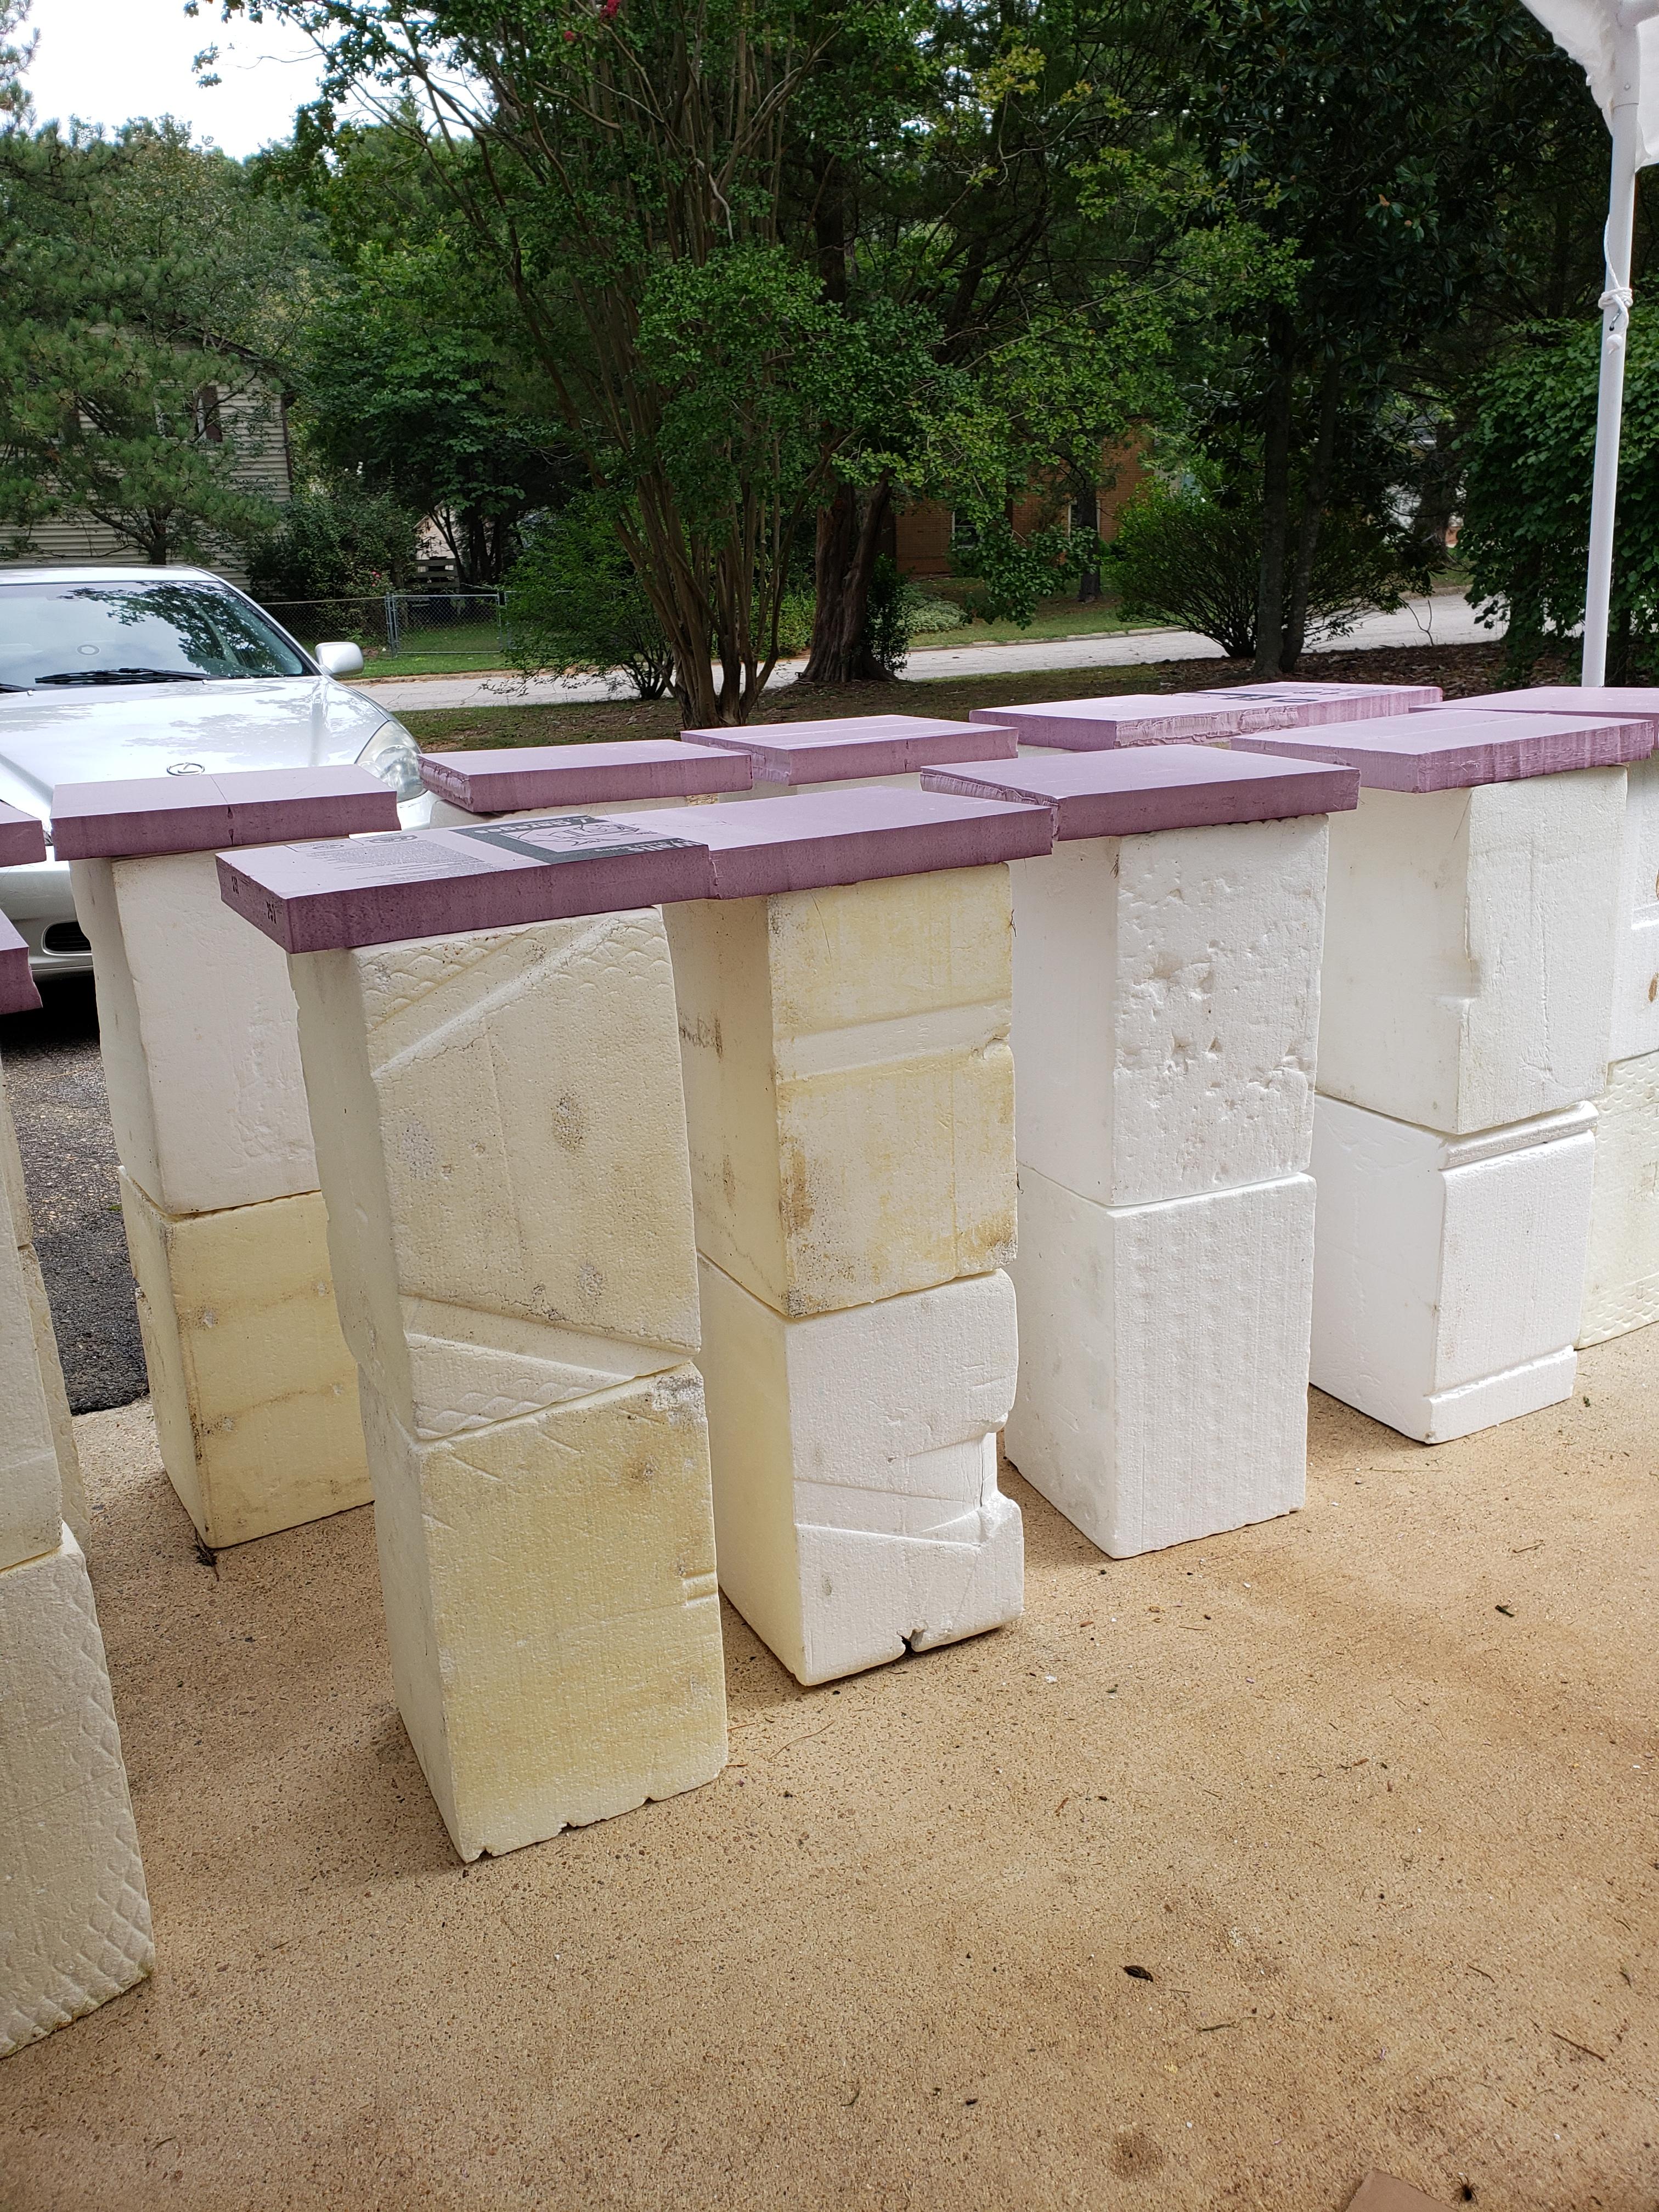
We got sidetracked from tombstone building and made 12 fenceposts and a gateway. We got 50 free styrofoam blocks from a tractor supply store (they ship trailers with these blocks used to keep the trailer from moving). I thought Tom was crazy to bring home so many, but we only have 8 left!
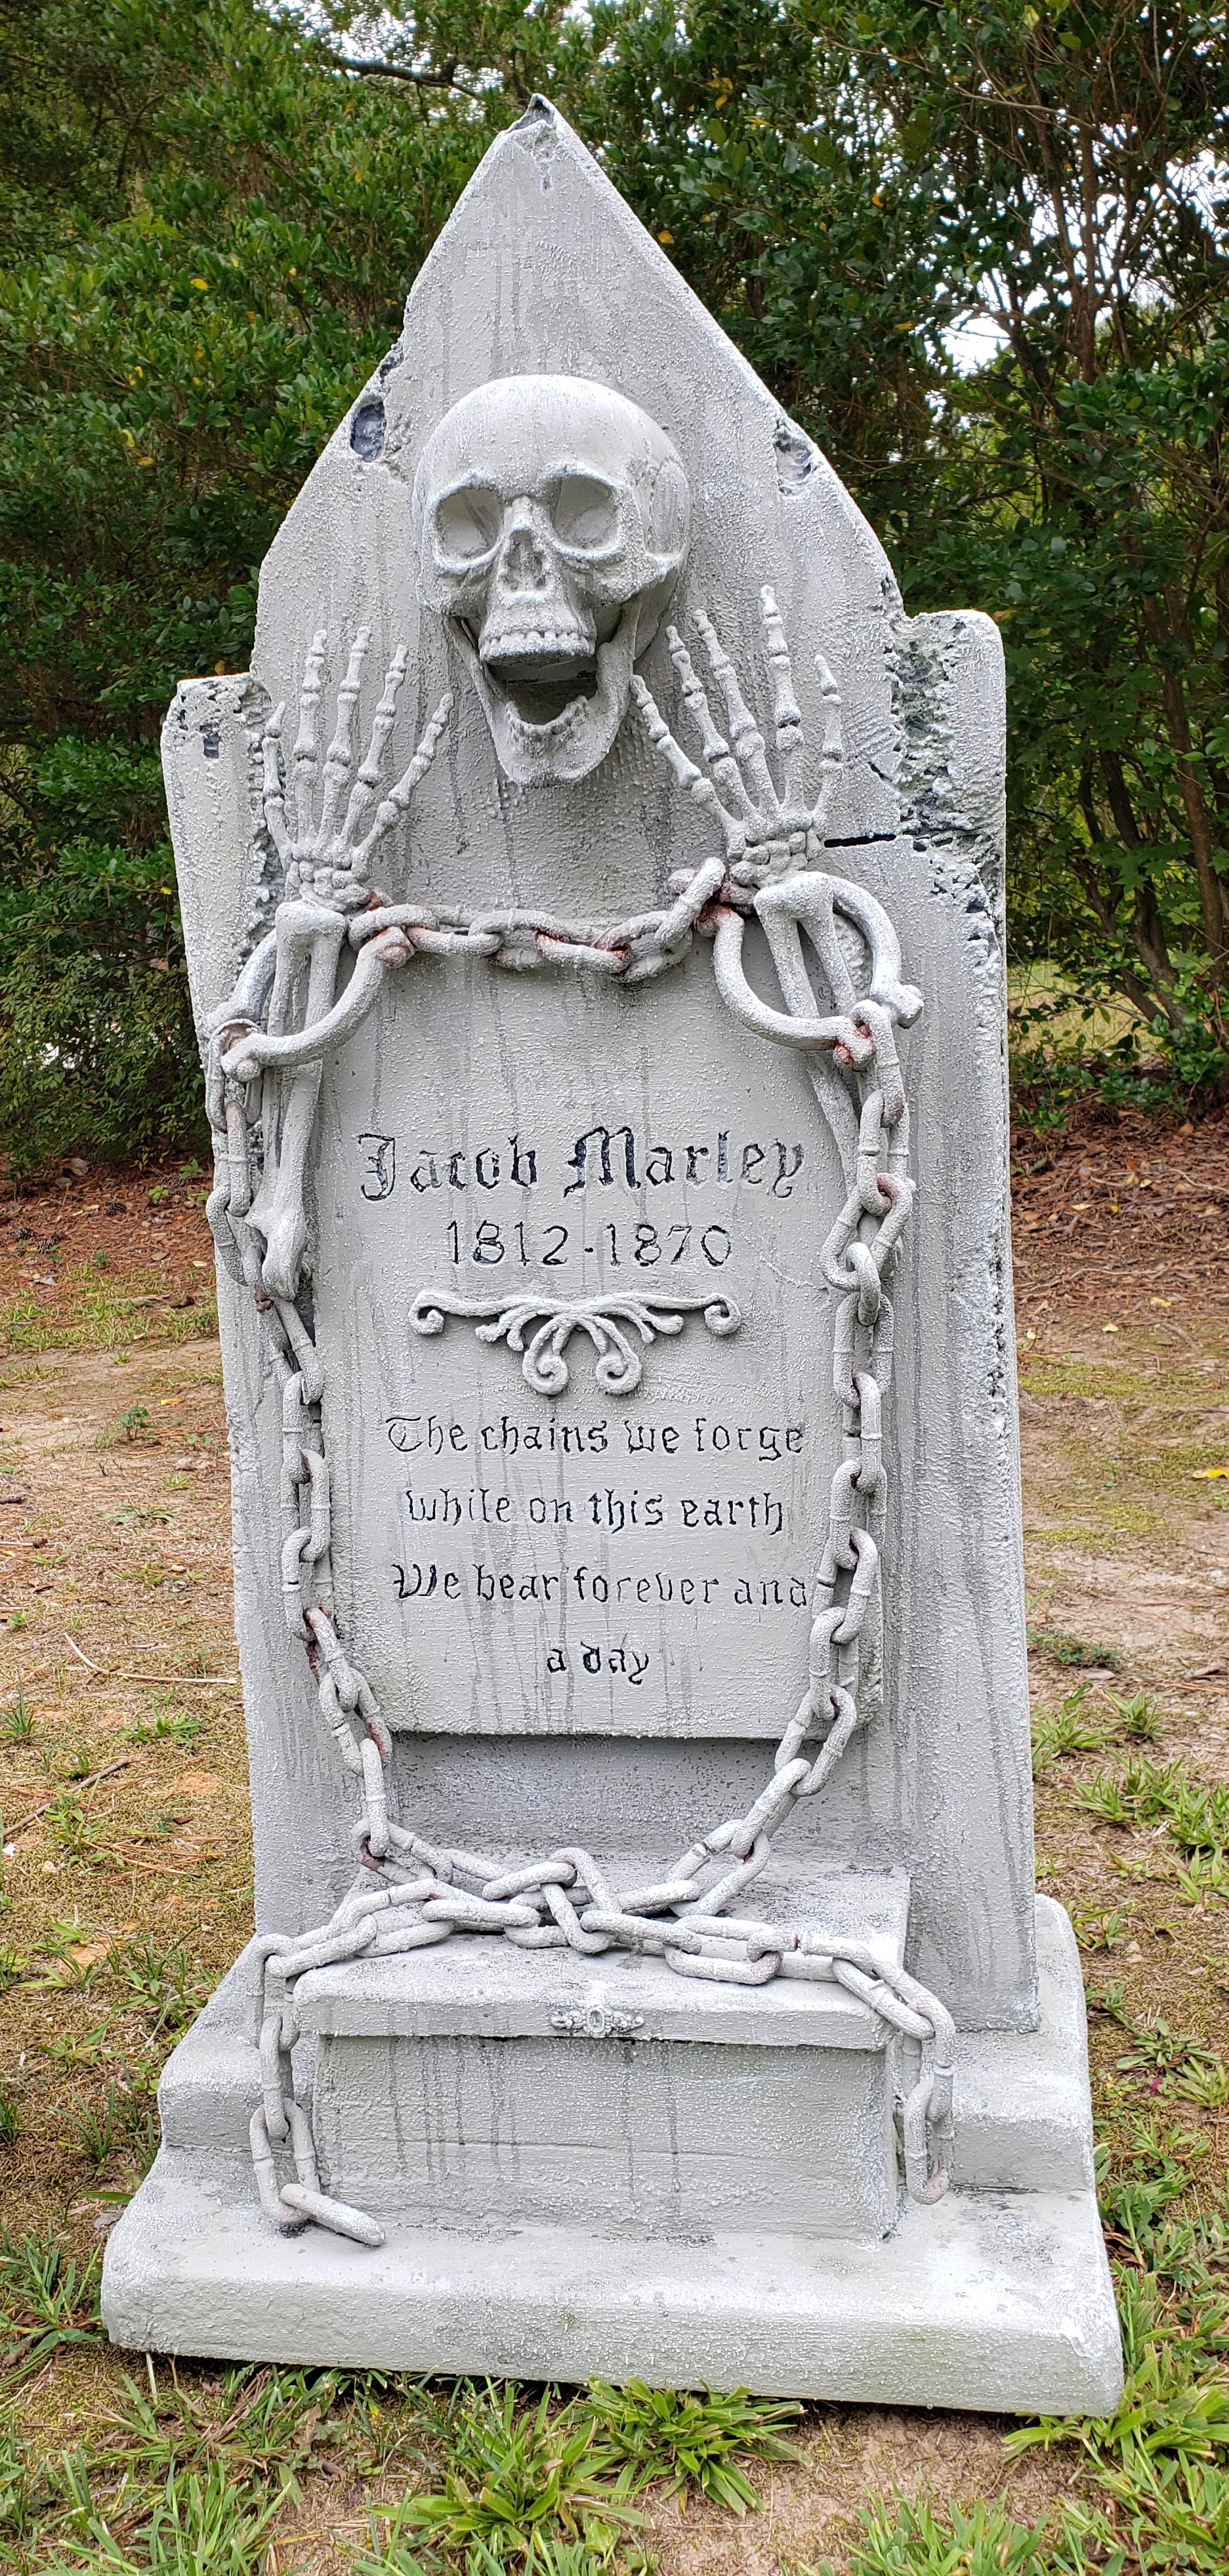
I saw a Jacob Marley tombstone on Pinterest and thought I'd give it a try. I really like the way it came out! The "hands" are from Big Lots. They were path markers. The chaines and manacles were from Dollar Tree. I made the money box by stacking 3 layers of foam and then shaped the box and lid. You can't tell it here, but I added some rust paint to the chains.
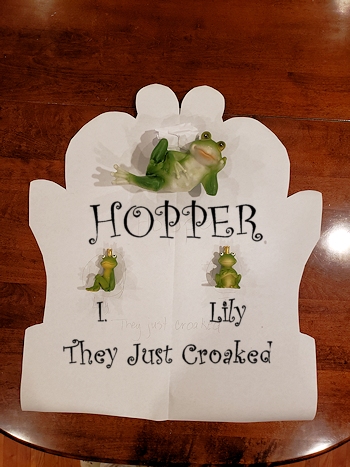
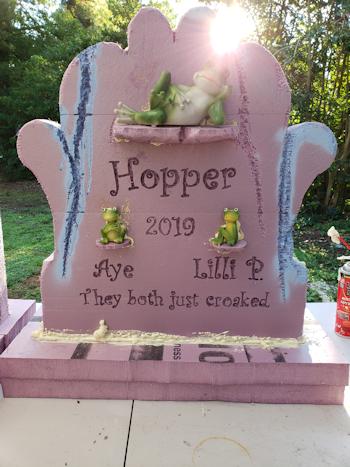
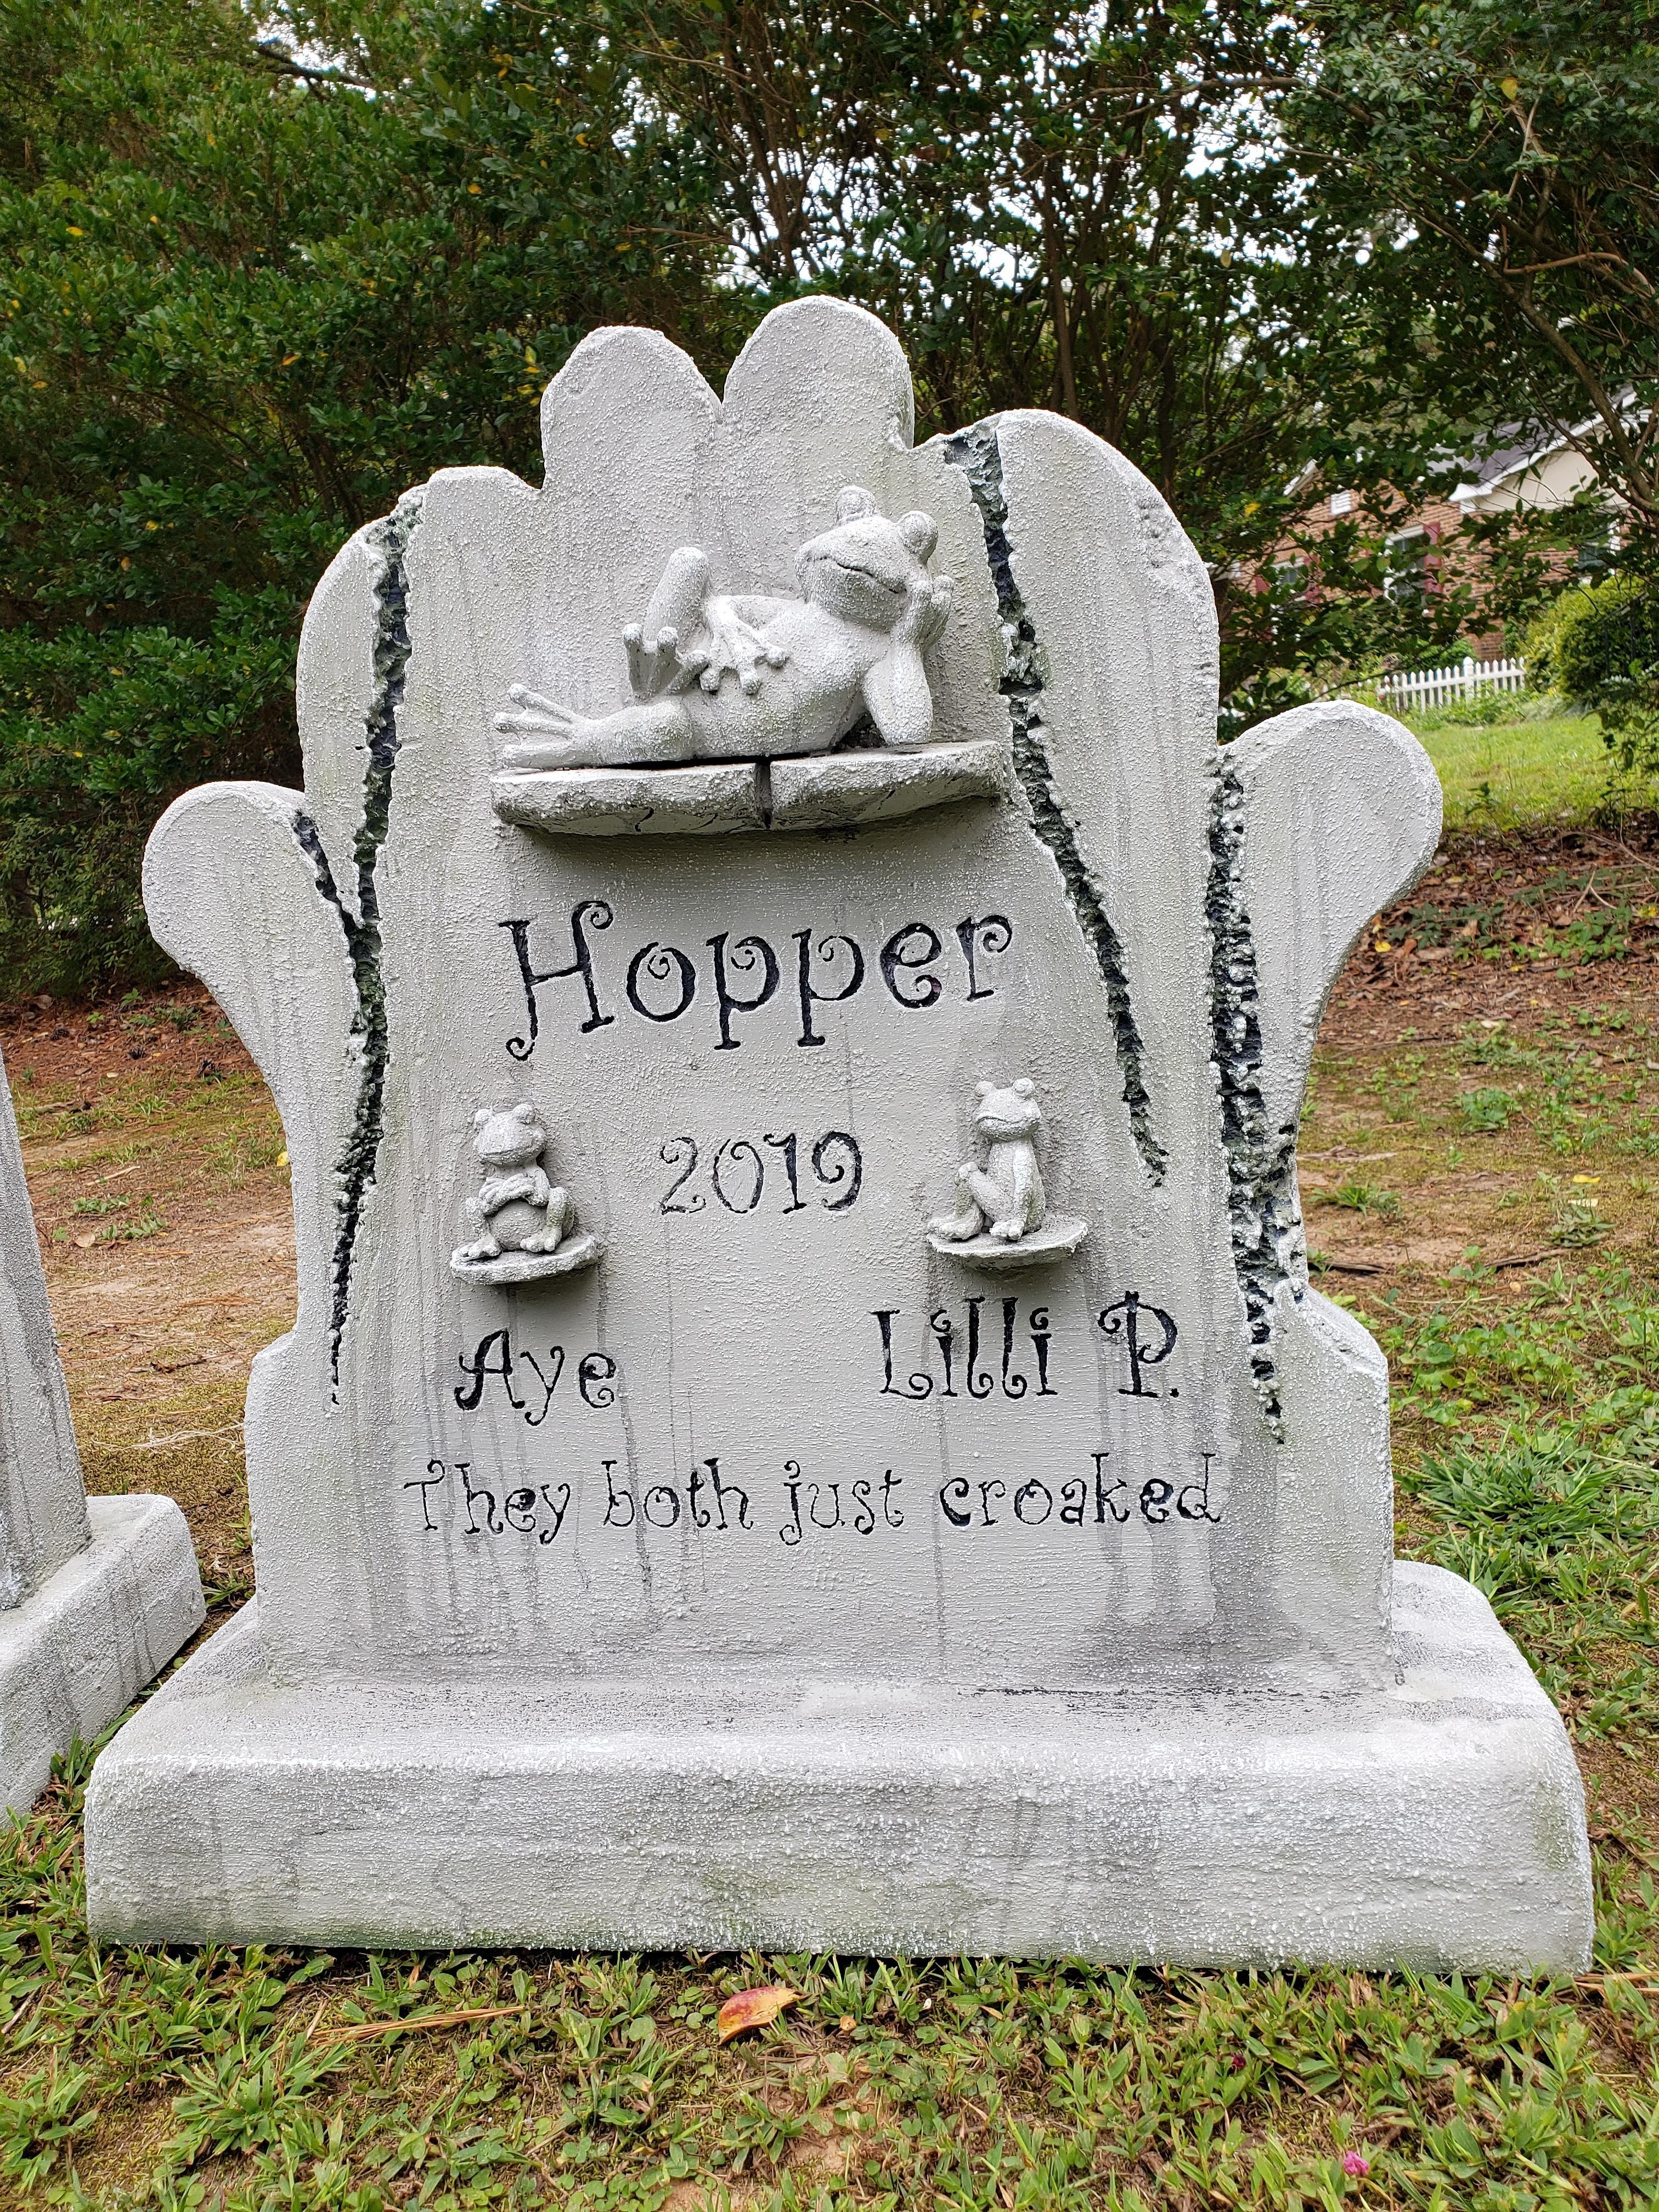
My husband found some frogs at Dollar General, so we just "had" to create a frog tombstone. The names are Aye Hopper and Lilli P., with their epitaph reading, "They both just croaked." I've always like whimsical tombstones, so this one is just funny to me!
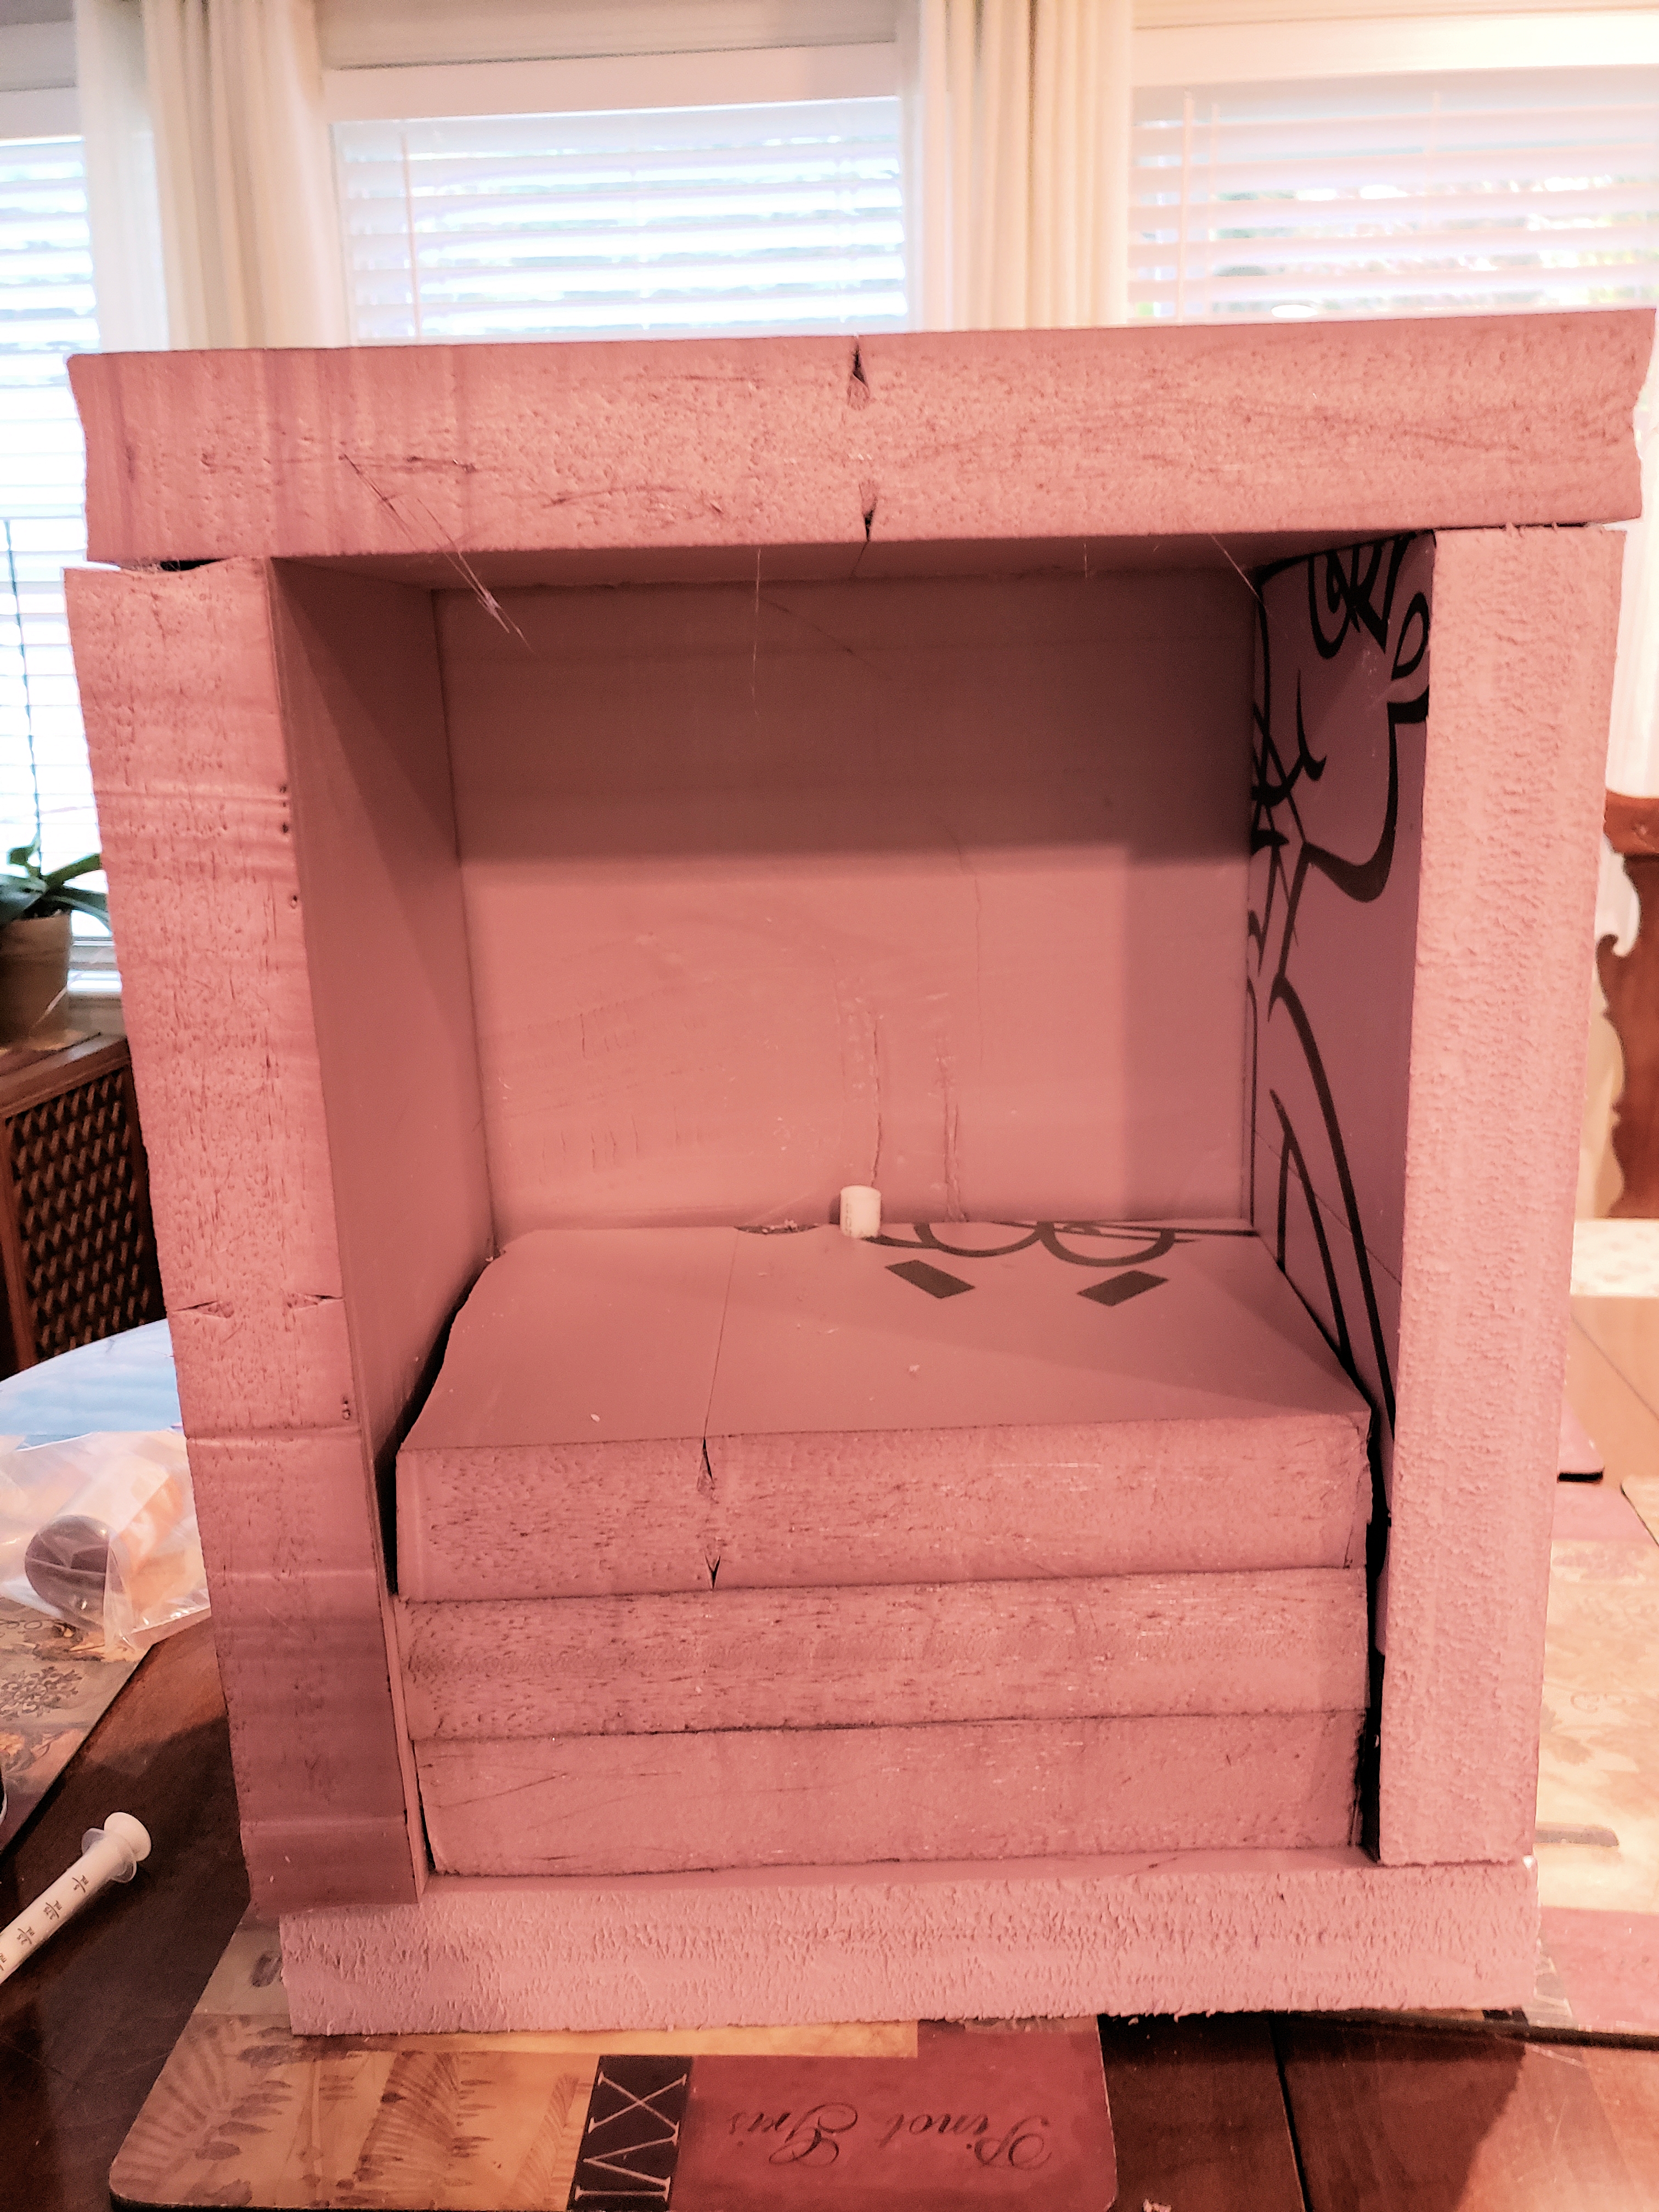
The Pedestal Base
I found the statue at Michaels and thought it would be fun to make a tombstone with it. The base has three levels of foam inside. As you can see in the back, the pvc pipe is installed so the rebar can secure the stone to the ground. There will be one installed in the front as well.
Once the front was glued on, I used wood putty to fill in the cracks and then sanded the stone until it was smooth.
I scraped and cut the stone using my rasp to make the cracks & crevices.
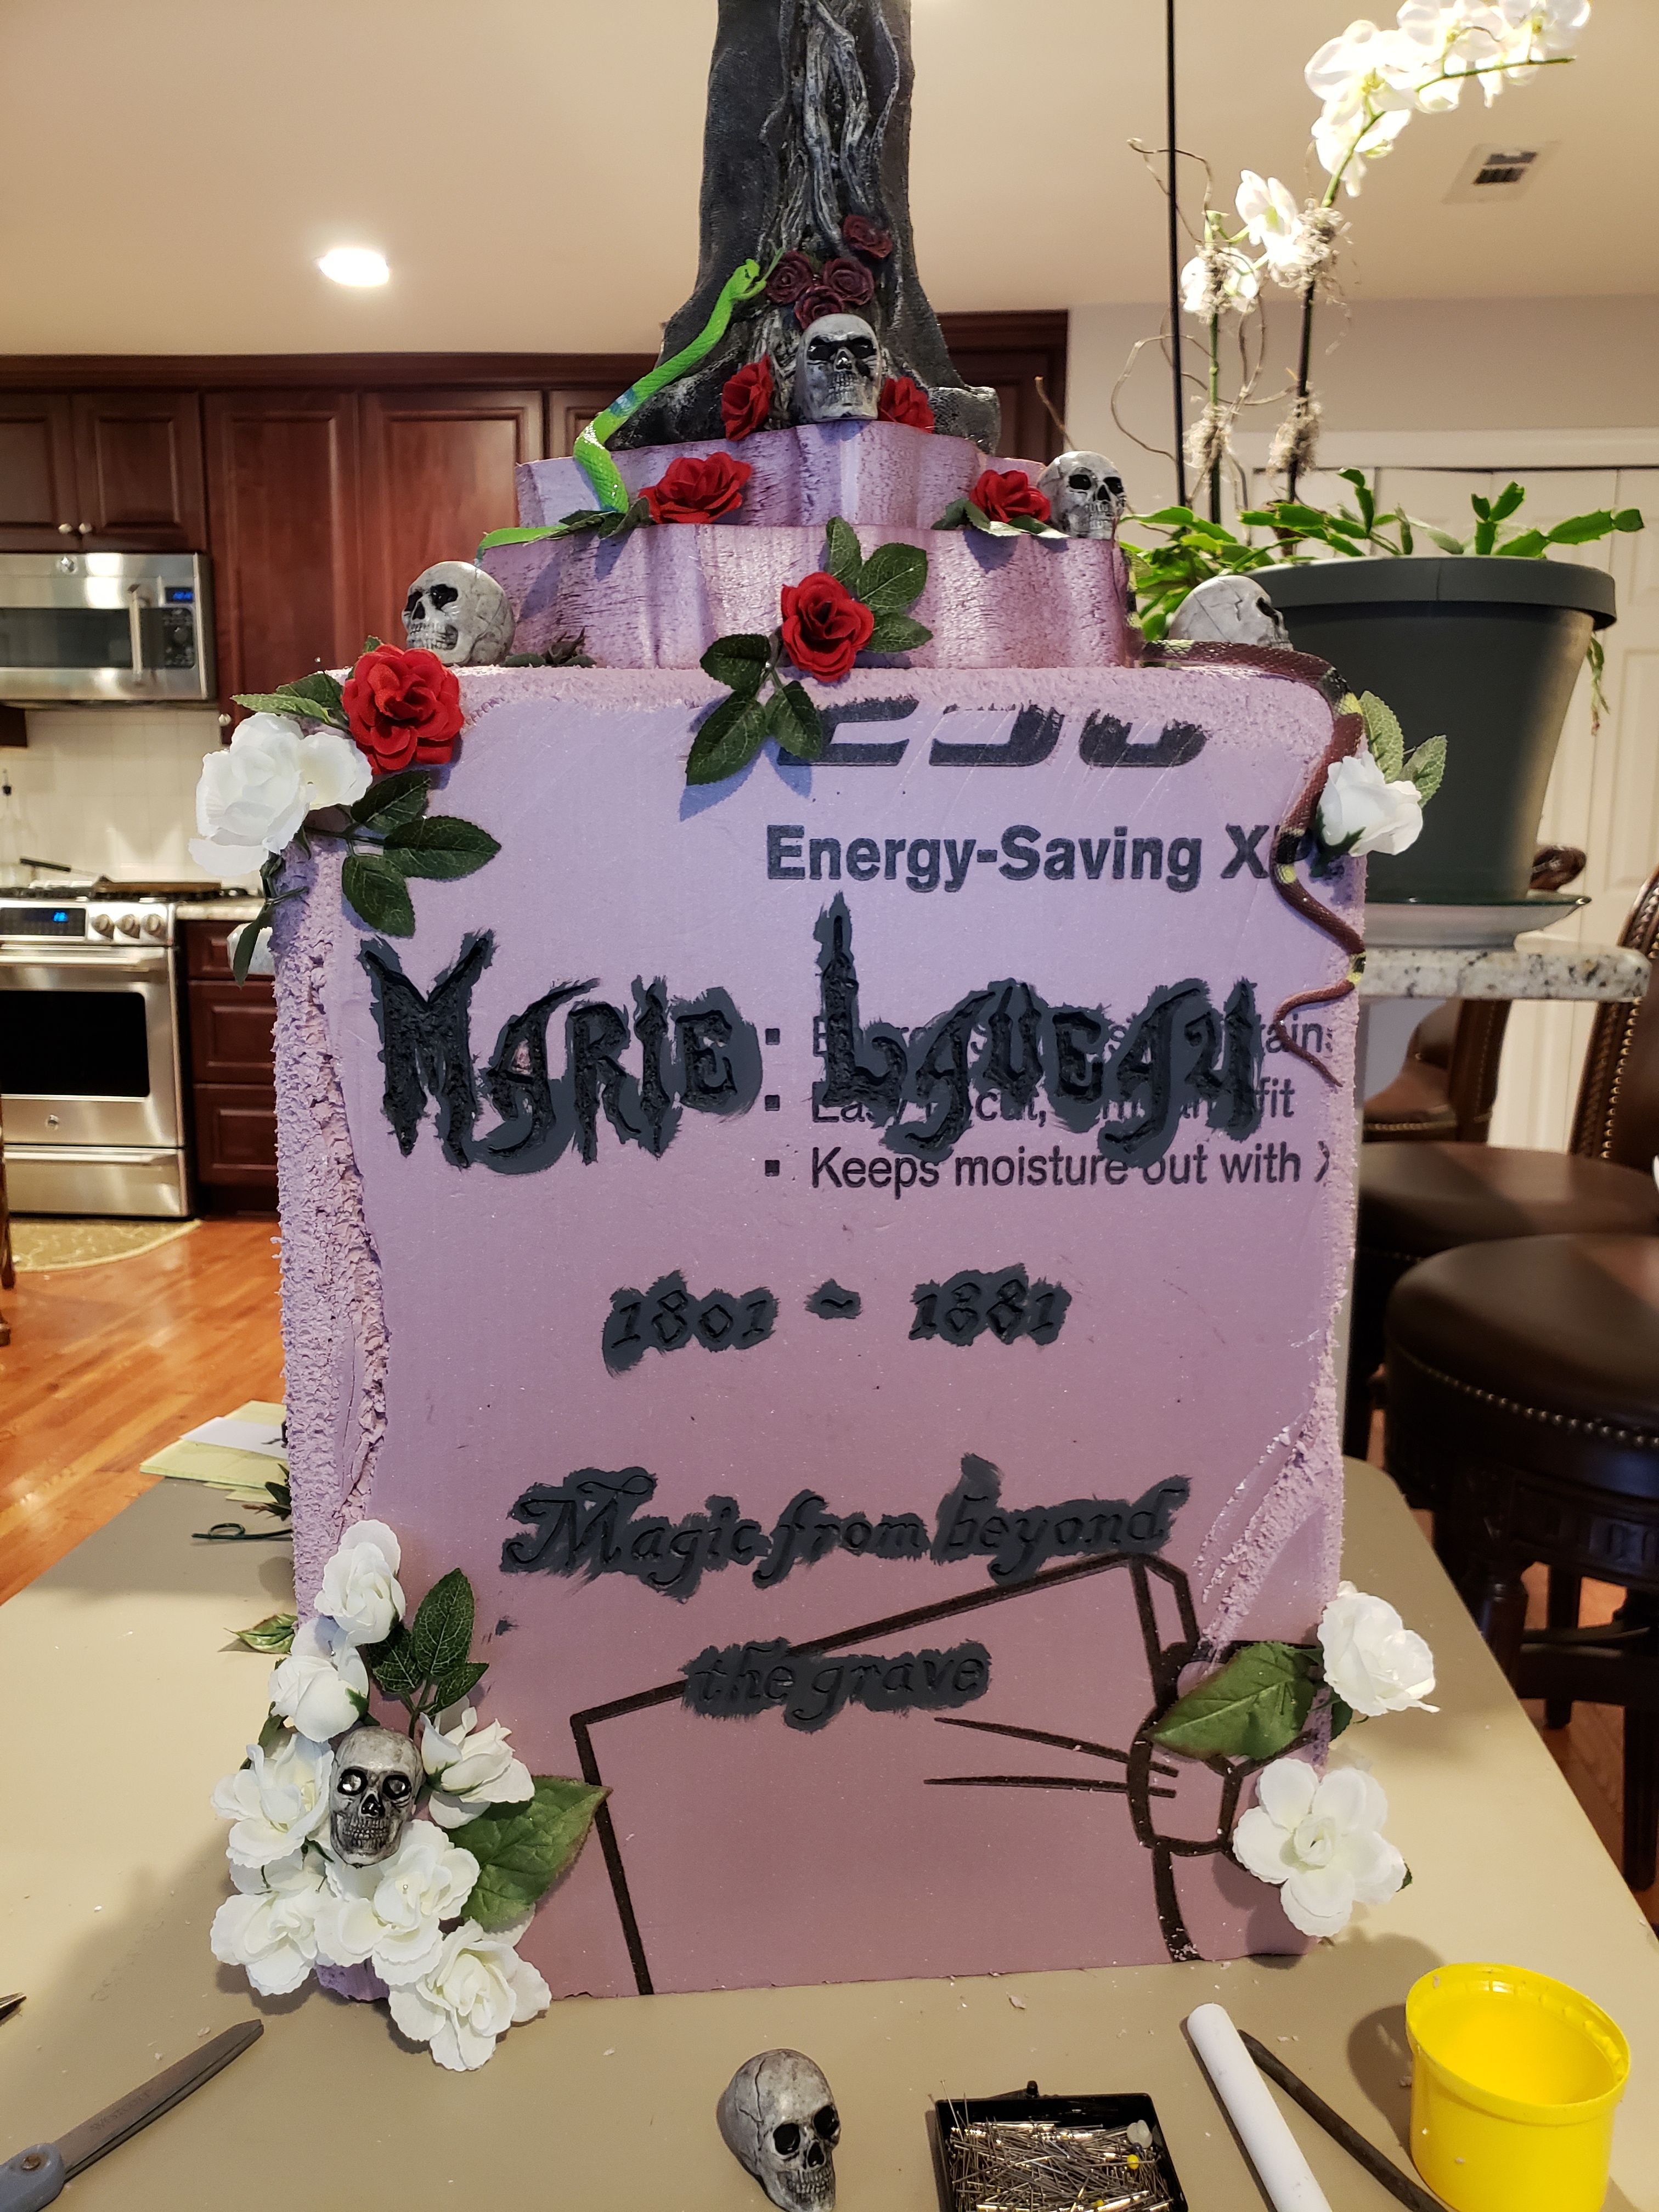
Placing The Flowers, Skulls & Snakes
Placing the embellishments where you think you want them is important. This way, you get the look of the stone. If you don't like something, you can easily move it. I also placed the two top layers so I could see if I liked them and if they were sized to fit the top.
You can see where I added the cracks & crevices to the sides and painted inside the letters.
I keep a container of straight pins to anchor the embellishments.
Placing The Mudded Objects
After dipping the flowers and leaves in monster mud, I pinned them on the stone. I used black spray paint to age the cracks and scrapes.
The plastic snakes were a pain to glue on. I used straight pins to secure them, but the one on her dress had to be pinned at the bottom and taped to her dress until the glue dried.
I decided that the font was too "frilly" to be easily read, so I used wood putty to fill in some of the serifs.
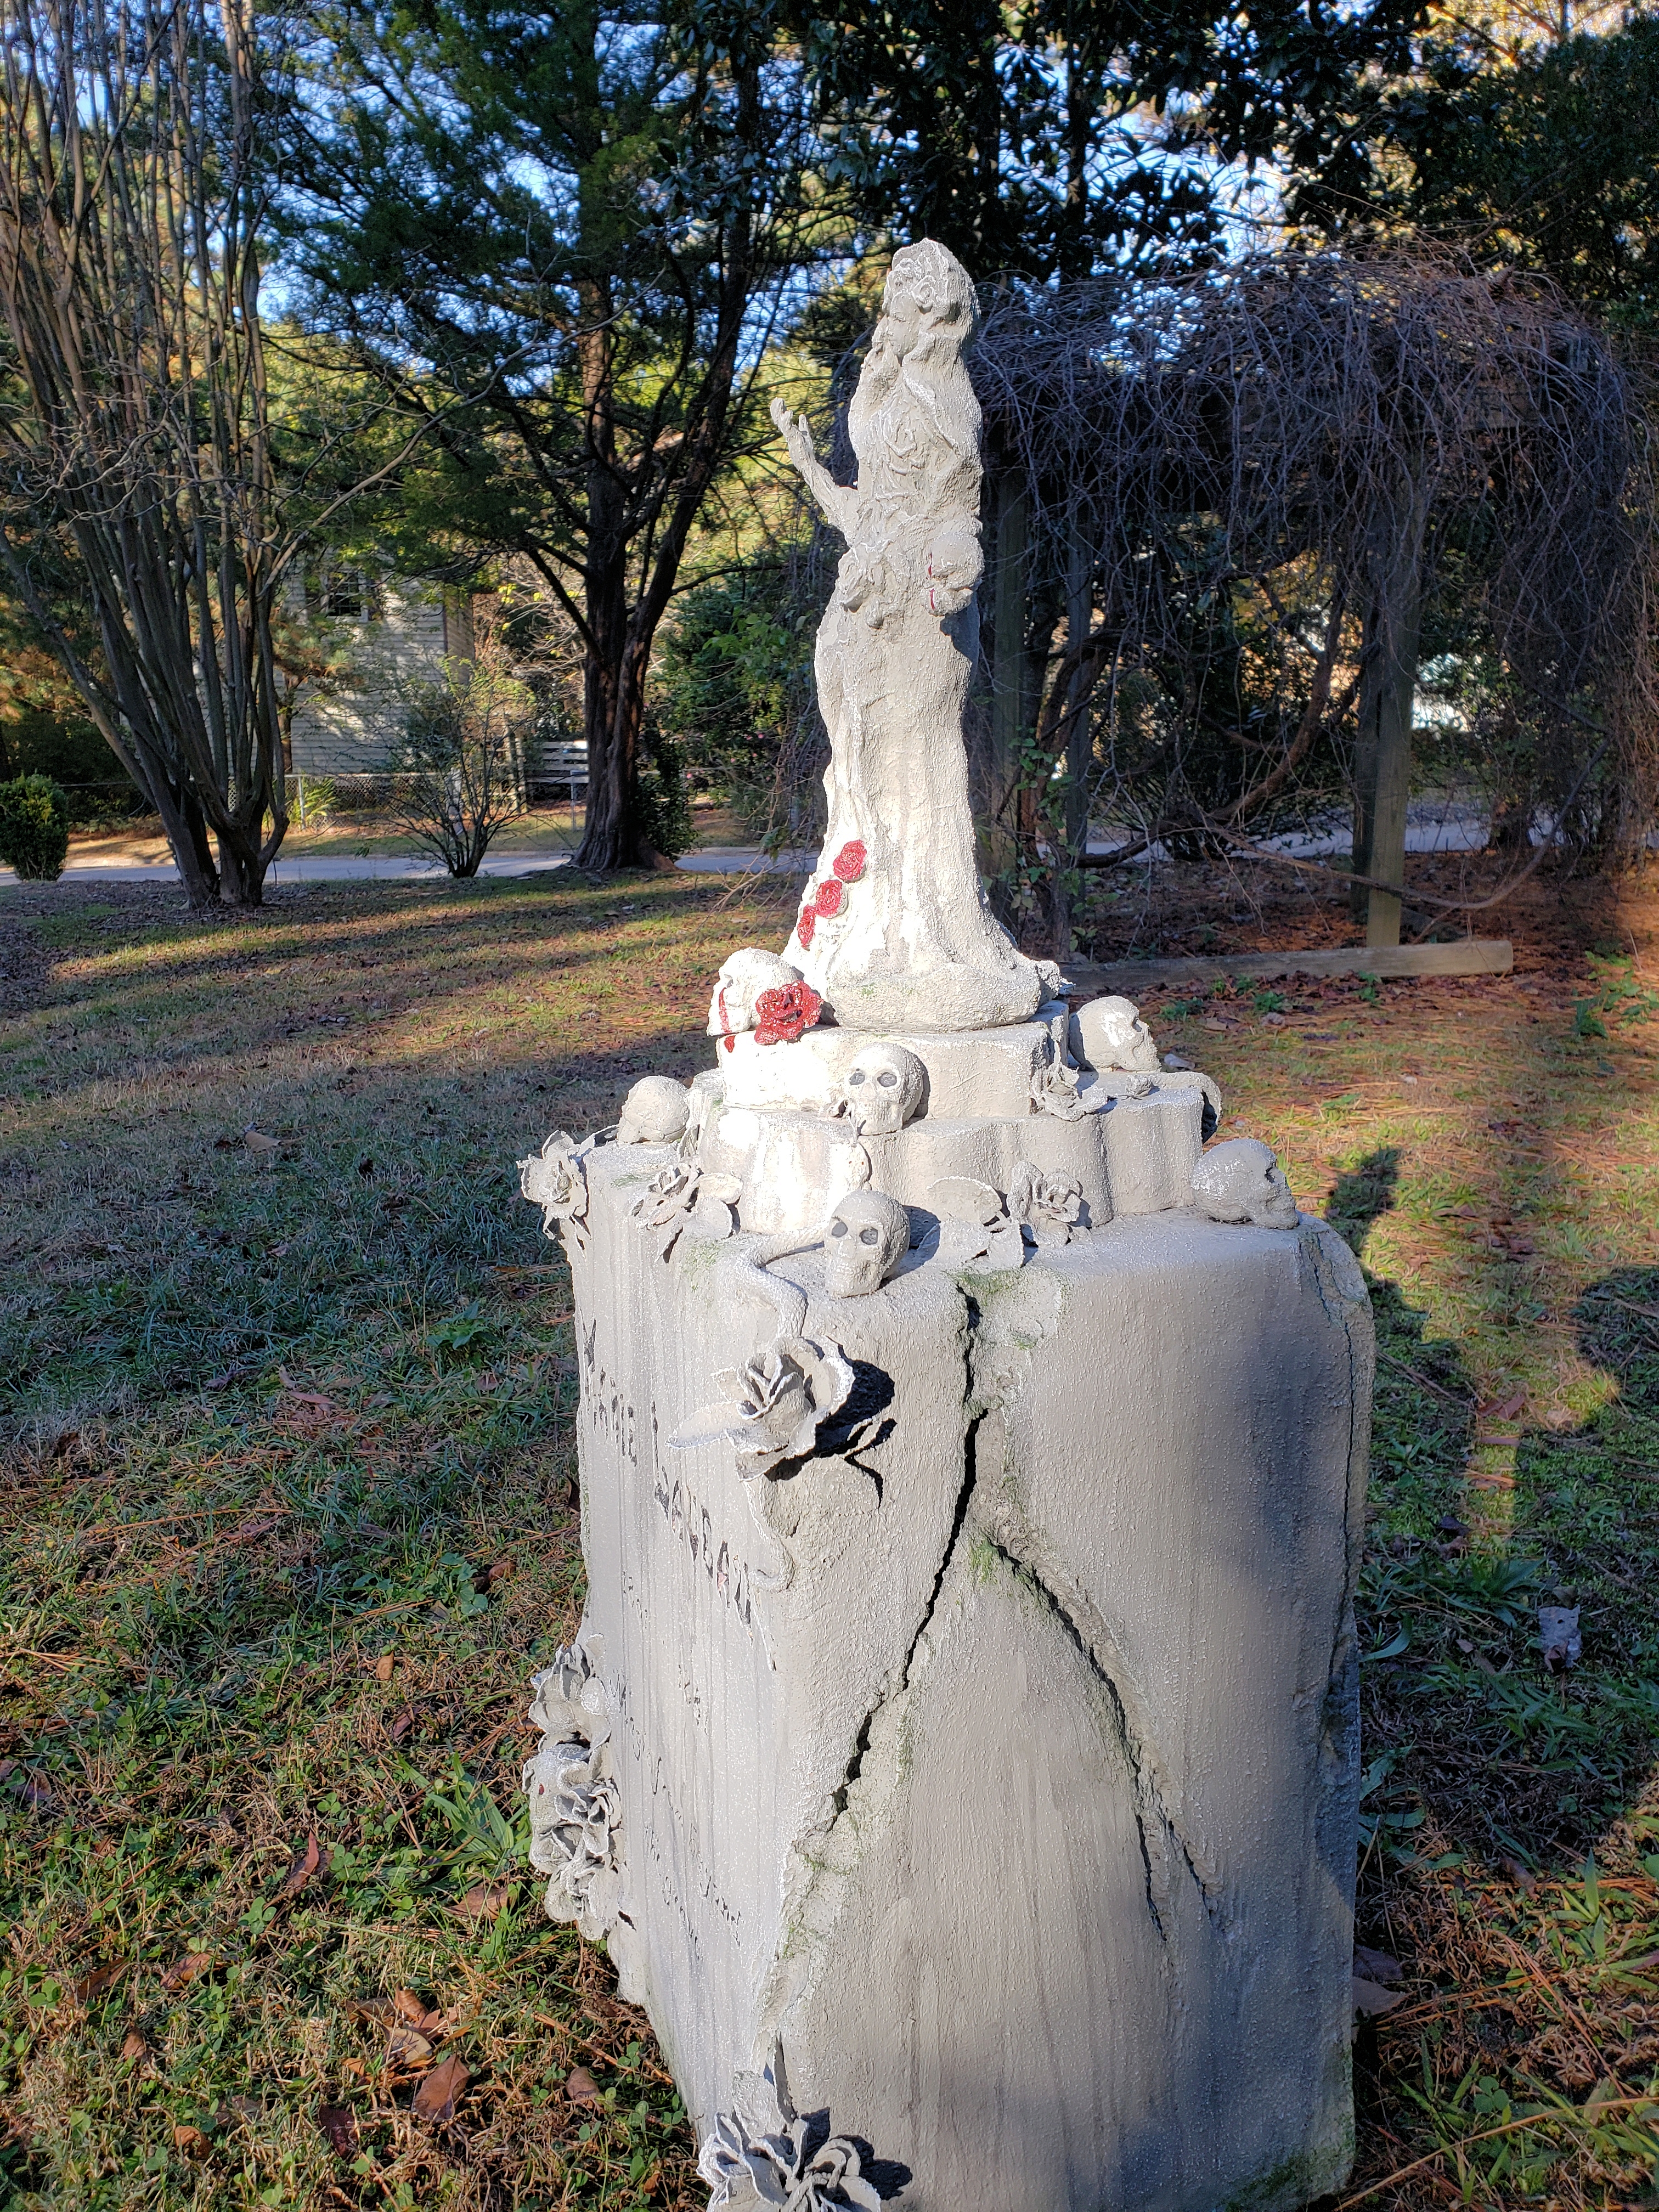
Painting a few Roses
After painting the stone a number of times with Dryloc, I thought it would be cool to paint a couple of the roses red.
I also used some green acrylic paint to make the mossy look on the bottom of the stone as well as in the cracks.

A Dab of Red on the Skulls
I decided to put a bit of red paint on a couple of the skulls.
You could paint any or all of the flowers and skulls. I chose to paint the one in her hand, at her foot and one at the base of the pedestal.
Why did I name her Marie Laveau?
We're from Louisiana and lived a number of years in New Orleans, the Voodoo capitol of the US! Marie was a famous Voodoo Queen in New Orleans in the mid 1800's and was well known throughout the area. The dates on the stone are the dates she was born & died in the French Quarter.
She is interred in a mausoleum in St. Louis Cemetery #1, where tours are directed to see her final resting place. The only way to see her mausoleum is with a tour guide, since so much vandalism has happened in the past.
Some people refer to her as a witch, but she is properly described as a "Voodoo Queen." When I saw the statue with the skulls, I thought of her and thought it would be fun to do the tombstone.
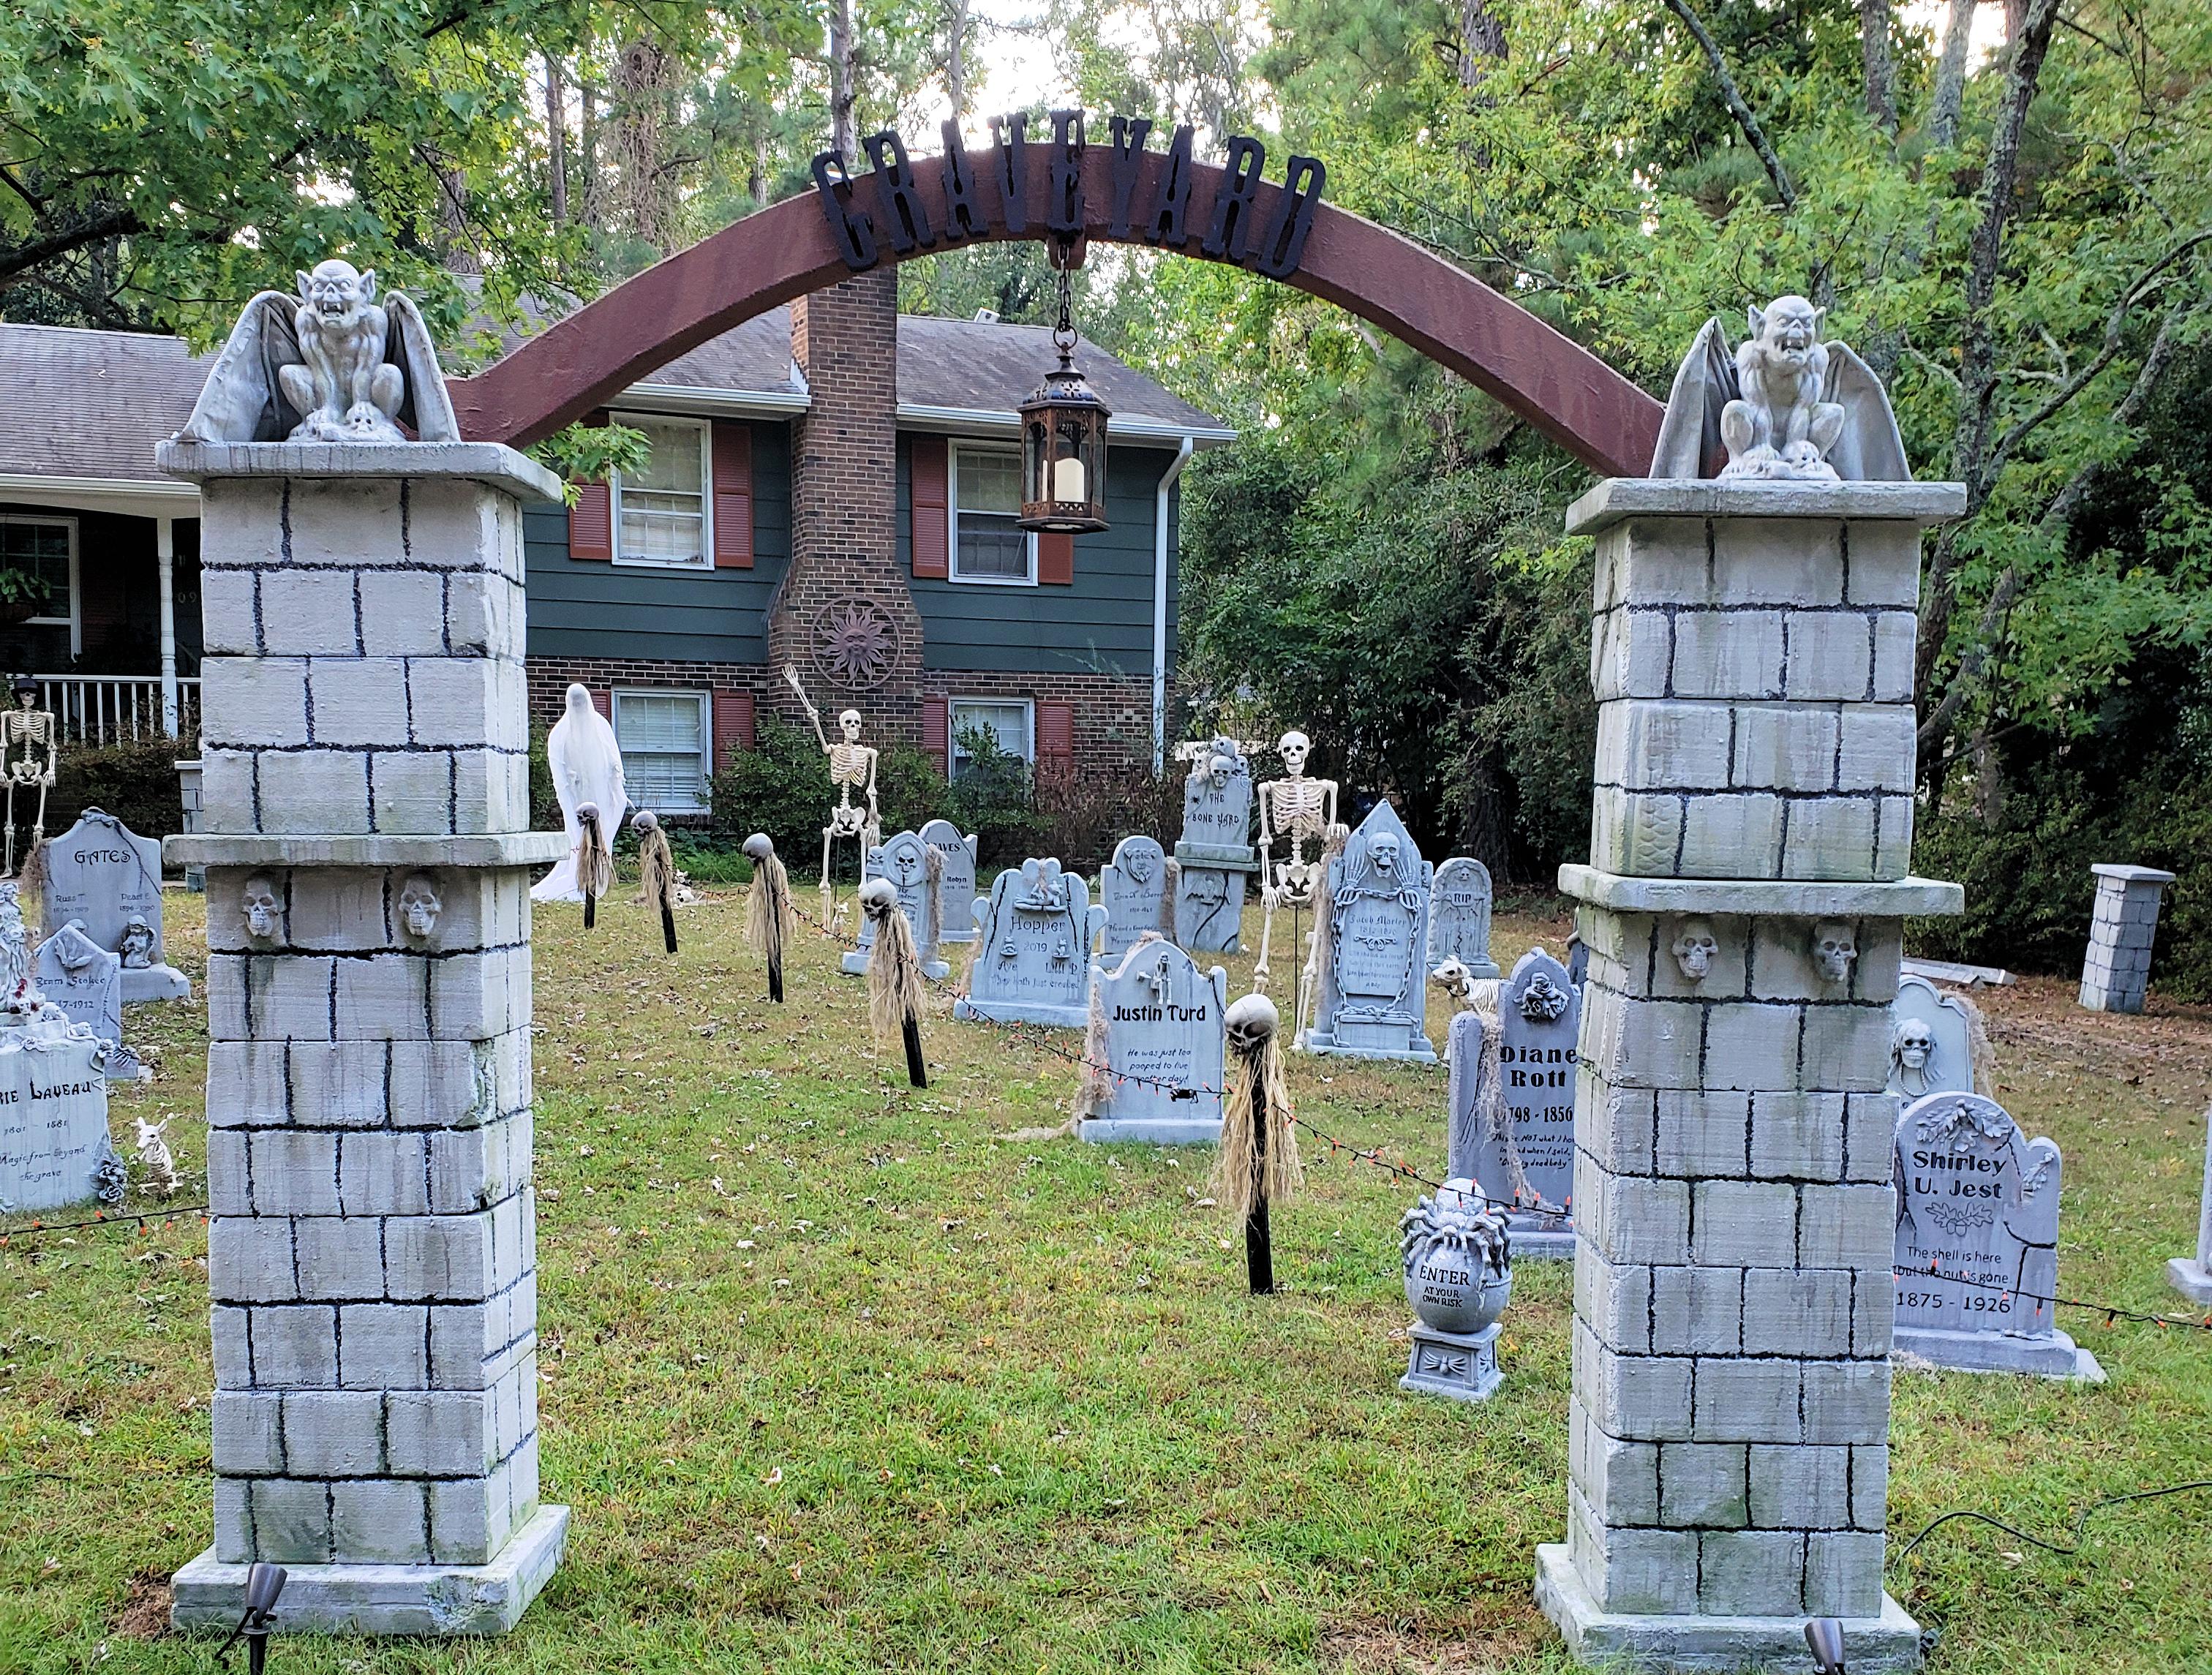
The fenceposts and gateway were constructed the same way with the exception of the arch on the gateway.
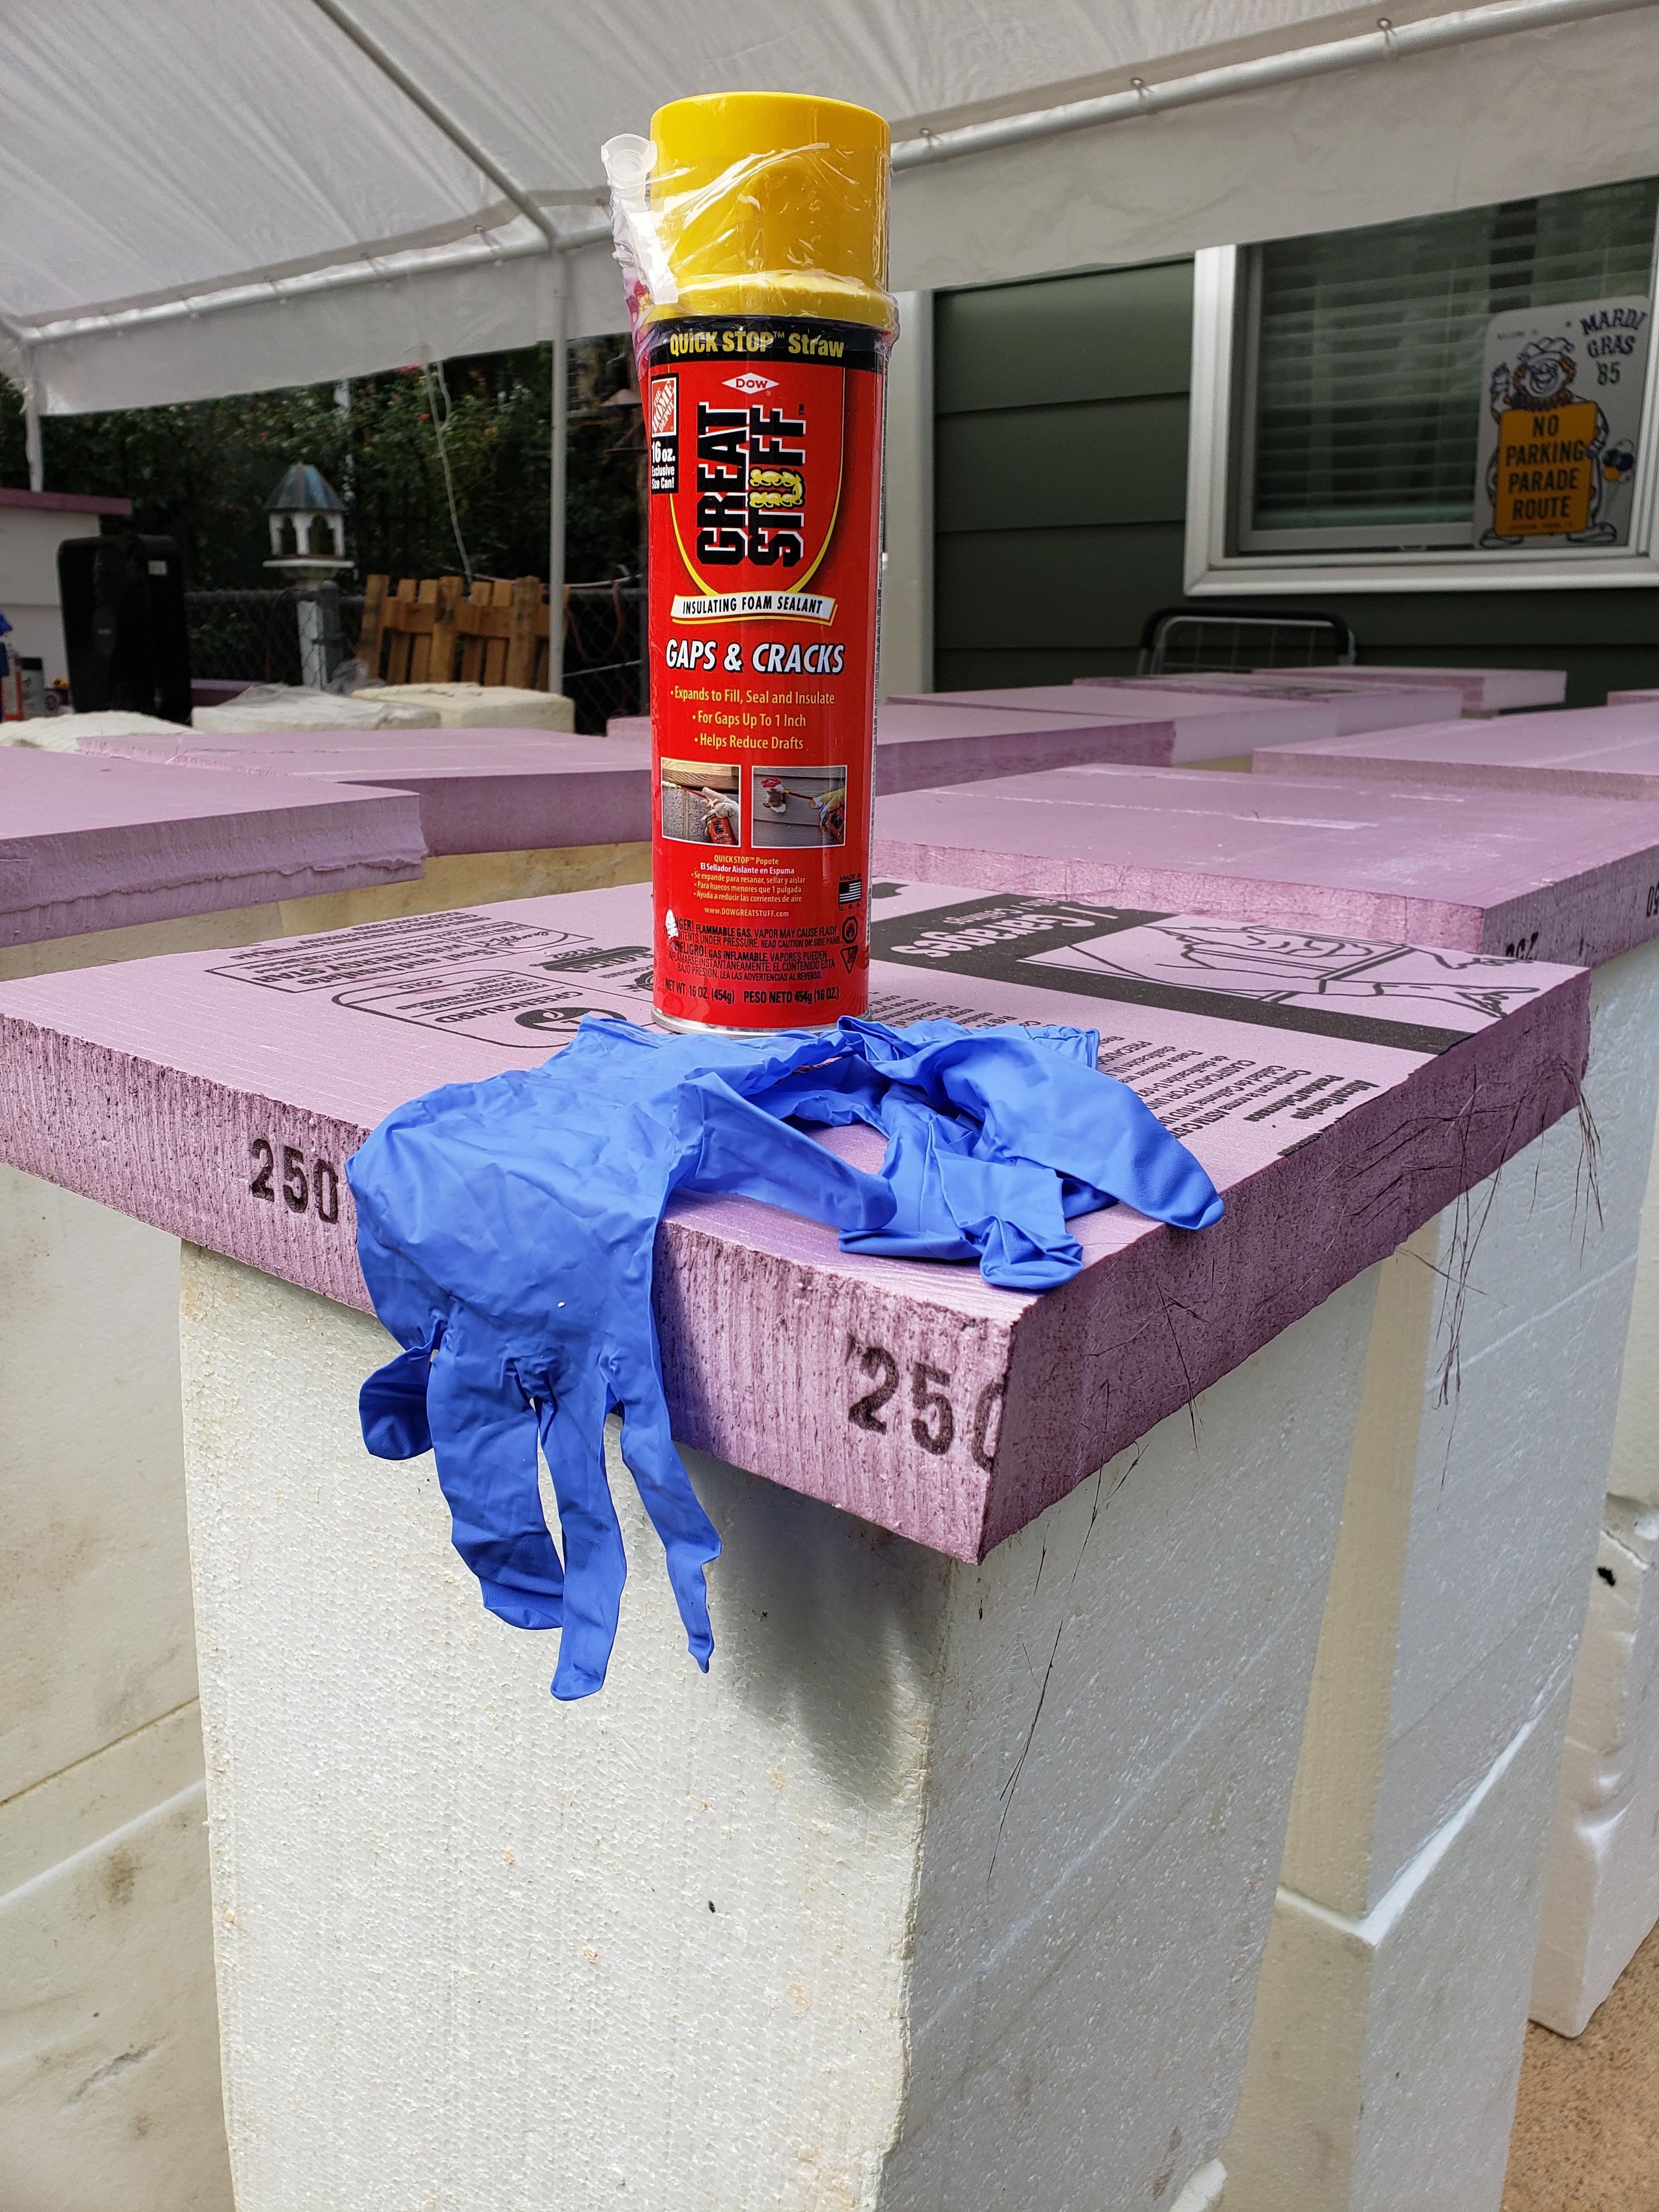
The free styrofoam blocks were 18x12x12. For the fenceposts, I stacked and glued them to make a 36x12x12 post. I then cut out a piece of 2 inch foam for the top, leaving about 2 inches on each side. I used "Great Stuff" to glue them together and to fill in some of the gouges made by the trailers while in transit. Use gloves! It's hard to get Great Stuff off of your hands!
They're all glued together now and ready for carving. I measured 6 inches down and drew lines horizontally, so I'd know where the "mortar" should be. I took a cross-point screwdriver and dug lines into the styrofoam about 1/2 inch deep to mimic the shape of the bricks.
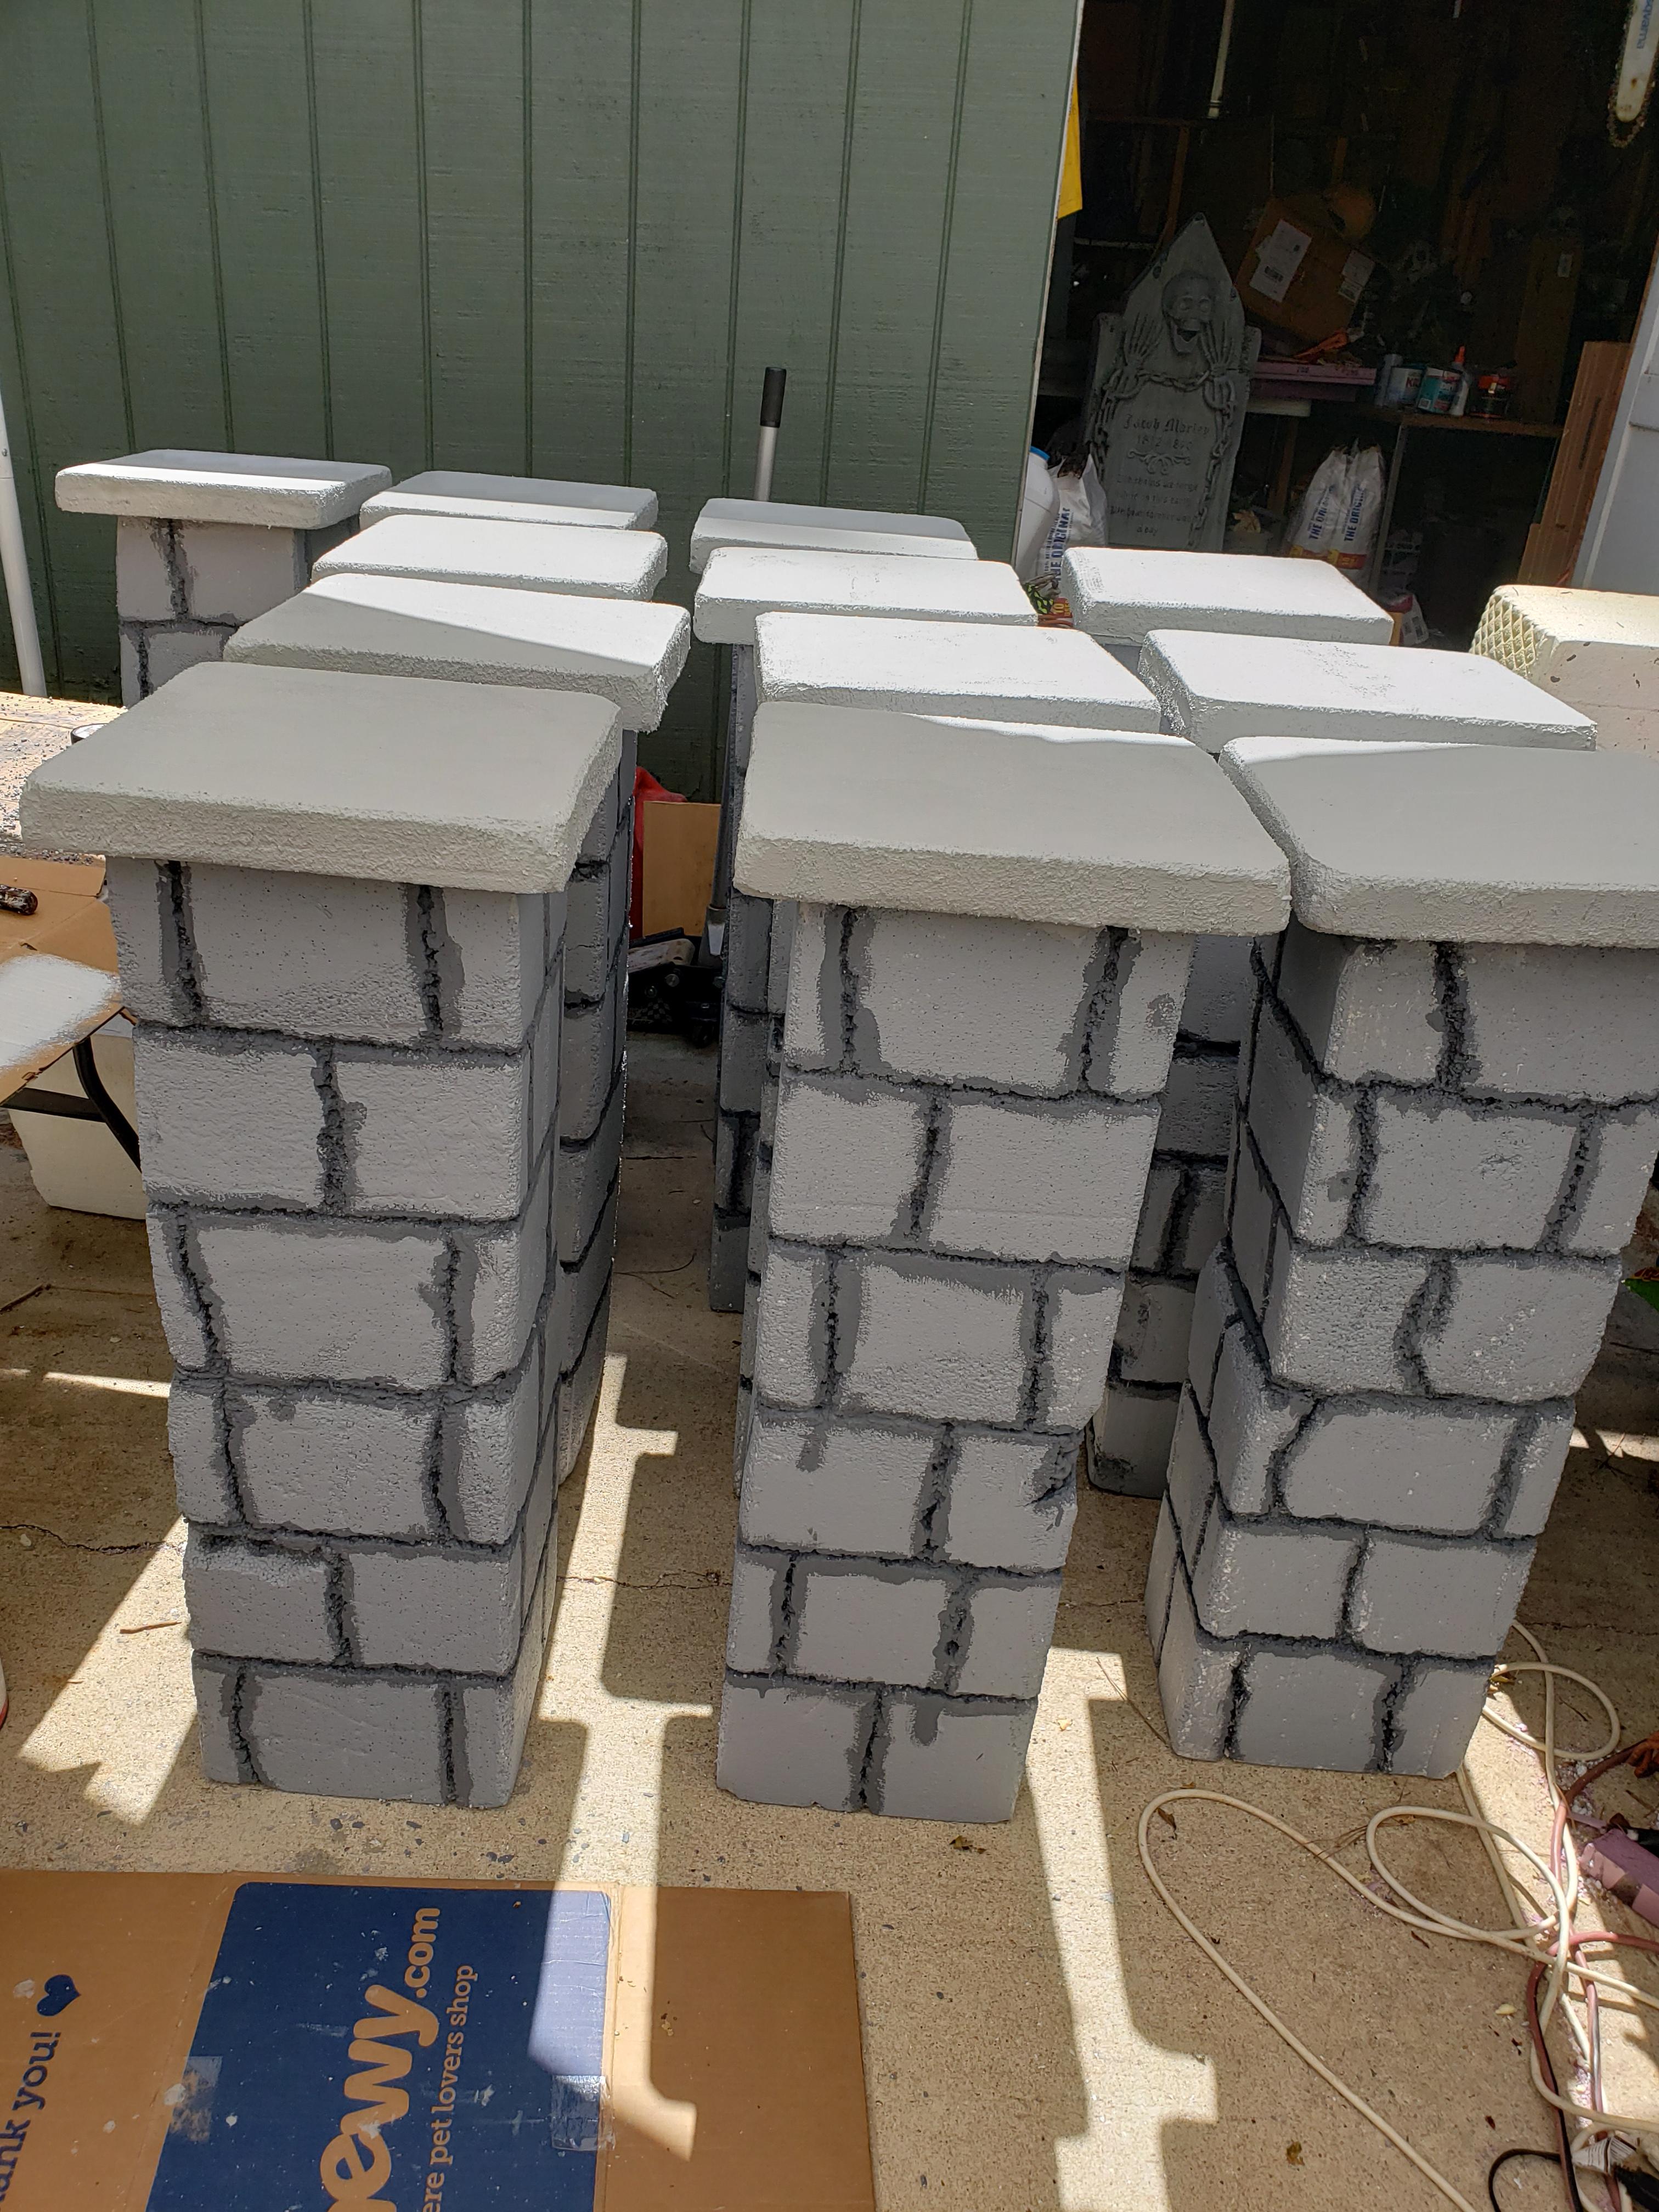
I painted the lines with a darker color of Dryloc masonery paint. I added a bit of black to the regularily colored gray to make the paint darker. Once that was dry, I used a roller to roll on two coats of Dryloc. One just wasn't enough to cover well.
Using a piece of heated rebar, we burned a hole from the bottom of the post towards the top that was about 20 inches long. We then stuck in a 20 inch long piece of pvc pipe and glued it with Great Stuff.

The finishing touches were added with a couple of different colored green paints and a stiff, really pitiful brush. I put a couple of spoons of three different colors of green paint on a paper plate. I dabbed the brush in them, trying not to mix the paints completely. I then dry-brushed the paint on the fenceposts. If I got too much, I just used a wet paper towel to dab some of the paint off.
All we had left to do was to pound in a piece of rebar in the ground and slide the fencepost on it.
We constructed the gateway with the styrofoam blocks laying longways. The bottom section has 3 stacked blocks sitting on 4 inches of a styrofoam base. It also has a 2 inch top of styrofoam. We burned in two holes about 40 inches deep from the bottom of the blocks toward the top. We then added 1 inch pvc pipe and used Great Stuff to secure it in place. We knew we would need the two pieces to anchor the base securely to the ground. We used 1/2 in rebar hammered into the ground and then slid the base over the two pieces of rebar. We also burned two holes at the top, so we could attach the top section with two pieces of rebar.
The top section was 2 stacked blocks with monster-mudded gargoyles sitting on top of a 2 inch piece of foam. We followed the same procedure for adding pvc to the top. The gargoyles were cheaply made styrofoam with some type of cloth-like wings. I got them at the end of last year for about $7 each.
The arch was cut out of a 8 foot sheet of foamboard.There is a 12 inch flat section before the archway starts in order to connect it to the top section as well as a small opening to hang a lantern. We made two pieces and then, using a dremmel, we cut a channel out to embed a piece of 1 inch pvc. We glued the two pieces together. The pvc was 12 inches longer than the arch.
Once again, we burned a hole in each top section to accept a piece of pvc in order to anchor it. Fit like a glove!!!!
We found some rust colored deck paint at Home Depot that someone had returned. Their paint is really cheap when you buy the returned paint! We painted and tea-stained the arch and then glued the painted letters I had cut out from a piece of 1 inch foam. We added a lantern we purchased from "Big Lots".
We were pretty excited. Both the gateway and the fenceposts were never planned, but once we got the free foam, we decided that they both would be a great addition to our graveyard. Wouldn't you agree???!!!!