I don't have images for everything I did, but I'll try to explain it as I
complete the build. If you have any questions, just call or email me.
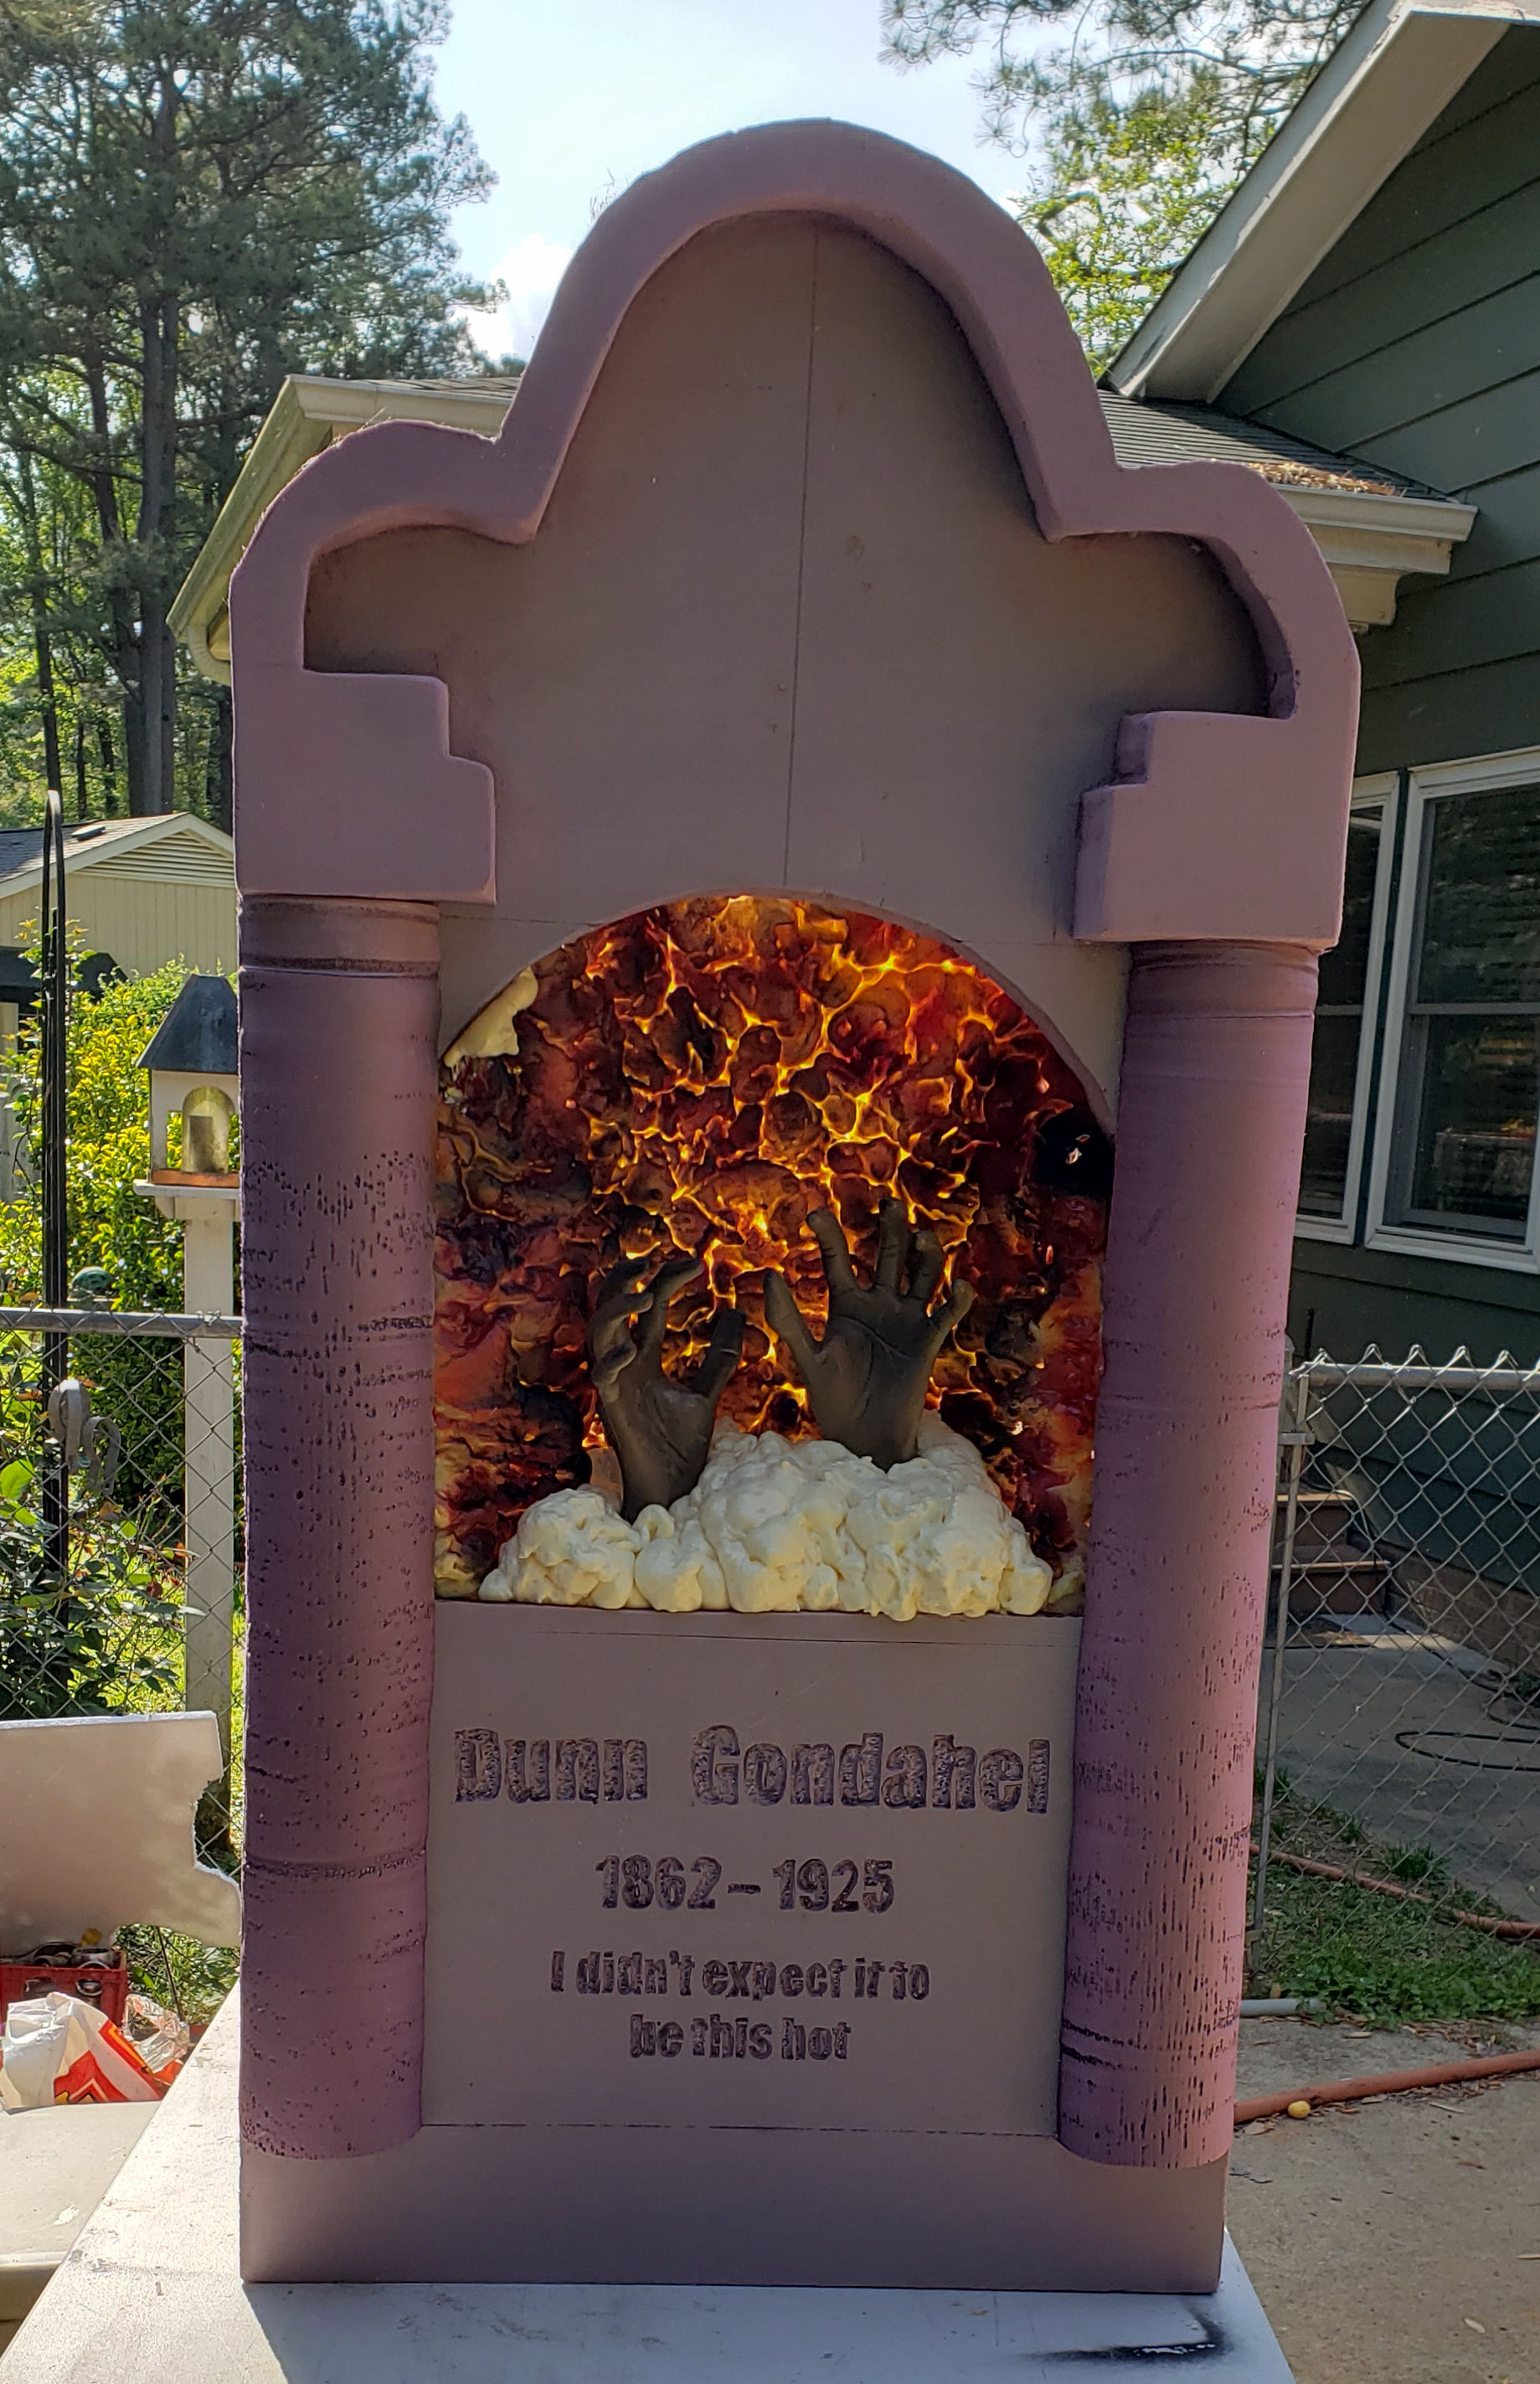
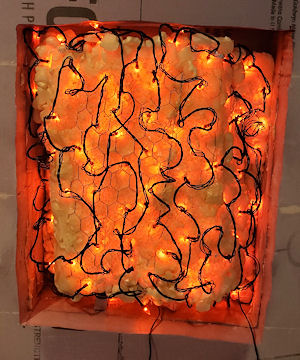
It was light outside, so you can't see the lights as clearly.
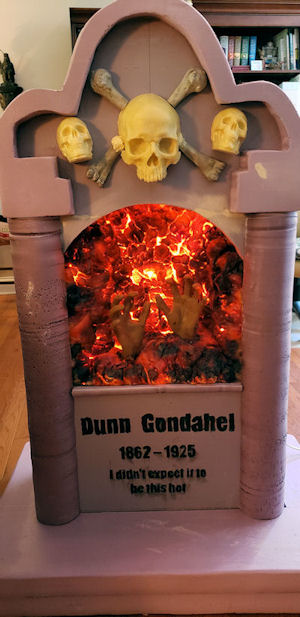
Can't wait for Halloween!!!
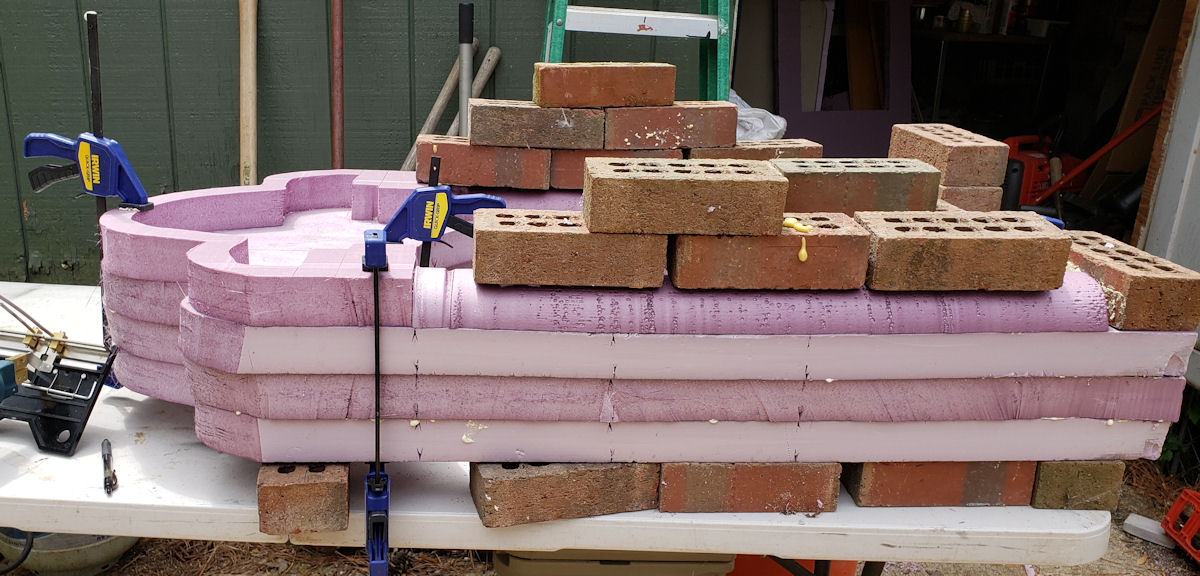
Cutting & Gluing
I cut 4 pieces of 2 inch foam and glued them together along with
the header and the column. (this image shows only 3 of the full
pieces) The column was made with my newest favorite
tool, the Industrial
hot knife with the sled and shapeable blade. It was a piece of
cake to make the colums. It took less than 5 minutes to make both!
Inside view
Take a look at the four layers. The layer on the front is
intentionally shorter by a couple inches on the cutout. I carved out about one inch on the
inside, so the front lip wouldn't be so thick. The chicken wire needed
to be hidden on the front. Also, the front layer has the curved face.
The other layers are about 2 inches taller and are square.
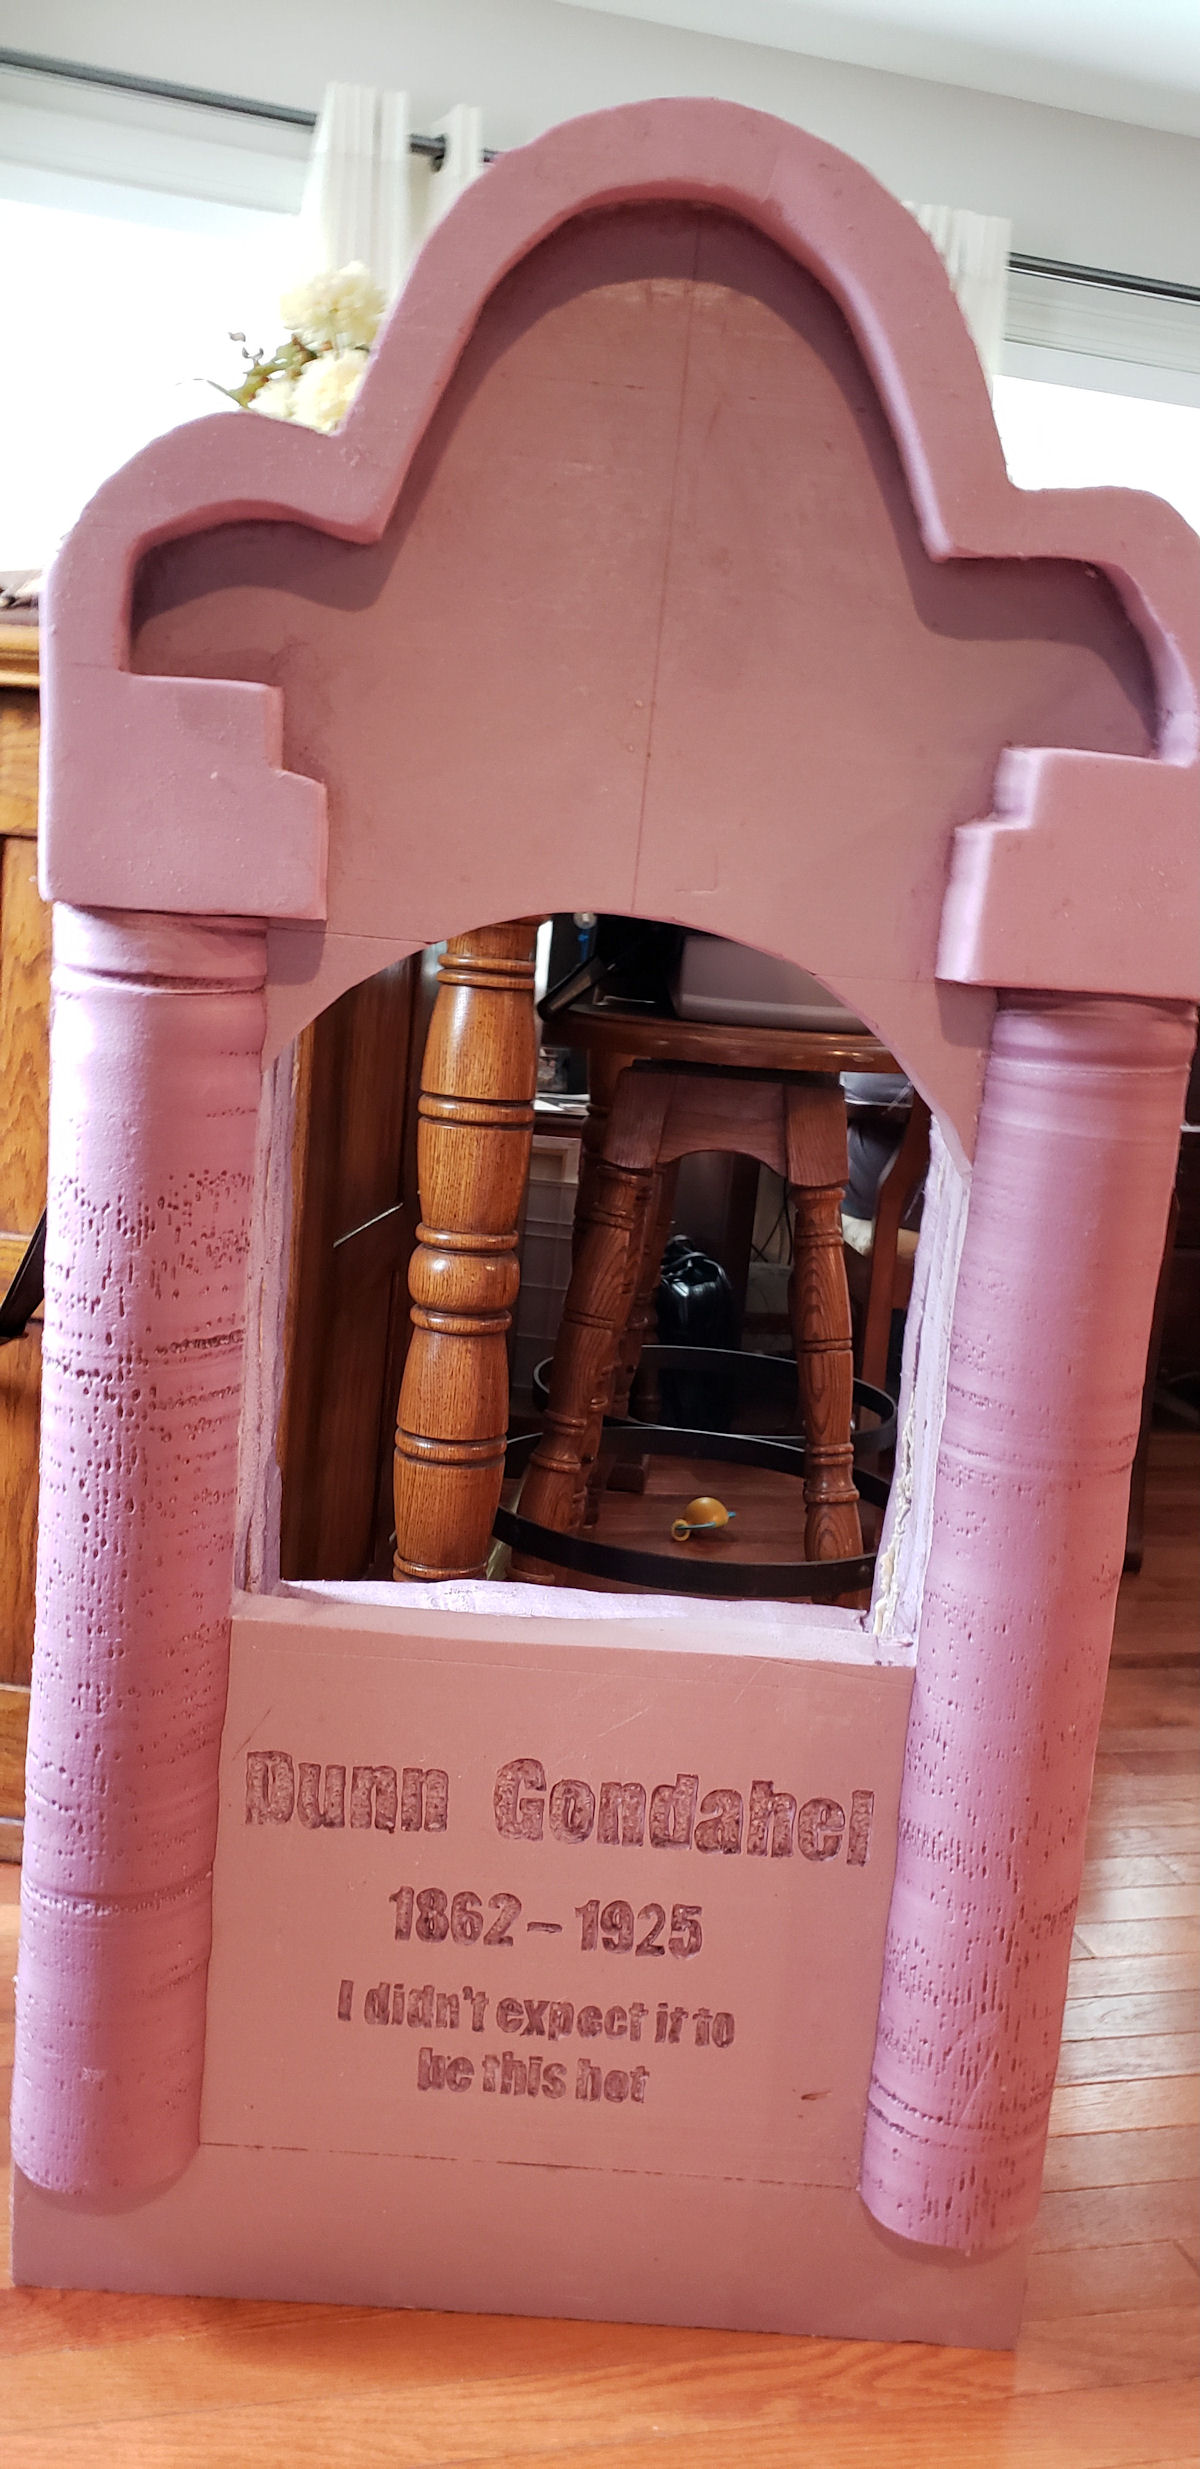
Outside View
This is the front view before carving out the inset. Notice how
thick this is.
I also carved the name and added the top section prior to gluing on
the columns. You'll notice that the colums don't go down to the
bottom. This is because I'll be adding a base for the tombstone.
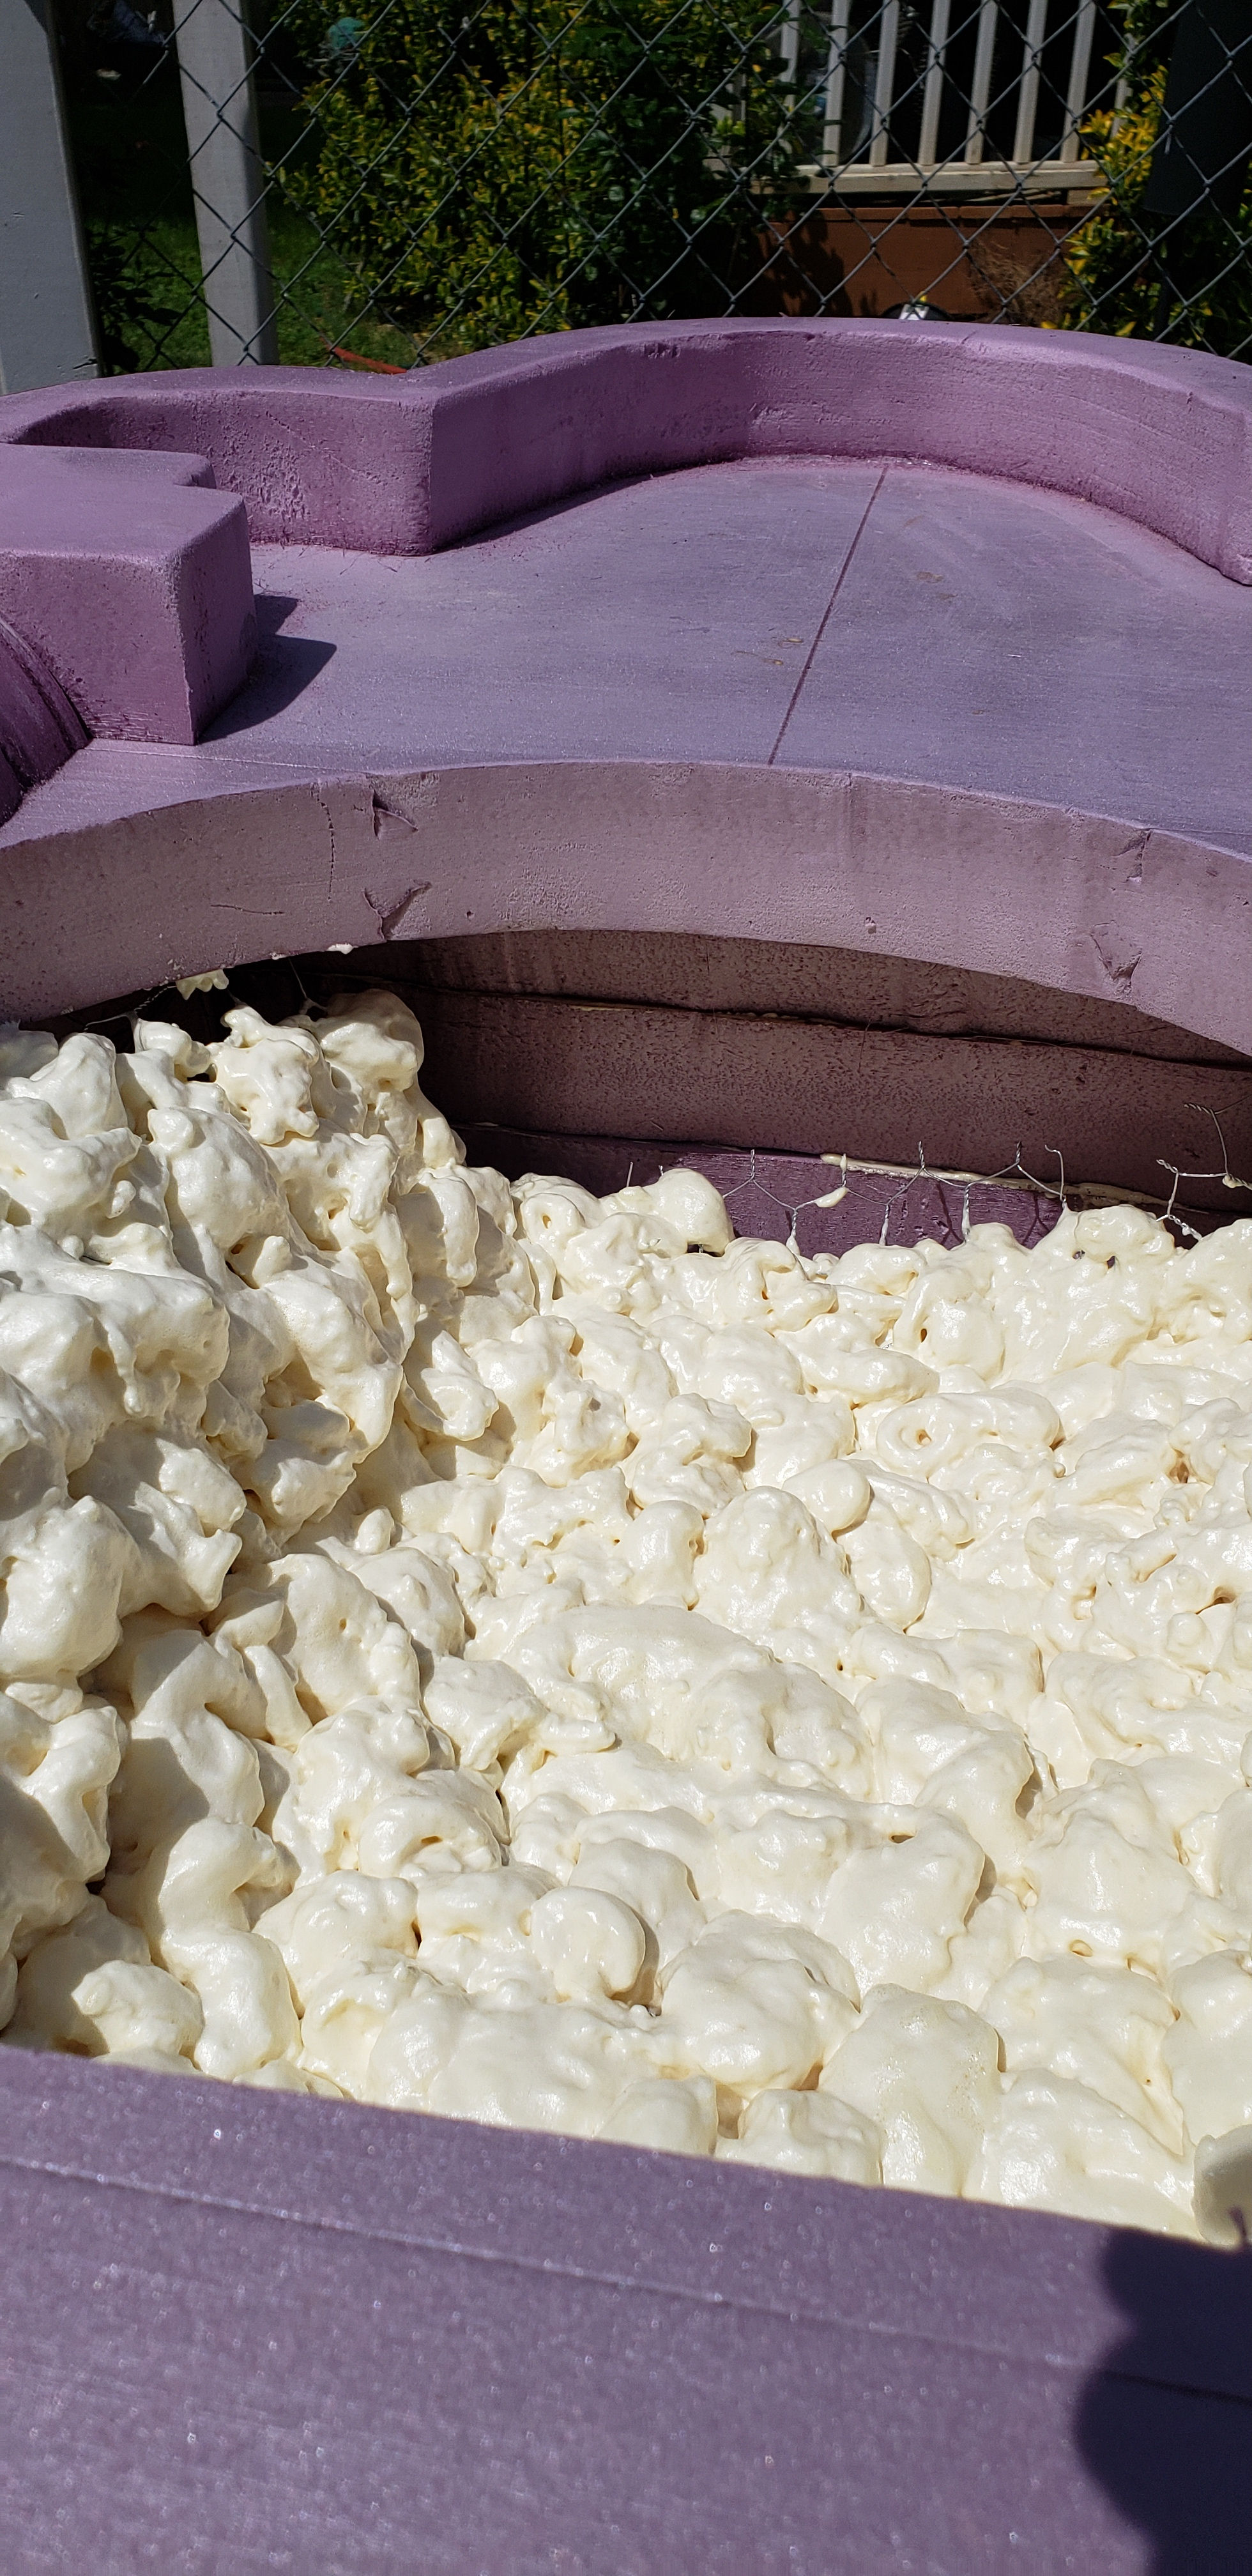
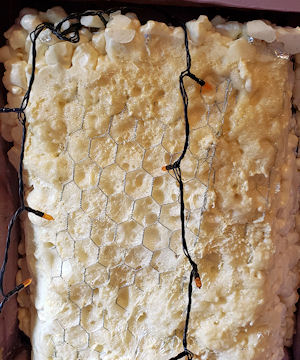
Adding Chicken-Wire
I made a chicken-wire cage and sprayed it with Great Stuff. I made
sure that I could reach the sides and bottom from the back in order to
add the lights later.
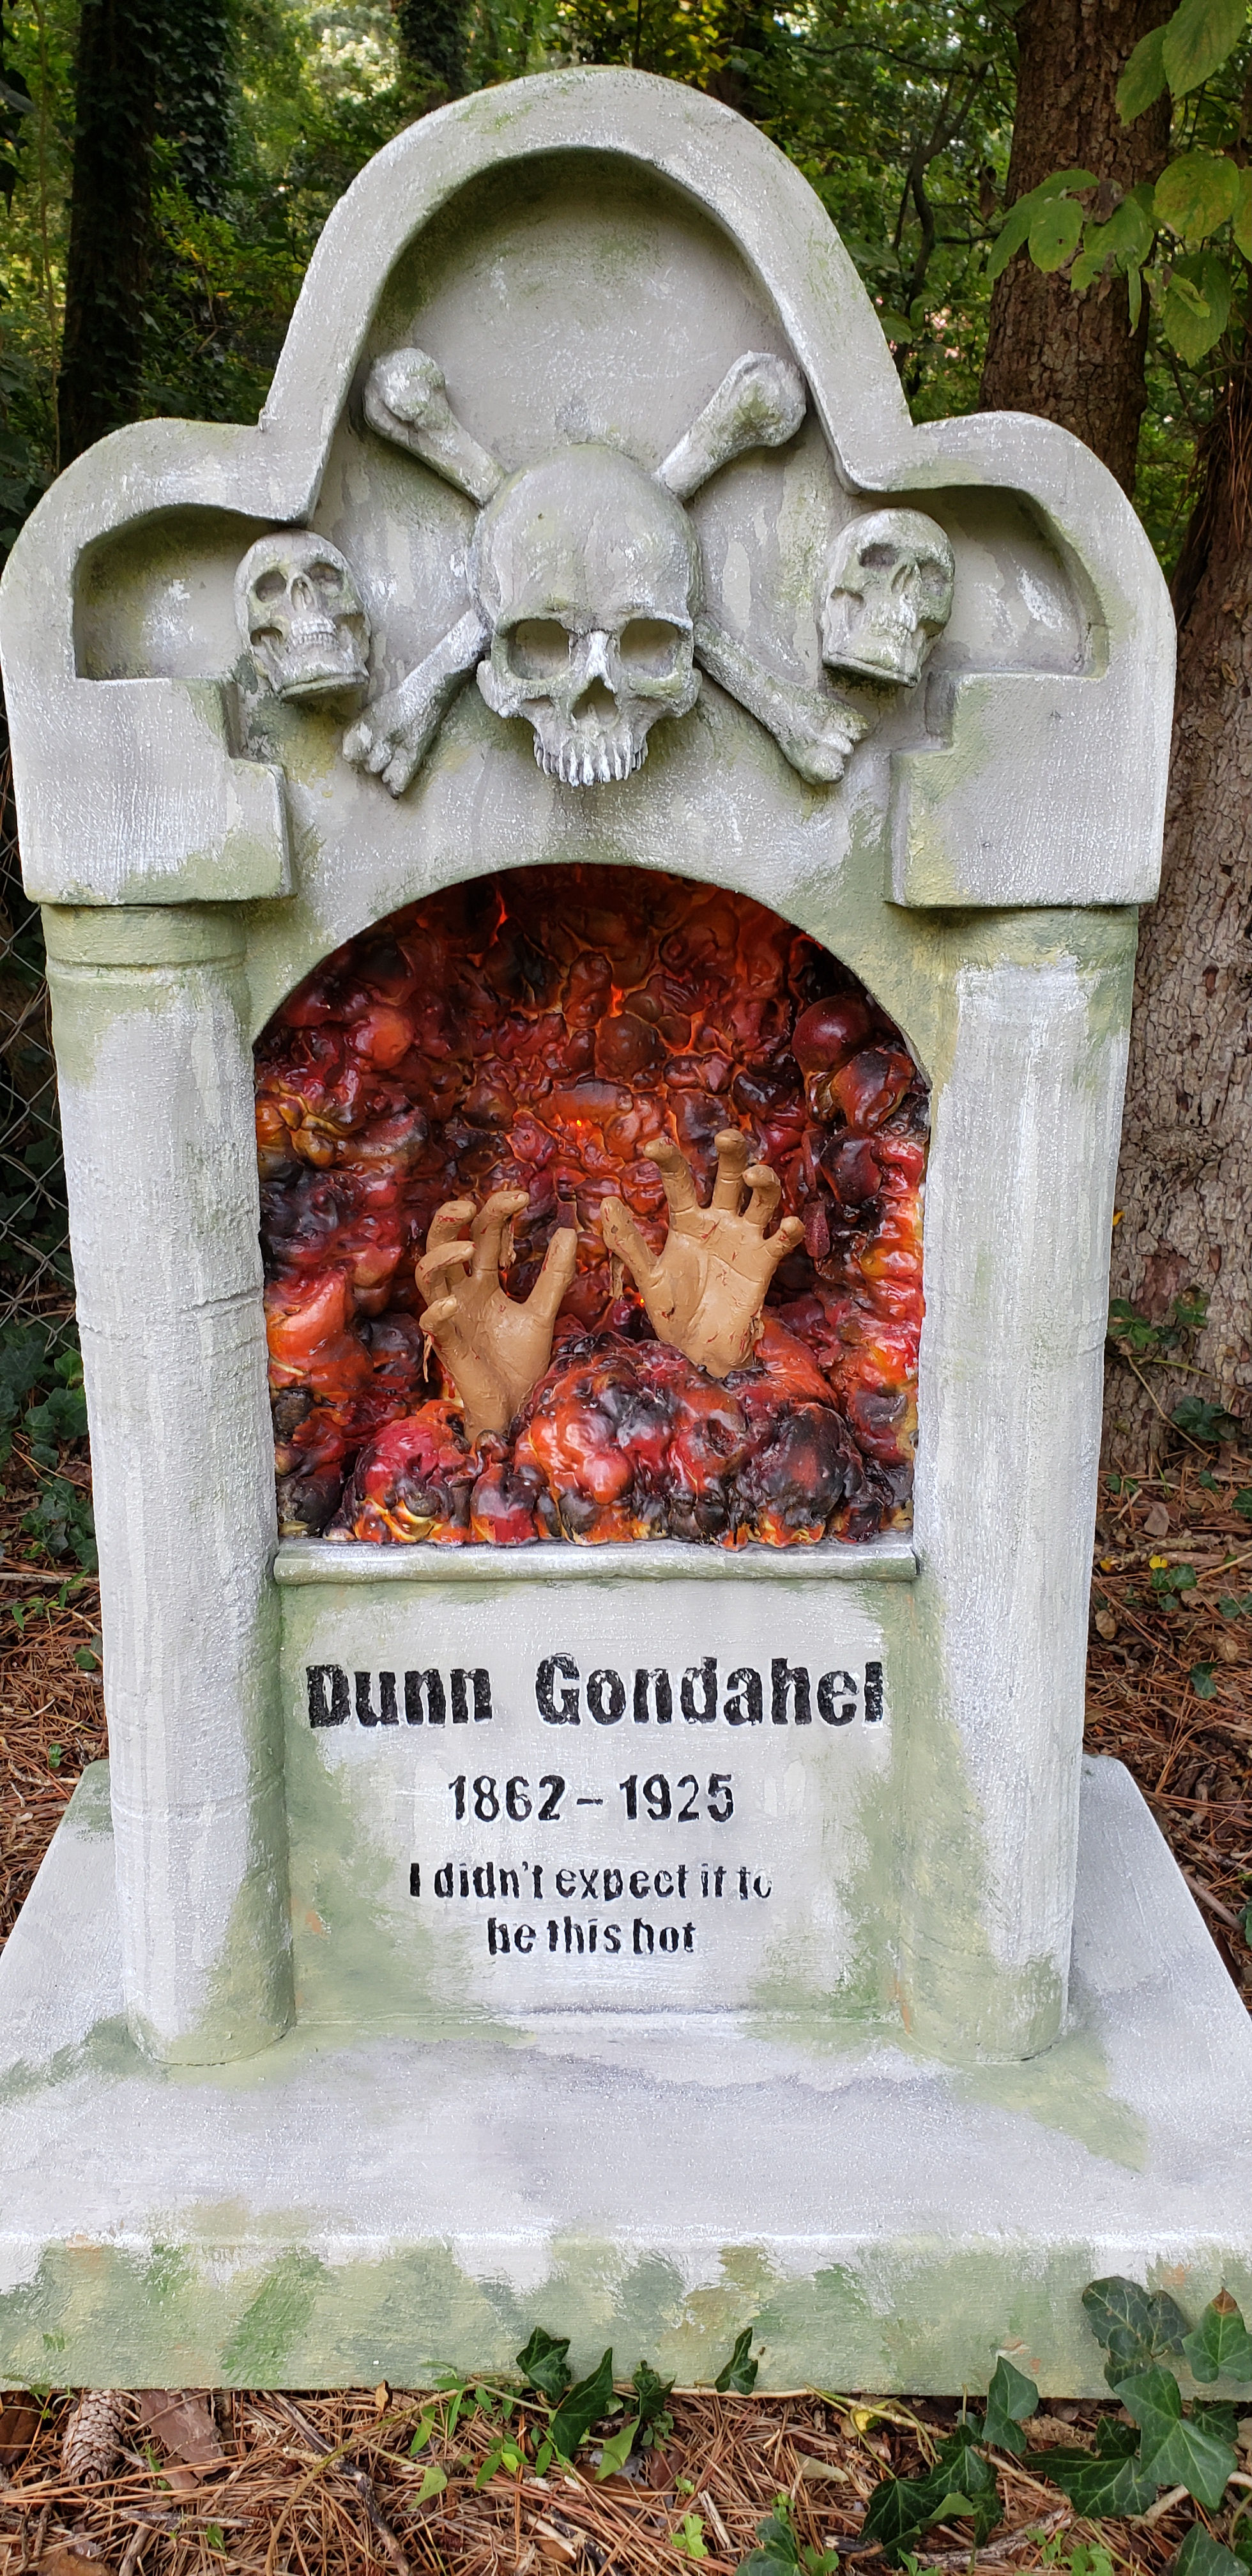
Painting the inside & adding the hands
When you're spraying the Great Stuff, don't make long movements. Make
"piles" of great stuff instead as it creates the cracks between the piles.
I used three colors of spray paint on the back: orange, fire engine red
and black. The yellow you see in the cracks is the Great Stuff. You can
spray paint directly on the Great Stuff, but don't spray to heavily as you
want the yellow to show through as well as light up the different colors of
the "coals" with the string lights. Make sure you spray the back "coals"
BEFORE you add the hands.
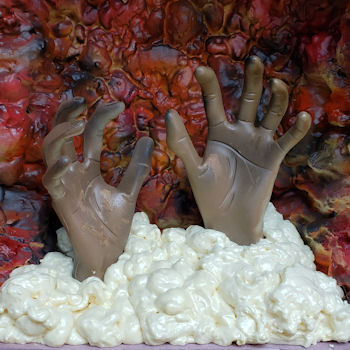
You can see in the image below below that I added water bottles that I
split sideways. I placed cut-up water bottles on the chicken wire base for
two reasons: First, so the spray foam wouldn't fill up the bottom cavity (I
want to add lights later) and second, I wanted to elevate the height of the
foam "coals" without making it too thick. This way, I could reach higher in
the coals for more lighting.
The image to the right is just sunlight coming through the coals, so I
can't wait to see the string lights.
But.... the hands are just too dark. Gotta work on them!
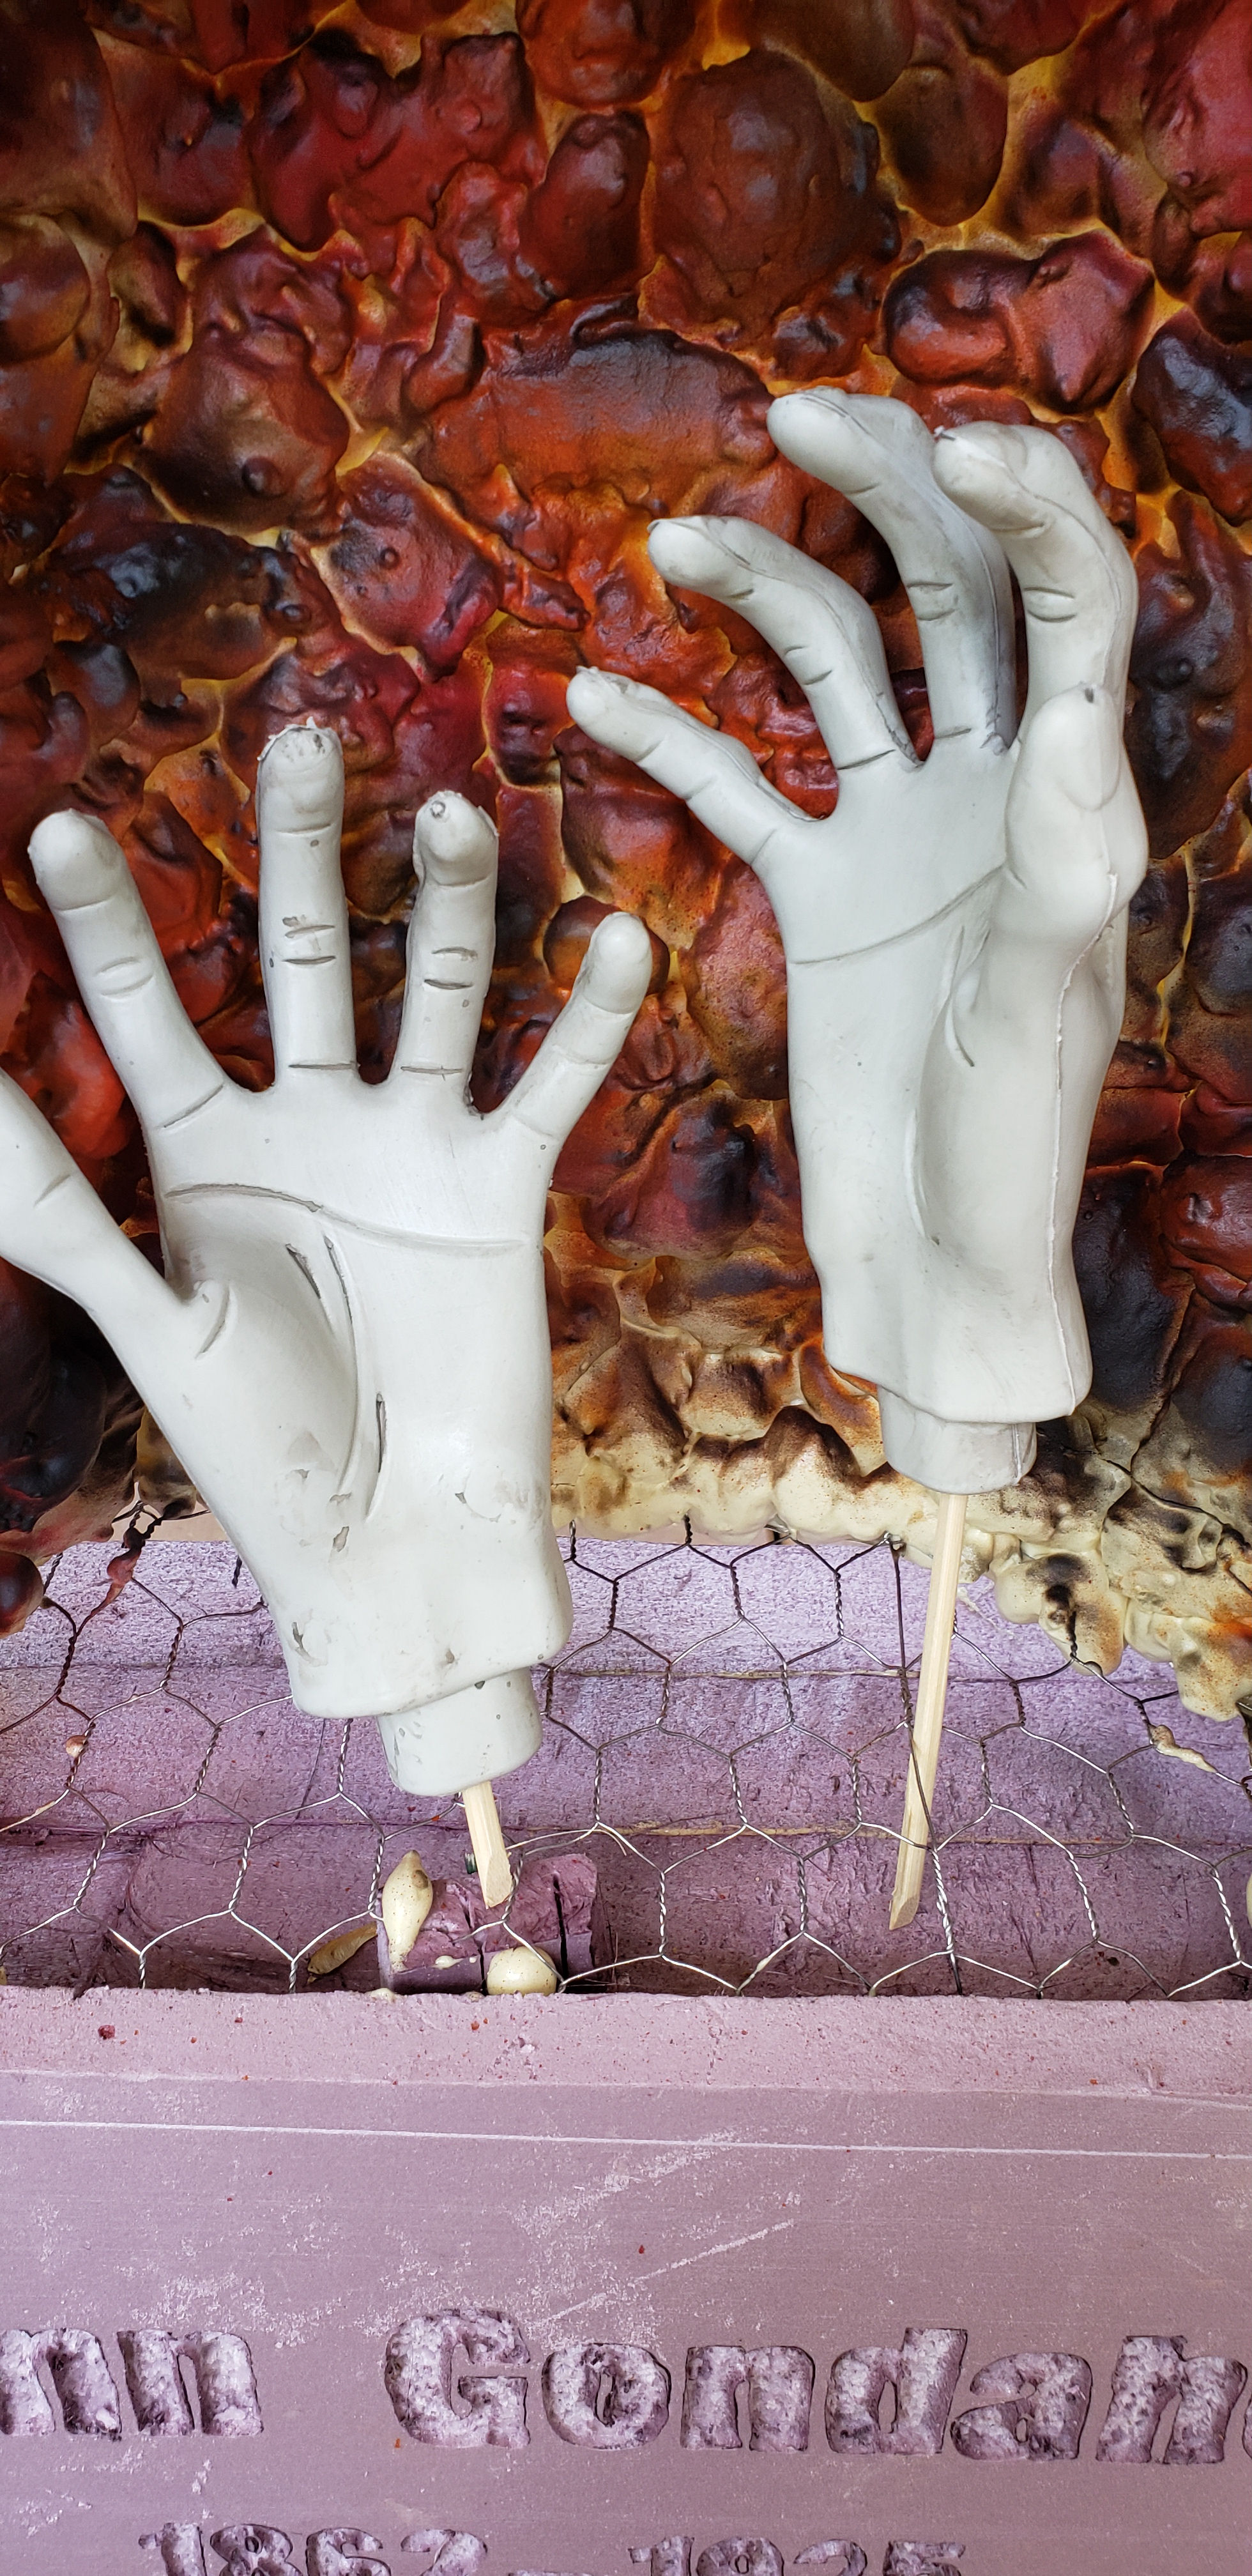
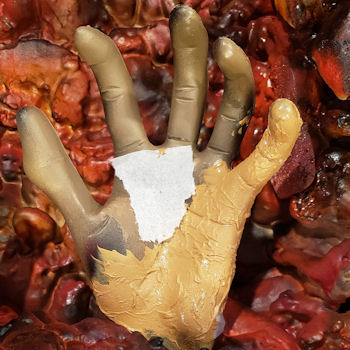
Dunn's hands
I purchased Dunn's hands from Amazon. they were almost white (see
above). I filled them with Great Stuff and stuck a skewer into each so I
would have something to skick into the styrofoam. I spray painted them
tan and added some black spray paint to show that they were burned. Still didn't like the look, but I wanted
to get them set in the tombstone.
I placed small styrofoam pieces under the chickenwire so I could
anchor the hands.
It worked perfectly. Now I can place my orange blinking lights
through the chicken wire and up into the plastic bottles for brighter
lighting.
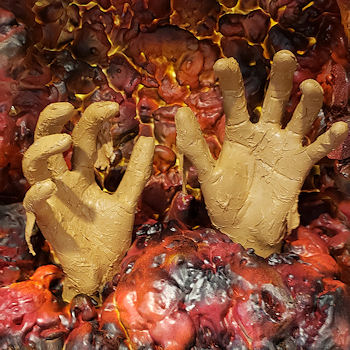
I hated the look of the hands and the dark brown/black coloring just
got lost in the tombstone. I purchased some tan acrylic craft paint, I
know, it looks yellow, but not in "real life!" As I started painting
them, I thought I would add a single ply pieces of kleenex tissue and paint over
them for more texture.
I also added a couple of painted loose tissues to resemble skin that
is peeling off. I plan to paint a small line of red where the "skin"
meets the hand/fingers. Then I plan to lightly spray pain the edges of
the "skin" black. I don't quite know how I'm going to accomplish the
black spray yet, so I may just end up leaving it alone.
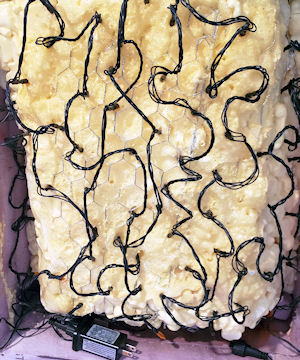
The Back - Inside of the Stone
Divide the string lights in half, so there will be equal parts on each
side of the back.
Use an ice pick or something else that you can make a hole for the
lights. Don't force the lights directly into the foam as you don't want
to chance breaking them.
This is what the back looks like when plugged in. The lights are
amazing! I got them on
Amazon. My setting is #2 Waves. They are just perfect!!! The light
controller will stay inside the tombstone to protect it and an extension
cord will be used.
I added a small rounded "lip" on the outside of the opening on the
front so I could get a finished look. (Love the industrial hot knife
with the cutting wire. It makes all sizes of curves.) For the back,
I glued a piece of 1 inch foam with the center cut out in order to
access the lights and a slit in the bottom of it for the cord to
come through. Then I screwed on another piece of 1 inch foam the
same size so it would be removeable.
FYI: I'm making the back removable because, with my luck, the lights
will go out the first night and without a removable back to change
them out, I'd have to tear up the tombstone. Not gonna happen! I
didn't want water in it, so I used my handy industrial hot knife &
cut a quarter circle as a "drip guard". I glued the drip guard
directly onto the stone and made sure that the glue did not get on
the screwed on piece. Worked like a charm.
Materials List:
3 2-inch foam boards 1 1-inch foam board for the back cover
Chicken wire Clear water bottles to cut up Glue 2-3 cans Great Stuff
Spray Paint: Fire Engine Red, Orange & Black Tan acrylic paint
for the hands Drylock paint Black/Dark Gray paint for
lettering White outdoor paint to dry brush
tombstone Wood putty Lights - Moving lights from
Amazon Hands - From
Amazon Skulls - 1 half skull and 2 small skulls from
Nightmare
Makers I won't purchase skulls anywhere else, now that I've
found these guys! Long bones - I had those from a misc. bone pack
(Wish I would have ordered them from Nightmare Makers!) Extension
cord Gloves - a MUST when working with Great Stuff
Tools List:
Sand paper: coarse &
fine Cheap paintbrushes Clamps Compass - From Amazon
- makes it so much easier to draw
a circle