Anita Moore Tishan - The Build
This build assumes that you know how to print the name & epitaph on paper from your computer, trace the letters on the
foam, use the Hot Wire's Engraving tool
(or dremel) for carving the letters, as well as inserting the pvc into the foam. If you have
questions, just give me a call.
Click on the images for a larger view.
The Concept
Concept - I drew it out on paper to make sure I captured the look I wanted. I also wanted to make sure that my text would be the
size I needed. If you look at the faint lines on the large image, you will see the cap and footer for the top layer.
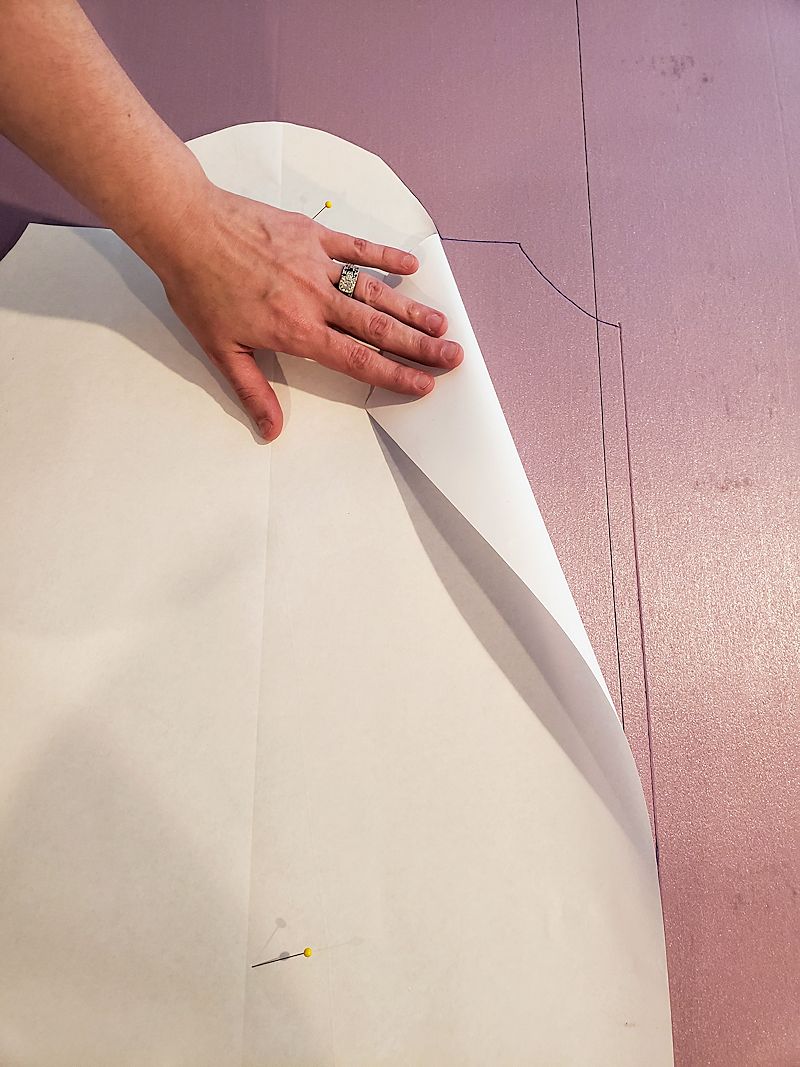
Tracing The Shape
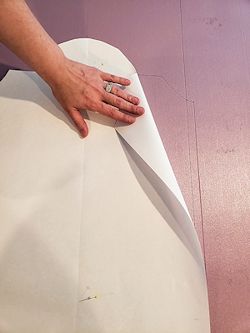
Trace/draw the stone's shape onto the foam - Three times! With Tishan, I also had to cut out the top (cap) and bottom (footer) pieces for
the top
layer.
I used 2 inch foam for this tombstone, so she is 8 inches wide!
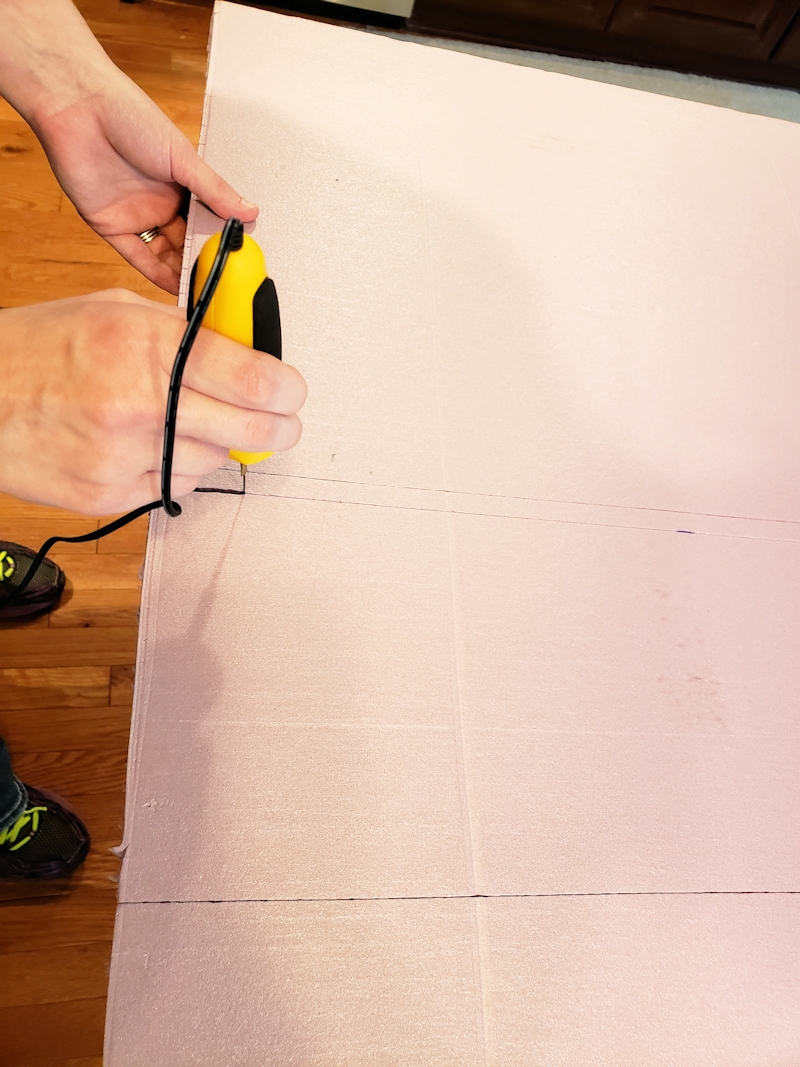
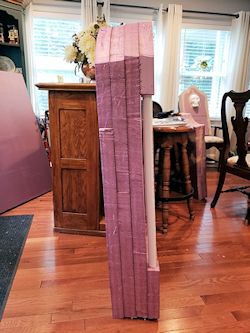
Cutting the Foam

Using the Hot Wire's Hot Knife, cut the shape. Couple of pointers: Keep the knife at a 90° angle to the foam and make sure you don't go too fast,
let the foam melt as you gently push it through. This was the first time I had ever used a hot knife. It was wonderful! Can't believe how easy it
was to cut the foam. I'll never go back to a jigsaw!
Now carve the names & epitaphs.
Glue, Lots Of Glue
When gluing the pieces together, I used 5-6 clamps to keep the pieces tight. I used
Hot Wire's Foam Fusion Glue. It was fabulous! So
much easier than using liquid nail and it won't damage the foam.
As you can see, I cut three pieces for the main stone, two
have the opening for the statue. The front of the tombstone has
the tombstone cap & footer cut to fit.
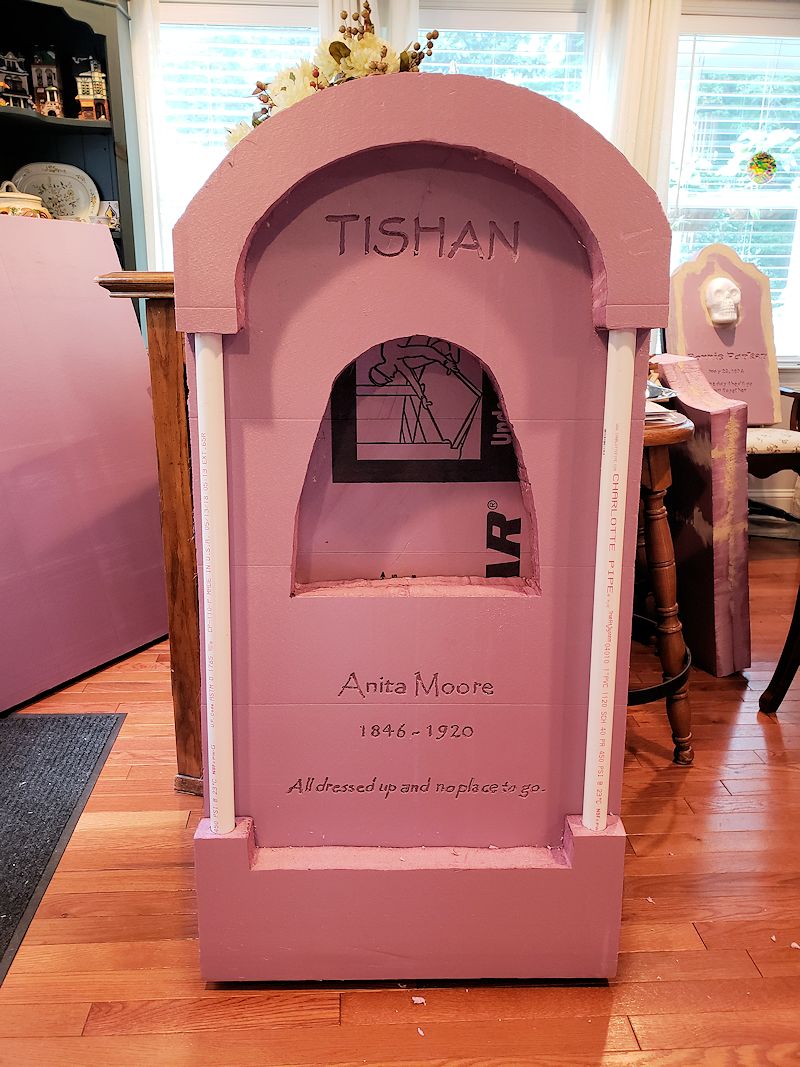
First Looks
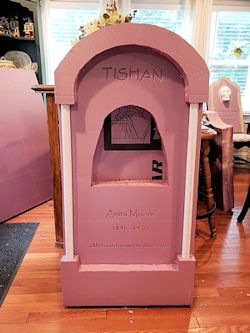
After the glue set, then I made the base for the stone and glued it on. There were a couple of gaps between the stone and the base
on the bottom and one of the sides, so I added Great Stuff foam.
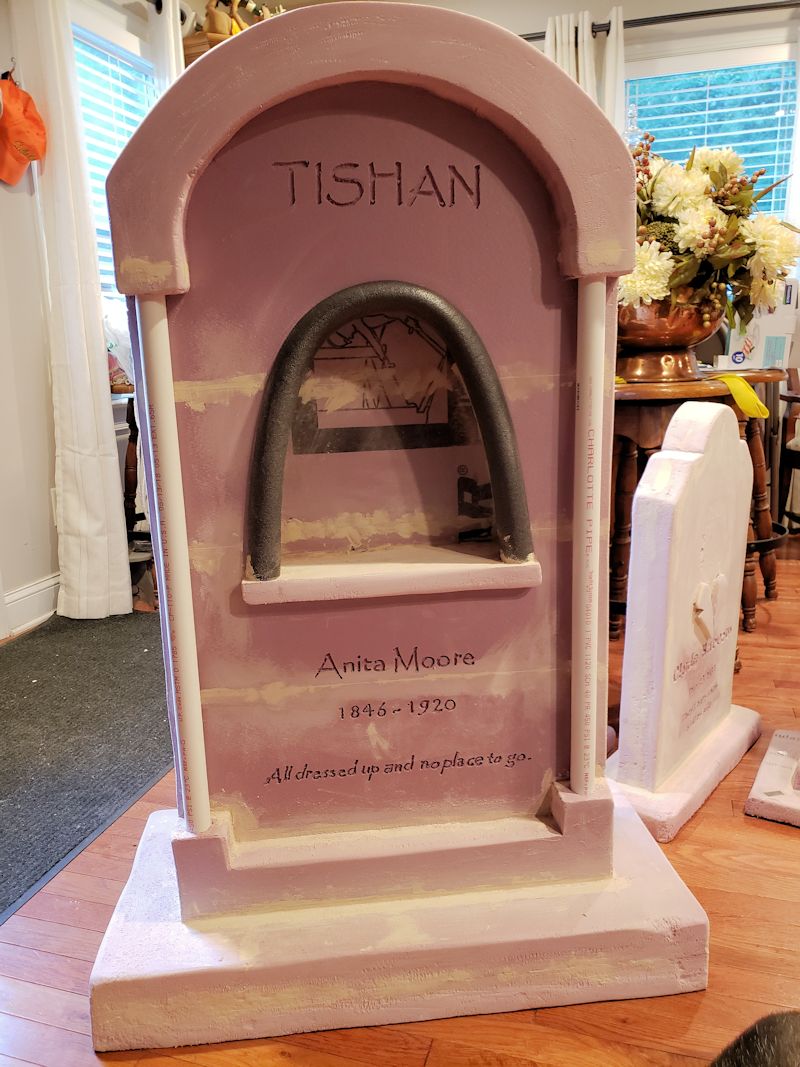
I measured out the PVC pipe for the posts and pushed them in place, after using
Hot Wire's Engraving tool to cut the slot. Next
time... put the PVC in BEFORE gluing the top and bottom and prime the posts!
Foam Inset
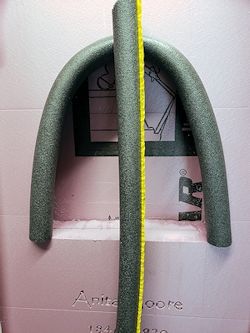
Foam Inset- closeup. The yellow strip peels off and has adhesive on it, so that made it easy to stick it in the correct place.
This is pipe insulation. It is easy to bend since it is foam and is found in the plumbing section of the hardware store.
Foam Inset
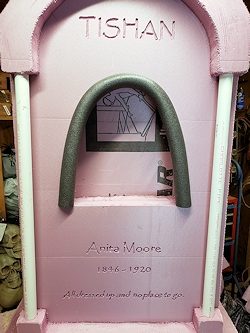
I had to cut off some of the back of this pipe insulation foam in order for it to seat nicely (probably about a
quarter of the foam).
My opening looked so shabby that I needed something to look uniform... so pipe insulation was the answer!
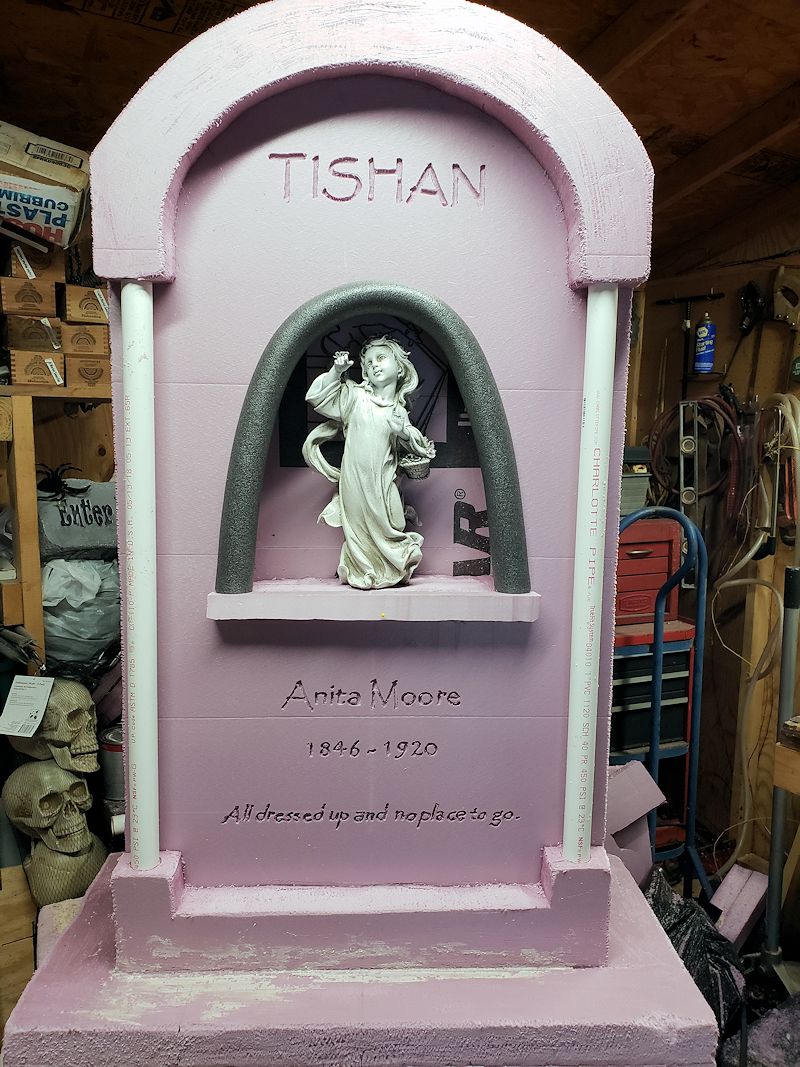
The Ledge

I measured how far the statue "stuck out" and made the ledge deep enough for her to sit on. I stuck toothpics halfway into
the backside of the ledge and then added glue. I pushed the ledge onto the front of the stone, pushing the toothpics into the main
stone as well.
Wood Filler
Wood filler. Wood filler. Wood filler. You get really tired of wood filler! Everytime you think you're finished, you see something
else that needs to be filled.
Try to make your filler as smooth as possible, as it decreases sanding time. I used a touch of water to help smooth it.
Sanding
Sanding - almost the same as wood filler! I sanded and then sanded some more. Make sure all of the edges are smooth and that all of the wood filler is sanded down.
Tombstones usually don't have hard corners, so make sure to sand them. Now is the time to make the cracks in the stone. I used a
rasp to cut into the foam.
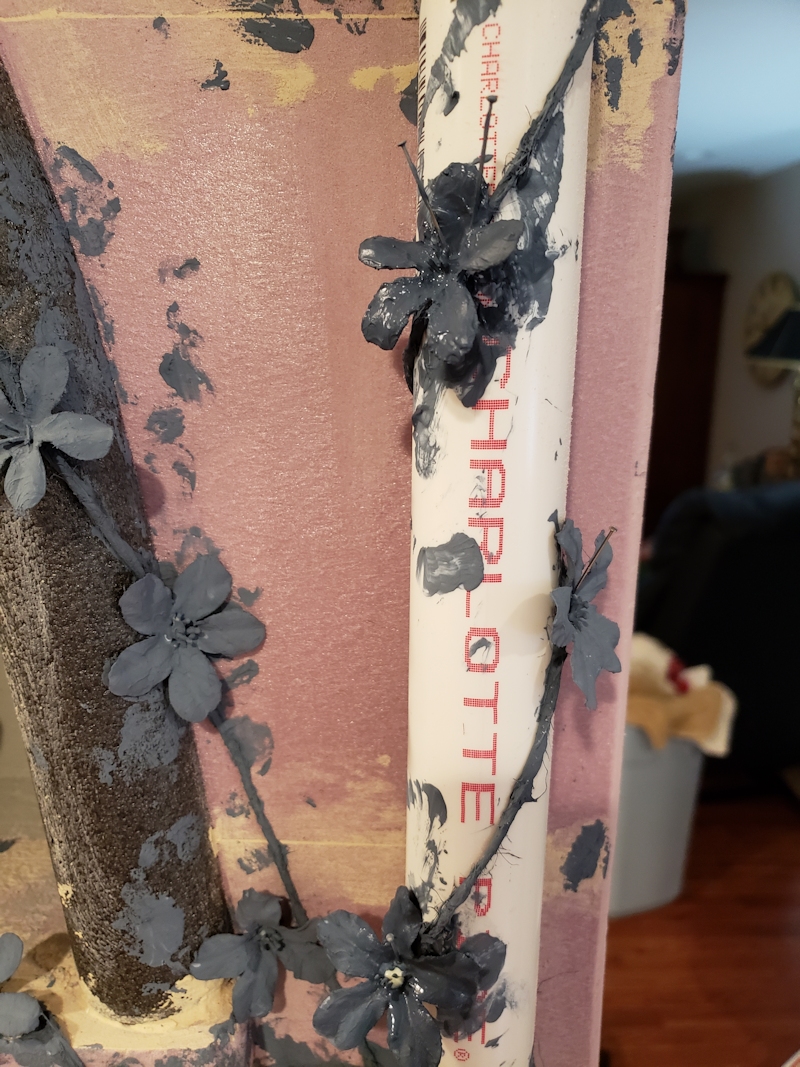
Monster Mud
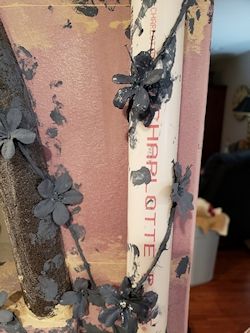
These are regular silk flowers and twine for the stem. Make sure you cover everything completely. I ended up dipping & mashing
everything into the monster mud (3 parts joint mud and 1 part latex paint) and then I used a stiff brush and pinching my fingers
together to remove the excess.
I had to use gloves, otherwise my hands would be grayish-blue forever. Once dry, the flowers are very stiff.
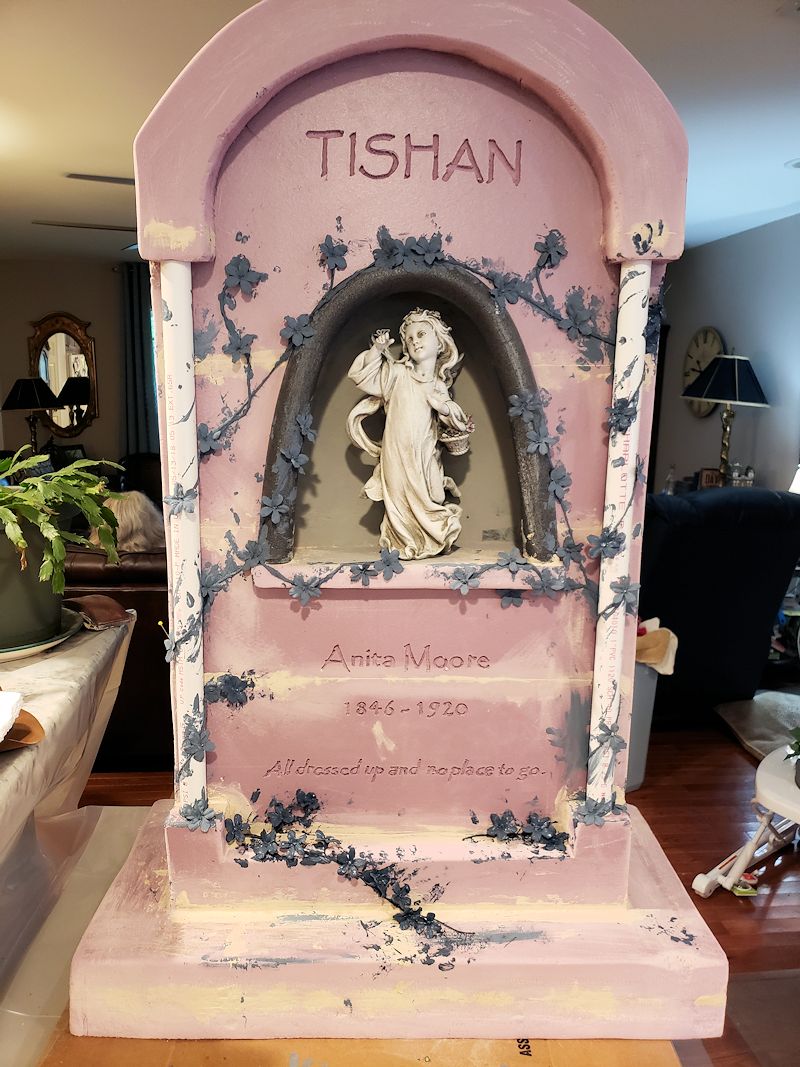
More Monster Mud

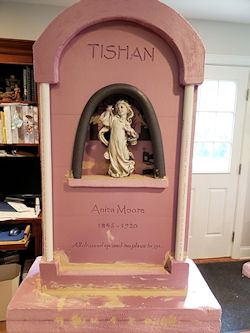
Complete and pretty ugly! The statue is not glued in yet. I just wanted to see what she looked like. I also painted the
inside of the cavity with Dryloc. Make sure to do this PRIOR to gluing the statue.
I made the monster mud a dark color for two reasons: First, I had paint that had blue in it, so I
couldn't use it anywhere! Second, the dark color of the monster mud showed clearly when I painted with Dryloc and missed a spot.
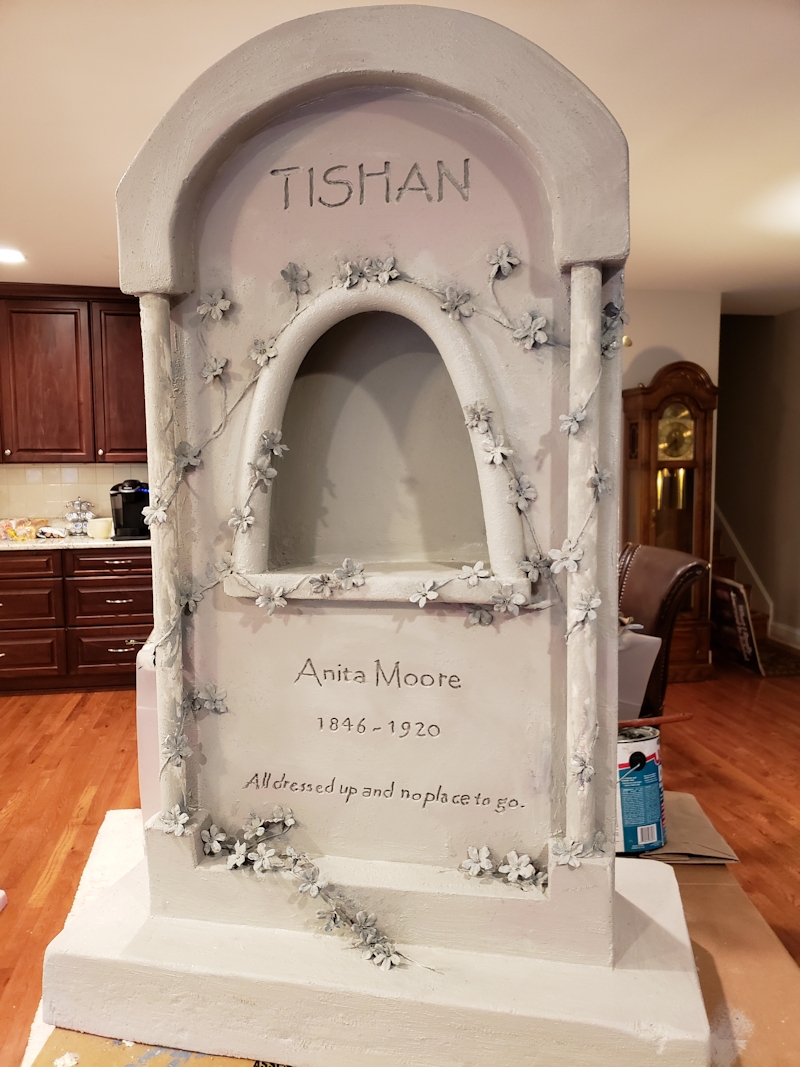
Dryloc
First coat of Dryloc was added. It makes the tombstones waterproof. Drylock comes in a white or gray color. I made sure all of the flowers were coated. Just when you think you have them all, you find more spots that you
missed!
I painted her with three more coats of Dryloc. I tea stained her and then used a white dry brush to paint highlights.
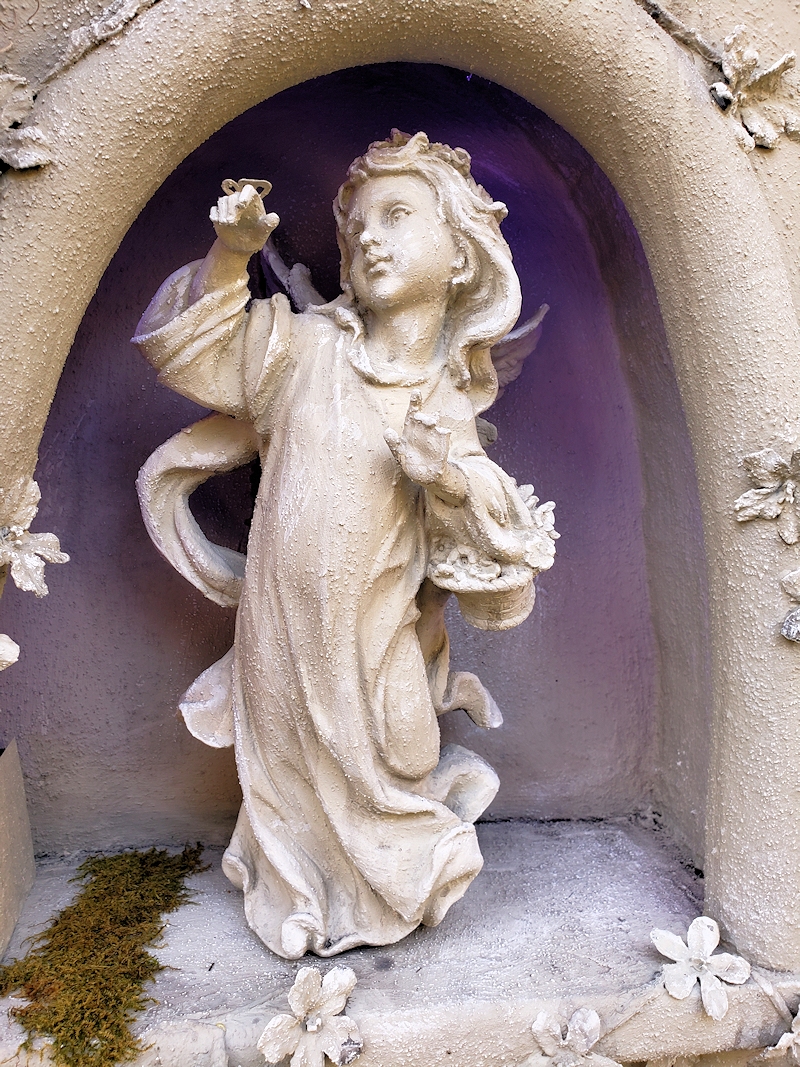
The Statue

Yes, I used Dryloc on the statue. It's easier to do it PRIOR to gluing her in. I also tea stained her and white dry brushed her.
After all of the coats of Dryloc were painted on and the mini lights were installed, I glued the statue in with Gorilla Glue. I cut a small slot
in the foam behind her for one of her
wings to fit in and glued it there as well.
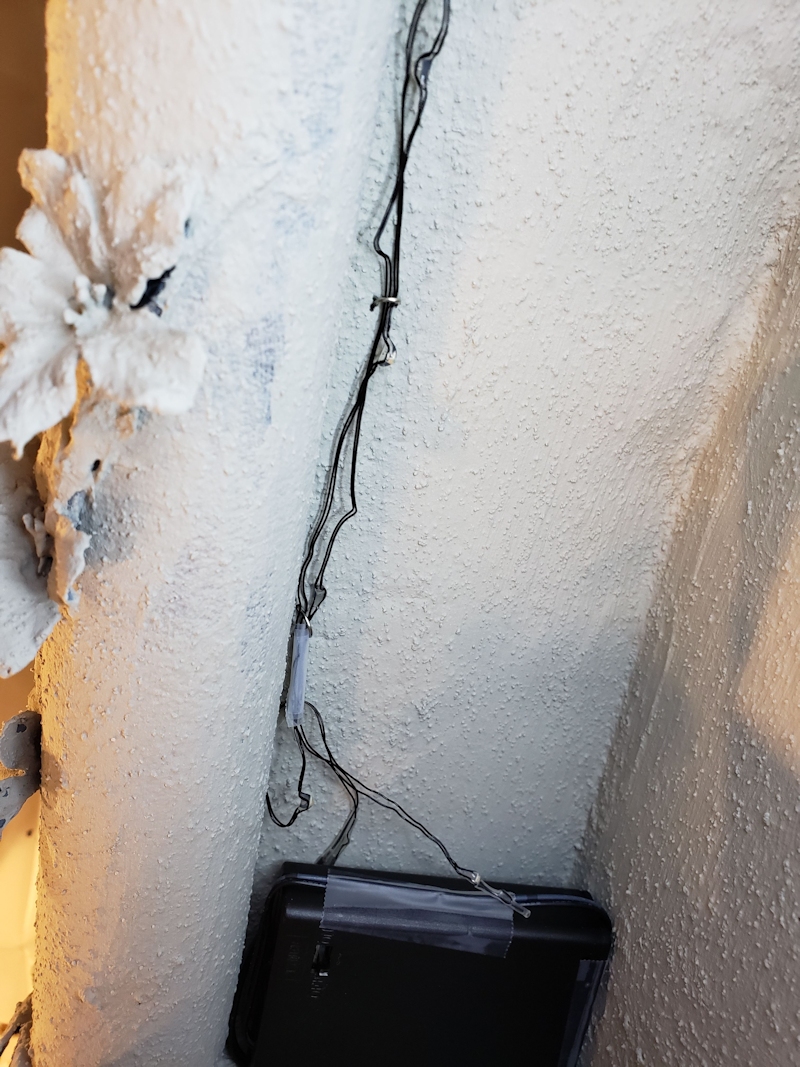
Lighting
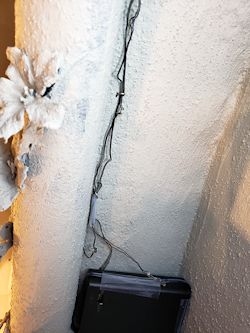
I purchased a string of mini lights that were supposed to be purple, but they were blue. Found that out after I added batteries.
Good thing I like blue!
I cut paperclips in half and used them as staples in order to keep the lights where I wanted them. Luckily the control box fit
perfectly inside the opening.
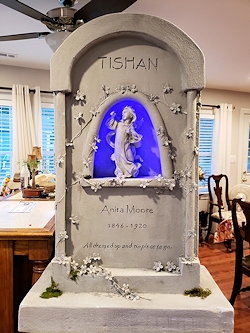
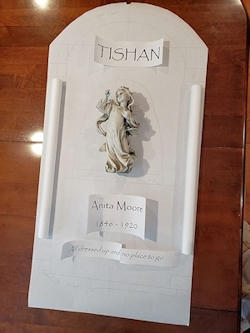
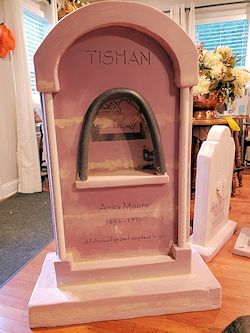
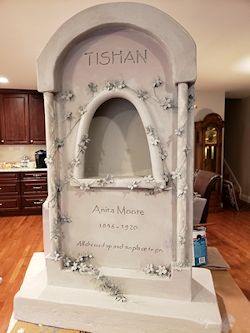
Finished!
Finally finished!!! No, I didn't make her in my dining room! I didn't have room in my shed, so I worked on her outside, then brought
her inside to dry.
I did do some of the touch up painting on the zillions of flowers (ok, not zillions) inside the house.
In The Graveyard

Love her looks! She is 48 inches high, 24 inches wide and 8 inches deep. These measurements are for the
stone only,
not for the base. She is the centerpiece of my graveyard.
Thanks for dropping in!!! If you build her, please send me pics!